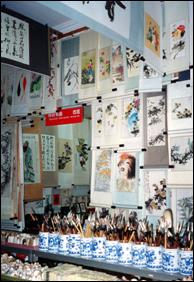
 Photo 1
Mass production scroll mounting is rampant in Beijing.
This is the front entrance of a retail scroll shop that produces over 100 scrolls per day.
They mass produce for their own sales as well as for other merchants.
In my April and May 2001 columns for PFM I wrote a two part article "Japanese Scroll Mounting, Part I: Form, History and Background" and "Part II: The Rest of the Story". Part I covered the general history, traditional layout and terminology of Japanese scrolls, while Part II followed an abridged step-by-step by a master scroll mounter as he took us through only the preliminary steps of the Japanese process.
During my October 2004 trip to China I spent three weeks studying scroll mounting with a Chinese master I was taught the basics of both traditional preservation mounting and commercial scroll mounting. Interesting that even the old Chinese tradition has have given way to the mass production, fast paced requirements of today (photo 1). This will be a three part series Scrolls: Part I The Chinese Approach; Scrolls: Part II Mounting; and Scrolls: Part III Repairs. There is much to share and even more that I will need to edit out, so here we go.
Photo 1
Mass production scroll mounting is rampant in Beijing.
This is the front entrance of a retail scroll shop that produces over 100 scrolls per day.
They mass produce for their own sales as well as for other merchants.
Basic Scroll History
The history of the Chinese scroll dates back to the Tang dynasty (618-907AD) where mounting specialists were enlisted for maintaining the Royal Academy calligraphy and paintings as mountings on boards and screens. Techniques evolved during the Song dynasties (960-1271) developing the hand scroll and vertical scroll mounting methods known of today. During the Ming dynasty (1368-1644) mounting skills had elevated to where the mounting artisans were very highly paid, and by the Ching dynasty (1644-1911) the Su County mounting artisans were as famed as the master calligraphers and poets of the time.
Historic and Contemporary Scrolls
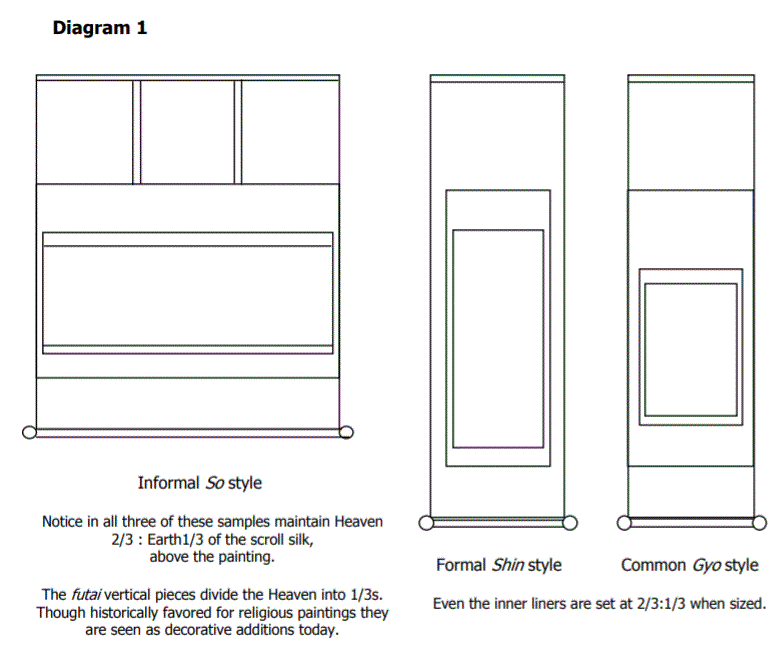
Chinese mounting techniques were introduced into Japan during the sixth century, who also perfected their techniques throughout the ages. By the 16th century Japan has established three basic hanging scroll styles: Shin, Gyo, and So (see PFM, April 2001 for detailed diagrams). Traditional layouts have very specific rules for the proportions, and colors for each, while style selection is determined by the painting's subject matter. The formal Shin style was used only for religious Buddhist paintings (diagram 1). The semi-formal Gyo style was the most common of mountings used for colored paintings of birds and flowers. An informal style is the So mounting used mostly in tea ceremonies.
The goal of scroll mounting is to preserve paintings and present them in as aesthetically pleasing manner as possible. Hyogu and Mincho style scrolls are basic and informal, with hyogu meaning "to decorate the surface" (diagram 2). These are considered contemporary styles and the most commonly seen and taught in both China and Japan today. Hyogu scrolls are common place for mass production because of standardized dimensions and assembly line scroll mounting practices. Hyogu may either have a narrow colored liner surrounding the entire painting (photo 2) or be quite simplified with no colored liner at all.
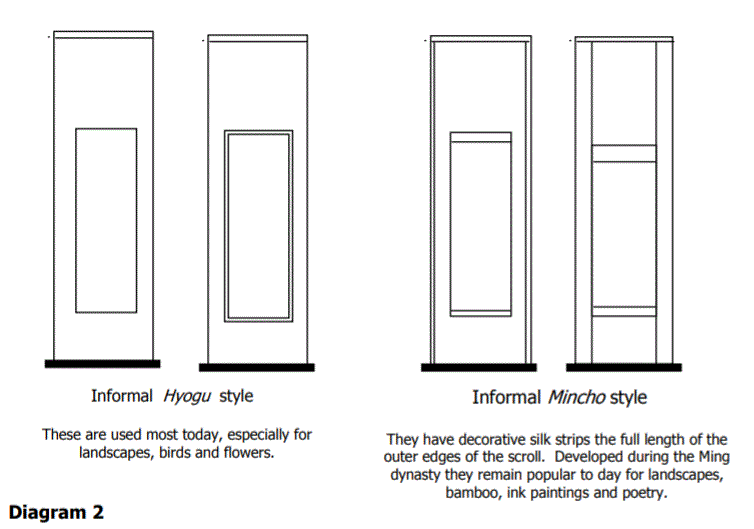
 Photo 2
These are a set of four different colored plum blossoms.
The scrolls have an off white silk with a narrow ⅛" brown liner surrounding the paintings.
Optical illusion makes heaven and earth appear to be out of ratio, but they are indeed ⅔:⅓ as they should be.
Mincho style scrolls are a little more detailed and elaborate while still being capable of being made in production houses. The labor remains about the same, its the parts that are assembled in a different order. Next month I will follow the actual assembly of a hyogu style scroll where I took my scroll classes in Beijing this past year.
Proportions
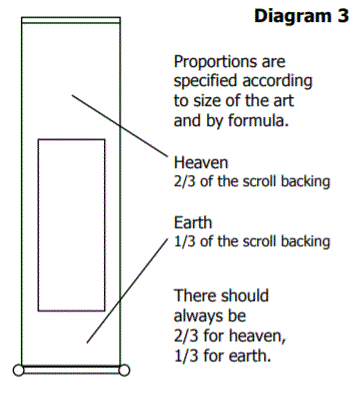
Most important in scroll construction are the proportions above and below the painting itself. It is said that 30 percent of the finished picture is in the painting and 70 percent is in scroll mounting surrounding it. Basic ratio proportions of the silk scroll area above the painting is ⅔ of the total with the other⅓ of the total below the painting. Diagram 3 illustrates the space above the art, known as "heaven", is twice as wide as the space below the art, known as "earth". This proportion does not include the actual painting, only the silk of the scroll. Though the side panels vary in width depending on the style of the scroll, for contemporary mountings they are often about half of the width of earth.
A vertical painting may have one, two or three colors of silk used in a scroll, like a triple mat.
Innermost liners on hyogu scrolls are often ¼" wide strips that are mounted to show ¹⁄₁₆" of color, much like a thin innermost liner mat. (photo 3) Often the plain, unlined hyogu mounting will be offset or accented with another addition such as the fan at the top of the painting in photo 4.
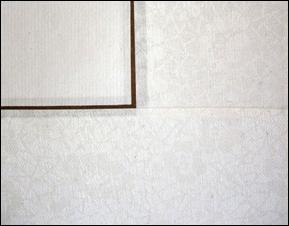 Photo 3: Detail of Hyogu Liner
The faint shadow of the brown liner is evident behind the painting to the left and the silk scroll additional to the right. This also illustrates the seam between the bottom of the right side and the earth portion of the scroll. No...they are not just glued on top.
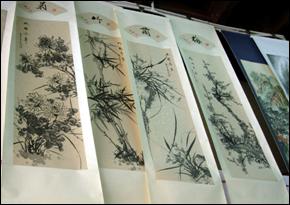 Photo 4: Hyogu Without Liner
The four plain paintings have been accented with the insertion of small fans at the top in the space of heaven. From left to right they are chrysanthemum, bamboo, orchid and plum blossom...the four gentlemen.
Mounting, Backing or Stretching
Most Chinese paintings are on thin 1 ply xuan paper (see PFM, May 2005, "Mulberry Paper" for more info) which requires backing by the artist prior to considering the painting finished. This process is known as mounting, backing or stretching the painting. Once backed the painting may then be mounted for display in either Chinese traditional scroll format or Western mat and frame. Scrolls may be designed as hand scrolls or hanging scrolls. Hand scrolls may be of any length horizontal surface that may be unrolled gradually as the viewer goes on a journey through time and scenes with the artist. Hanging scrolls may be rolled up and changed according to season or mood of the owner or artist, like rearranging framed art.
Historically, scroll backing materials were made of fine silk, satin and brocade, while the scroll ends were of ivory, porcelain, jade, gold, silver and sandalwood. Scrolls displayed in temples and public places are only done so when there is no fear or concern about the painting or calligraphy becoming soiled, damaged or totally ruined. Same as we advise for display photographs.
Western Framing
Once the backing paper has been applied to the painting it may then be framed using regular Western techniques (photo 5). Chinese masters agree that natural wood is best for framing Chinese art because the materials are in better harmony with the painting. They also encourage wide mats (or silk strips) allowing for a minimum of 4" surrounding border for paintings up to 16". And mat color...well, must also be in harmony with the painting.
Even when a painting has been scroll mounted it is best to place it behind acrylic or glass to protect it from the elements.
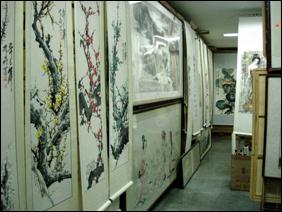 Photo 5: Scroll or Western Framing
The paintings have been backed with paper and may be either completed as a scroll or matted and framed in a regular wood frame. Mats or pieces of paper backed silk are used as the surrounding mat.
Backing Papers
When water and ink are applied to thin xuan paper, the fibers are altered by moisture absorption so they need to be restretched back to their original structure. By fixing a second layer of paper of equal weight its original shape is restored and the colors of the painting enlivened. The backing paper is known as life paper because backing the art livens up the painting by making the colors and tones pop, and the imperfections all more visible. The same weight paper should be used for backing the painting paper so both layers will react the same during humidity and temperature changes. Same as with Western mounting practices.
It is important to understand that this process of backing or mounting the painting does not necessarily involve scroll mounting. Backing is also referred to as "stretching" the painting because of the ability to remove wrinkles that are created by the water absorption during the painting process. The mount (backing) of a painting is considered part of the finished picture, and is most often applied by the original artist. But there are times a single sheet painting or stone rubbing is brought into our frame shops by someone who is not the artist, and will not have a reinforced mount. Then what?
Backing, Mounting or Stretching
One of the questions that arises on PPFA Hitchhikers or the Grumble is how to deal with thin wrinkled rice paper paintings. If the piece is brought back from the Orient it is safer to proceed with this process because the inks and colors will have lacquers in them and will generally not run. It takes a week for the lacquers in the inks to set prior to mounting. If the painting is from a local artist who is into Chinese ink painting and sumi-e they should have already stretched and flattened their painting for you.
The following procedure is the backing (mounting or stretching) processes of the original painting and is only step one in the scroll mounting process, which will be covered next month. As with any framing technique, always work on a clean, flat, and in this case, also non-porous surface. A perfect surface is a piece of acrylic sheeting, it is clear so may be placed over any opaque surface (photo 6). The Chinese like to have either a wood grain board or solid red table beneath the clear plastic because imperfections contrast better against it.
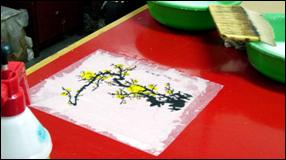 Photo 6: Working Face Down
Lightly mist the table and lay the original painting face down on the smooth surface and adhere to the table. Notice the 12" wide hake brush and bowl of paste upper right, and sprayer of water lower left.
Step by Step Backing
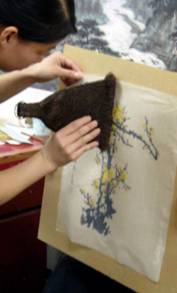 Photo 7: Smoothing to the Drying Board
Place the artwork face up on a smooth vertical board, acrylic or window and tap around the outer edges to hold it in place. It will maintain trapped air between the drying board and the backed art.
Parting Thought
This is only the beginning. By mounting the painting it has only become a completed masterpiece awaiting its final scroll or mats and frame. This appears to be a rather invasive approach to an original painting when we are taught to do nothing to the art. No sealers on pastels; no liquid laminates on digitals, but here we are soaking the painting with water to bind it to another sheet. Though a common practice in Asia, perhaps this is why Western framers should not be tempted to try this at home, it is after all...the Chinese Approach.
END
Copyright © 2005 Chris A Paschke
For more articles on mounting basics look under the mounting section in Articles by Subject.
Additional information on all types of mounting is found in:
The Mounting and Laminating Handbook, Second Edition, 2002,
The Mounting And Laminating Handbook, Third Edition, 2008 and
Creative Mounting, Wrapping, And Laminating, 2000 will teach you everything you need to know about getting the most from your dry mount equipment and materials as an innovative frame designer.
All books are available from Designs Ink Publishing through this website.
Chris A Paschke, CPF GCF
Designs Ink
Designs Ink Publishing
840 Tucker Road, Suite H-190
Tehachapi, CA 93561
P 661-821-2188
chris@designsinkart.com