 Photo 1
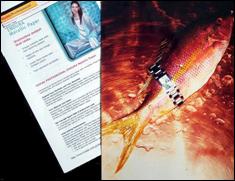
Kodak Endura Metallic RC photo paper may be treated as any traditional RC photo.
In 2003 Kodak Endura Metallic photo paper hit the scene. This revolutionary image appears to have a metallic finish which naturally translates into one that is out of the norm and may require special handling. Kodak Endura Metallic photos have now been around for many years and have been routinely embraced for all aspects of portraiture and social imaging including senior portraits, sport cards, weddings, glamour shots, and special events of all kinds. Plus, commercially the opportunities are endless as displays and in advertising (photo 1).
Photo 1
Kodak Endura Metallic RC photo paper may be treated as any traditional RC photo.
The metallic look of the paper is only a support feature accomplished by inclusion of mica in the base rather than actual metallic particles (photo 2). Image stability and lightfastness of Endura Metallic Paper is excellent at 100 years in typical home display, 200 years in dark storage, but only 1-5 years in commercial display. It shares the same emulsion as the Kodak Supra Endura Paper and performs in similar fashion. This is a resin coated (RC) paper and therefore may be mounted or laminated as you would any typical RC photograph, and as such are subject to fingerprints and orange peel issues.
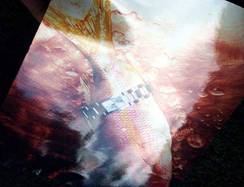 Photo 2
The metallic appearance is the result of mica in the paper coating beneath the image.
Endura Metallic paper is compatible with numerous other manufacturers digital LED printers for developing both traditional film and digitals, so images from OcLightjet, Durst, Noritsu, and/or Gretag are all names that could be printed to the back of a metallic image (photo 3).
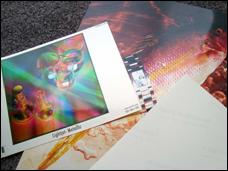 Photo 3
Oce Lightjet print on Endura Metallic (L), Kodak Endura Metallic (top R), back of Endura says "Kodak Professional Paper" not mentioning Metallic (lower R).
Heat Tolerance Tests
In 2003, basic heat testing of the original Endura Metallic photos was done at temperatures of 150ºF, 175ºF, and 195ºF using a Seal 210M-X mechanical press; sheets of permanent ColorMount tissue adhesive; and Crescent 4-ply unbuffered photo board. The photo had no adverse reactions using traditional mounting temperatures and materials. The high gloss surface was also unaffected by any heat applications—including tacking—though it is smart practice to opt for selecting lower temperature adhesives or HA boards such as SpeedMount or Step 150. Solvent tests on the early surface emulsion using UnStik (UnSeal), Undo, and Bestine Thinner also showed no damage when spot cleaning, but fingerprints were nearly impossible to remove.
Kodak vs. Fuji
Kodak released an updated version called Endura Metallic VC Digital Paper a few years ago. Since thinner digital papers are more likely to show orange peel, Kodak still suggests using the lowest mounting temperature, pressure, and duration time to minimize impact on the final print appearance. This newer version is very sensitive surface scratching and orange peel. It is a totally different animal than their original Endura Metallic paper.
Fuji released their own version of metallic photo paper called Fujicolor Crystal Archive Digital Pearl Paper. Pearl-like crystals give silver halide color prints (RC) a distinctive pearl luster emulating the metallic appearance of the Kodak paper. Pearl paper contains pearly mica crystals covered with a thin layer of metal oxides—titanium dioxide—resulting in a silver-white and metallic reflection. Recent mounting experiences with Fuji Pearl had less than stellar results even with low temperature, short dwell time, HA (heat activated) boards indicating that hinging or cold mounting might be the preferred method for these digital photo papers.
Online photographers on the blog photo.net have discussed the two papers as far back as 2007. In order to best identify a metallic finish you must be able to tell between luster, gloss and metallic. Luster has an eggshell finish, it does not show fingerprints or glare like glossy and metallic prints. Glossy, is a shiny image with more saturated color. Metallic, is also glossy though it has a reflective layer that gives images a metallic appearance. These are not inkjet prints, they are printed on silver halide photographic paper processed with RA-4 chemistry.
Unfortunately since the photo base is paper and not polyester they cannot be static mounted as an Ilfochrome Classic (Cibachrome) or FujiFlex can, therefore it must be handled in an alternative way that might still maintain the dignity of the high gloss image. Recent mountings have convinced this framer that hinging might be the better solution to maintain the smooth gloss nature of the unmounted photo. It has been standard practice to mount traditional fiber-base and RC photos over the years, and in turn it remains the usual practice even with today's thinner digital papers. That said there are far more problems associated with digital photo papers including surface scratching and mottling of the emulsion surface so proper technique must be stressed.
Extra Care Needed
Today's high gloss metallic/pearl photos are very sensitive to surface scratching, are tacking iron sensitive, and easily translate the texture of the selected mount board through to the emulsion surface. It is important to keep the tack at the very outer ¼" of the photo so if the emulsion is altered it will be hidden beneath the window mat (photo 4).
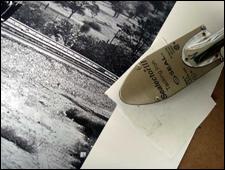 Photo 4
Tack at the outer ¼" of the image.
Proper preparation when mounting and close attention to "clean area—clean process" (Chapter 3, The Mounting And Laminating Handbook, 3rd Edition) seems even more pertinent than with regular photos. Matte or luster images are far more forgiving than any gloss photo, with any glossy photo make certain to wipe the substrate surface; back and front of the photo; both sides of the release paper, and the platen with a clean micro-fiber rag prior to bonding (photo 5). It only takes one particle to kill a photo (photo 6).
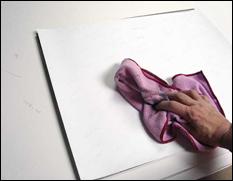 Photo 5
Wipe down all surfaces with a clean micro-fiber rag.
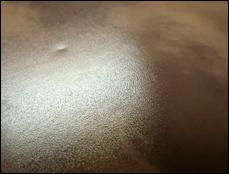 Photo 6
One single indent from a particle will ruin the image.
The beauty of working with removable HA boards—Step 150, SpeedMount, HAF—is they may be reheated allowing the photo corner to be lifted to remove a particle close to the edge which may have been trapped beneath. An indent from debris is another story. About the only solution to an indent is remove the photo completely, try to smooth out the surface indent in the photo paper, then remount to a new piece of HA board. There are two reasons the original board must be discarded: first, the indent cannot be repaired and will remain in the board; second, the adhesive layer will have been compromised and there may not be adequate adhesive remaining for a new bond.
Another issue to watch for with HA boards is the application of the adhesive. It MUST be a very smoothly applied since any texture on the board surface is likely to translate to the surface of the mounted photo. Properly applied adhesive is very smooth with no globs or spattering. Photo 7 shows three boards, two smooth and one with splotches(photo 8). If accidently mounted to a splotchy HA board the photo will show similar lumps requiring removal and remounting. If this occurs make certain all of the adhesive residue is totally removed from back of the photo prior to remounting or the blotches will remain even after the new bond.
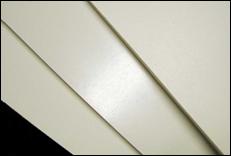 Photo 7
Bainbridge HAF (L), Bienfang Step 150 (C), SpeedMount (R).
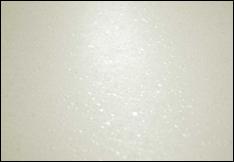 Photo 8
The splotchy application of the adhesive made the photo surface lumpy too.
TTPM
Any time a permanent mounting technique is selected attention must be paid to good basic mounting technique and paying attention to the elements of time, temperature, pressure, moisture (TTPM). Regardless of the tissue adhesive or heat-activated board there is a suggested time and temperature recommended by the manufacturer. It is vitally important that be followed. Altitude does play into the elements of time and temperature, for even at 5000 feet in Tehachapi I must increase the recommended 150ºF to 160ºF and 15 seconds to 30 seconds for a low temperature, short dwell time HA board to properly activate. Knowing your products and equipment very well allows you to tweak them slightly to work best.
When mounting in a mechanical press—particularly with low temperature, short dwell time HA boards—the press MUST be properly adjusted to the correct pressure (photo 9). Too much pressure will pick up additional board texture, too little pressure will not bond the photo to the board. Pressure is also very important during the cooling process, so always remove the release paper with the project and cool under weight before attempting to remove the release sheet. This will maintain the best bond. Lifting release paper from a removable HS board prior to its cooling can lessen the bond created by cooling beneath a weight.
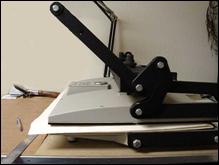 Photo 9
Press arm should be at 45 degrees to the table with all materials inserted.
This all sounds like a great deal of review every time a photo is to me mounted. But, it is no more time intensive than sizing a board or tacking the photo. It is simply a matter of getting into a routine—like switching out release papers after fifty working hours or turning on the lights when you come to work. And really examining the photo prior to mounting. Is it thinner than a traditional RC? What does it say on the back? Or, does it have a metallic sheen? The always wipe down all surfaces, tack and mount.
END
Copyright © 2011 Chris A Paschke
For more articles on mounting basics look under the mounting section in Articles by Subject.
Additional information on all types of mounting is found in:
The Mounting and Laminating Handbook, Second Edition, 2002,
The Mounting And Laminating Handbook, Third Edition, 2008 and
Creative Mounting, Wrapping, And Laminating, 2000 will teach you everything you need to know about getting the most from your dry mount equipment and materials as an innovative frame designer.
All books are available from Designs Ink Publishing through this website.
Chris A Paschke, CPF GCF
Designs Ink
Designs Ink Publishing
840 Tucker Road, Suite H-190
Tehachapi, CA 93561
P 661-821-2188
chris@designsinkart.com