 Photo 1
I'd like to thank Don Bowen for writing the February BACK TO BASICS: "Cutting 8ply and Double Thick Mats" article, for it turned out to be the perfect preface for my article on cutting "creative multiple ply" mat boards (masthead photo detail).
As I continue to show you creative ways to enhance your matting repertoire through an upcoming four part series on "tiered matting" (heat layering multiples of fine art papers and mat boards), it becomes increasingly important that clean well cut mats be the end product otherwise the intriguing creative bevel designs will be a disaster. Though I planned on following my "tiered matting" articles with the how-to of cutting...Don's article inspired me to begin with the technical cutting portion so you have a great two part series on multiple ply mat cutting and a better foundation for perfected execution of the later tiered look. It's always better to begin at the beginning.
Blades
As illustrated in "Cutting 8ply..." (PFM, Feb 1993), using the proper blades as well as setting the stops and blade depth are initial steps to successful multiple ply cutting. Check the blade depth by using an end cut piece of same thickness board or the short side of the actual tiered mat under the cutter bar to set the blade to barely score into the slip sheet. I prefer to use single sided blades (Fletcher #05-016 or C & H 1200 SE) for cutting these dense boards because of the control over the torque or blade twist of the thinner two sided blades. I still prefer regular 1200 blades for most basic mat cutting, and I've heard it said "any skilled framer should be able to cut about anything with the thinnest 1200/two sided blade", and basically that is correct.
Even though the single sided blades track better, and often may cut through a double thick mat with a single stroke, they still are not foolproof. Consider for a moment the density of a white core 4ply matboard "under tiered" with six added layers of art paper (Crescent Colored Art Paper, Strathmore Charcoal, Canson Mi-Teintes) and six additional layers of adhesive dry mounting film (Drytac Flobond, Seal Fusion 4000) mounting the entire package together. Sounds pretty heavy...well it is, but not the least bit impossible to cut.
Preparation
The same set-up, preparation and cutting procedures you practice daily should be used when cutting the very dense multiple ply mats described here. A checklist of the following points will help establish a more solid foundation for the basics, but you need to take them still one step further (see "Burnishing" PFM February 1992).
Don't really take the phone off the hook, just make certain this mat has your undivided attention until it is completed!
I also recently noticed I hold my breath as I make each individual score into the mat, but that of course is optional.
The concept behind pre-drying is to eliminate the drag that is caused by excessive moisture remaining within a mat board. When dealing with homemade multiple ply creations the element of pre-drying is often unnecessary since the very act of mounting the layers together placed them in a heat press and pulled the moisture from the boards. Even with the moisture removed a 10-12 ply board will still have a great deal of drag simply because of the additional adhesive and art paper layers.
The sample in the photos is a "pin striped/bevel banded" 4ply solid core museum rag base (Strathmore, Crescent or Bainbridge Museum Rags) layered with 3 sheets of art paper (2 brown/1 cream) in the center of the sandwich, top layer is a black surface black core mat mounted with a sheet of "flannel" art paper (photo 1/diagram 1). The whys of this creative mat will be covered in another article, so simply bear with the technical cutting at this point.
Photo 1
 Diagram 1
Cutting
Repetition is the key to a successful inner mat bevel and without it the dramatics and effect of a deeper bevel will be lost.Repetition of the exact entry point and score must be duplicated with each pass of the blade.It only stands to reason if you are attempting to score perfectly in successive strokes you best not move from your original placement.
Although we have been told never to double score any mat, herein lies the exception.In order to achieve a well cut, non-hooked bevel the mat should be scored in multiple slices each proceeding deeper into the thick mat. The concept is to cut the equivalent of about a 4-ply mat with each score until through the entire thickness of the mat
(photos 2, 3, 4). This brings me back to why your stance, pressure and arm placement are vitally important to the end product. Each score of the blade must be a photocopy of the one just prior to it.Always complete the cutting of one side prior to rotating the mat to the next side.If you generally use stops it must be noted they are usually set to a standard 4-ply thickness and if used need to be recalibrated to accommodate the additional mat ply.
 Photo 2
Cut 4 ply equivalent
 Photo 3
Cut 8 ply
 Photo 4
Cut through total 12 ply
With multiple ply mats, undercutting is often preferred to overcutting. Since it is often difficult to determine the required length of overbite on the back of the mat to be adequate for the particular multiple ply being cut undercutting is common, and it is quite easy to pop out the fallout with a sharp two-sided 1200 blade (photo 5).
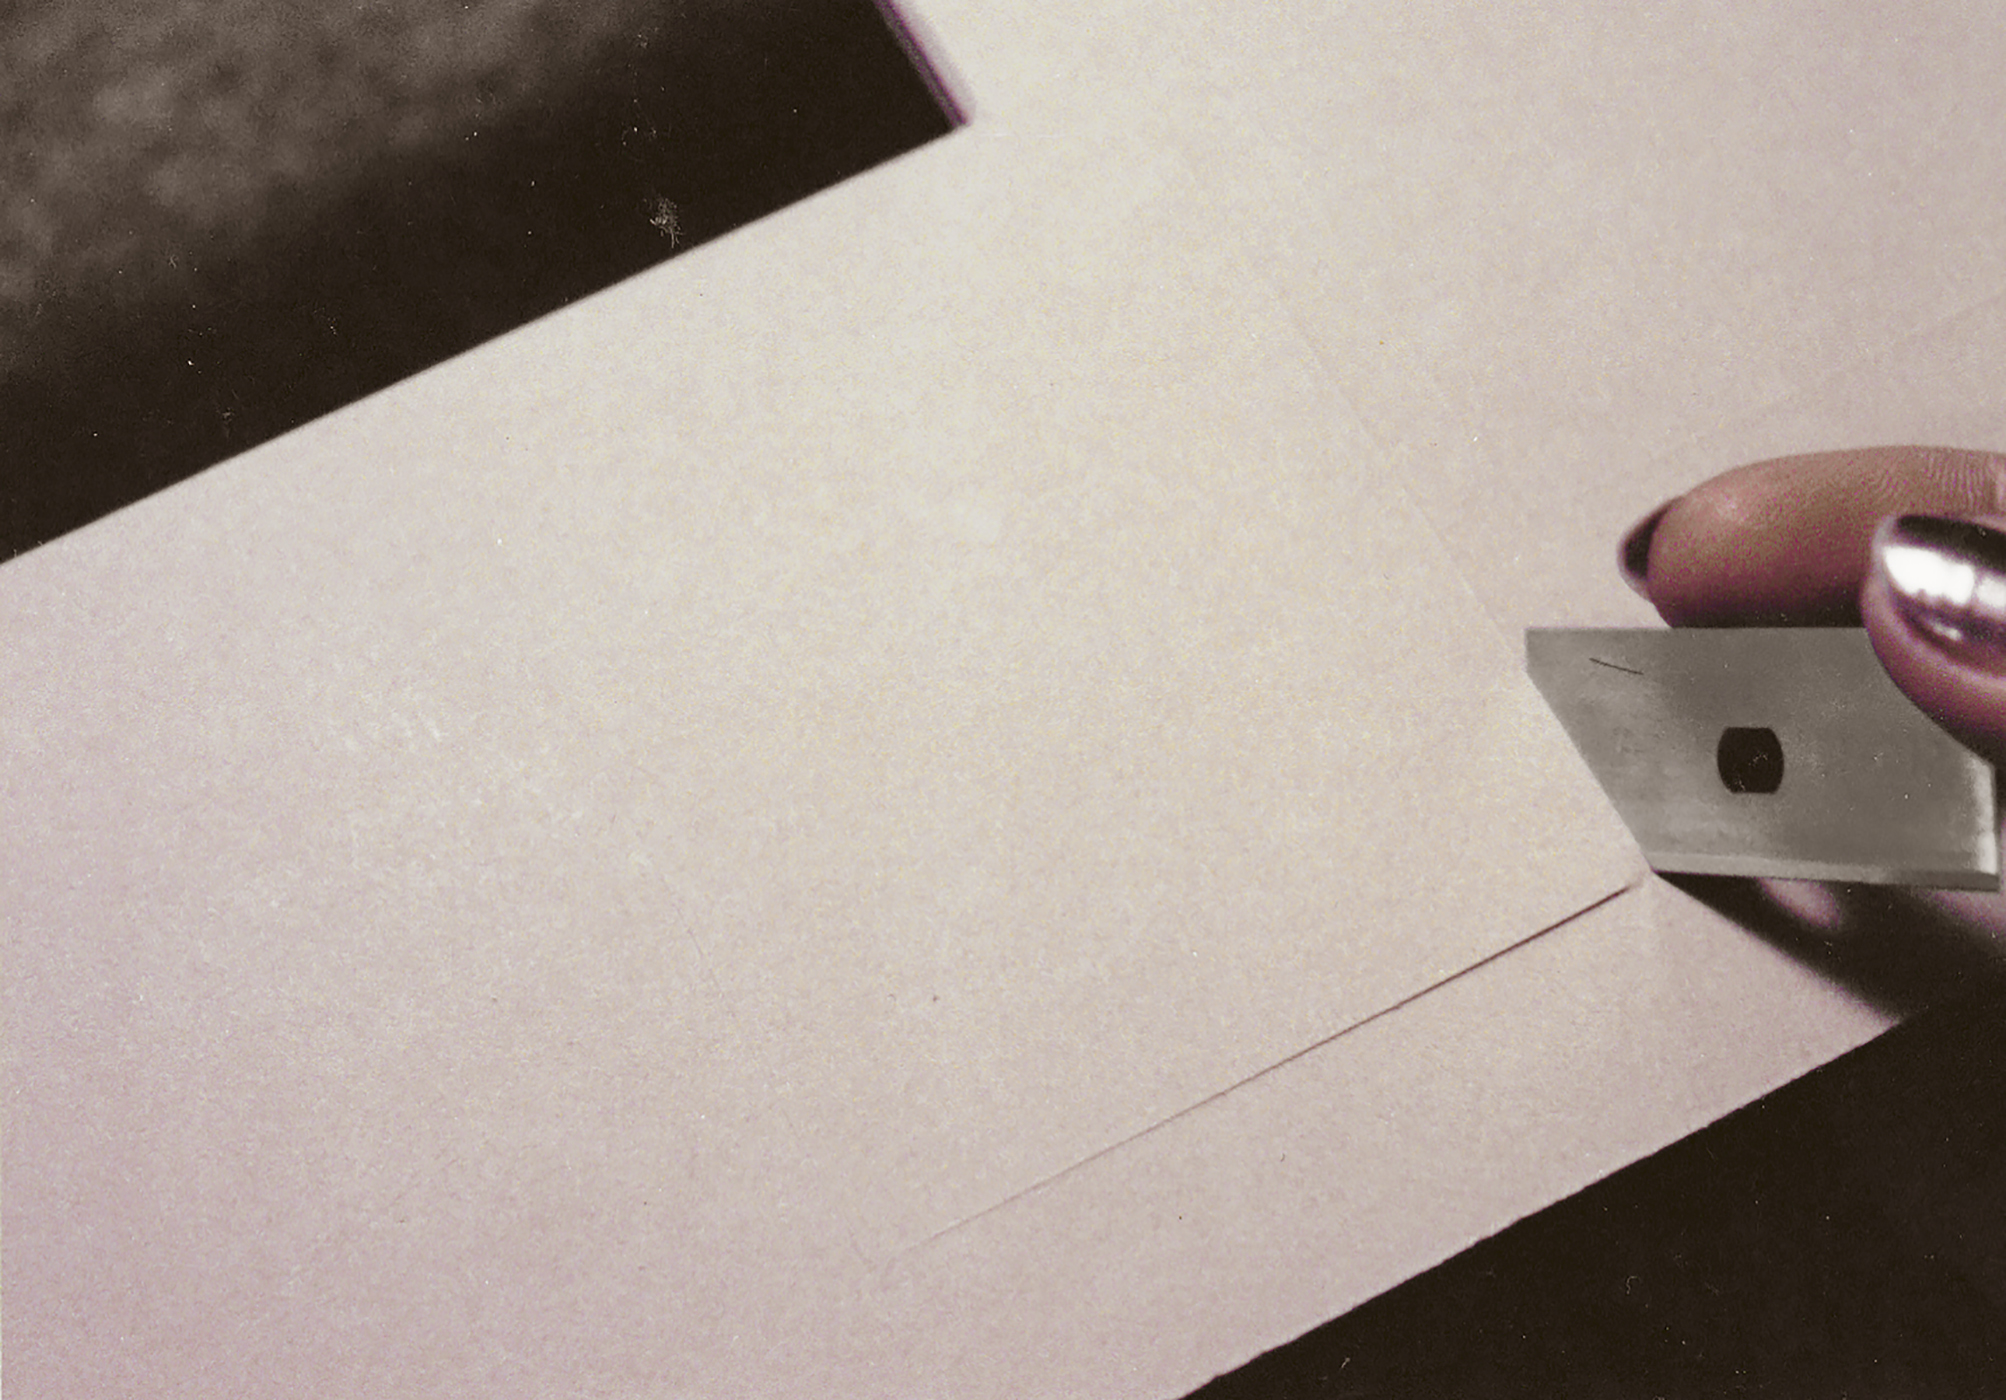 Photo 5
Pop out the undercut with the sharp inner edge of a thin 1200 blade making certain the angle of the established mat bevel is followed exactly.
Burnishing
The back of a multiple ply mat will have about a quarter inch of "overbite" cut (not an "overcut" which actually appears on the face of the mat).Because of the vast thickness and density of the created board the inner/lower edge of the bevel will often have a slight flair and the overbite slices on the back will not lie smooth. By simply running the edge of a bone burnisher along the edge the flair will be smoothed down (photo 6). The actual corner has shifted as a land fault in an earthquake, and although there is no overcut on the face of the mat, the corner where the bevels join will appear to be out of alignment.By burnishing the overbite aggressively with the bone on the back the entire unit will be realigned. This process should be executed on a firm countertop rather than carpet and will often create a shiny spot where burnished, but since it is the mat back no matter.
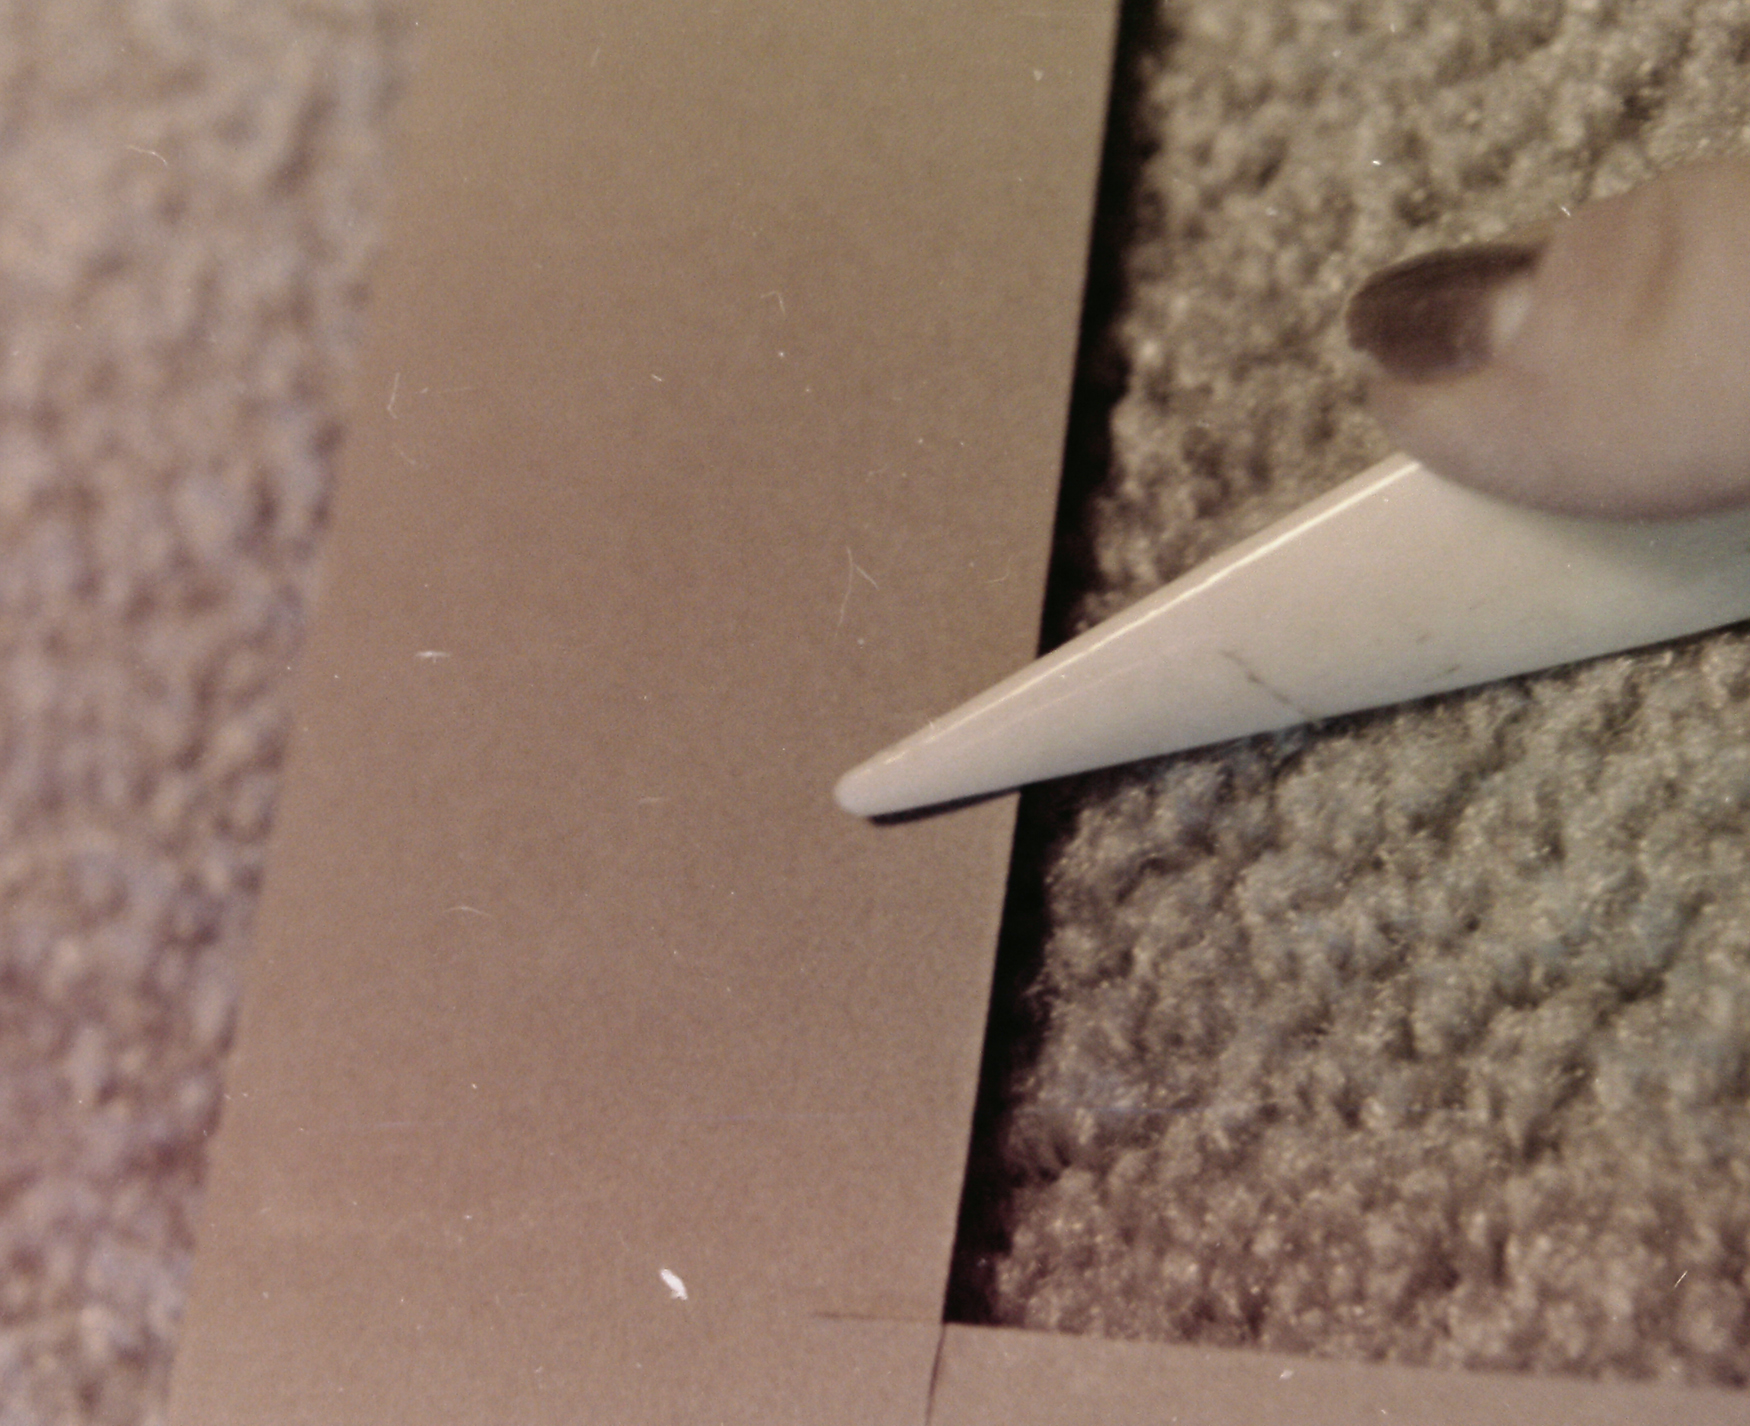 Photo 6
The slight flair is barely visable just below the bone in this photo. Run th bone burnisher along the inner bevel edge (as well as the outer top edge) to realign the paper layers. Then aggressively burnish the actual cut corner on the back to shift the front bevel into alignment also.
It's vitally important to realize that no matter how many exciting new and creative things you may learn to do with mat cutting and design, if you can't execute a perfected image there's no real point in trying.— Cutting 10, 12 and 14 ply mats may not be easy though with the proper tools and good step-by-step procedures a clean corner may be produced every time.Don't rush and don't answer your phone after the second score of a mat requiring three scores per side. Not only will your concentration be broken but your grasp of the cutter head and placement of your arm and feet will never be the same...the end result could be slivering of the bevel into annoying tiny curly-Qs of board.
I'm not trying to scare you I'm truly an extreme advocate of creativity and specialization, so merely conquer the multiple mat and go for the dollars!Keep an eye open for the upcoming "Tiered Series", the first of four parts will feature "surface tiering" where you can really begin to let your creative juices flow and your multiple ply skills shine.
END
Copyright © 1993 Chris A Paschke
For more articles on mounting basics look under the mounting section in Articles by Subject.
Additional information on all types of mounting is found in:
The Mounting and Laminating Handbook, Second Edition, 2002,
The Mounting And Laminating Handbook, Third Edition, 2008 and
Creative Mounting, Wrapping, And Laminating, 2000 will teach you everything you need to know about getting the most from your dry mount equipment and materials as an innovative frame designer.
All books are available from Designs Ink Publishing through this website.
Chris A Paschke, CPF GCF
Designs Ink
Designs Ink Publishing
840 Tucker Road, Suite H-190
Tehachapi, CA 93561
P 661-821-2188
chris@designsinkart.com