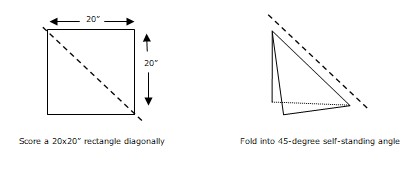
 Photo 1
Score a 20" square of foam board, corner to corner. Fold the board so it stands alongside the arm of the press.
Consider for a moment the four major elements necessary to achieve consistently good mounting: time, temperature, pressure and moisture.
Time and temperature are determined by the individual adhesive being used, the artwork or material being mounted, the substrate thickness or density and the desired end result. (see "Ghosting Newsprint," November 1991 PFM)
Moisture may be readily controlled and eliminated simply by pre-drying all items prior to mounting when using a mechanical press. Since the very nature of a vacuum press is to draw or extract the air from within the press, moisture is automatically pulled from the material during the mounting process. This "moisture issue" will be discussed further in a subsequent article.
This brings us to the pressure point of mounting. A vacuum press is self adjusting in relation to the substrate or mounting board being used because the rubber diaphragm or bladder conforms totally to the item within the press. Put in its most simple terms...it neither needs to, nor can be adjusted!
On the other hand, if you own a Seal Mechanical Press, and if the jaws and lever arm are not properly adjusted for the thickness of the substrate being used for mounting, you run the risk of a poor, unpredictable or inconsistent mounting. None of the words just mentioned should even be in the vocabulary of a successful, time-efficient framer. Dry mounting is by far the most predictable and reliable form of mounting available...if the elements of time, temperature, moisture and pressure are controlled.
To demonstrate how to adjust the pressure of the mechanical press using a Seal 210M-X (the procedure is identical on the 500T-X), start by cutting a 20" square piece of foam board. Join the two opposite corners by scoring the board corner to corner, but ony penetrate half way through the thickness of the foam (photo 1 & diagram 1). Fold the square in half and you'll have a perfect 45° pattern. By using a piece of foam this large it is easy to visually match the angle of the pattern against the press handle (lever arm). Also, by folding the board in half, rather than cutting it, it remains self-supporting.
Photo 1
Score a 20" square of foam board, corner to corner. Fold the board so it stands alongside the arm of the press.
Lever Arm Adjustment
Select a substrate for which the press will be adjusted and place it in the press with the handle (or lever arm) at the resting position—closed but not locked into position. Check to see if the lever arm is at the proper 45° angle for this thickness of substrate (photo 2). If the arm is too high for the foam pattern, the press would be too tight for this thickness of substrate (photo 3). If the arm is too low for the pattern, the press would be too loose and good adhesion or bubbles might occur in you mounting (photo 4).
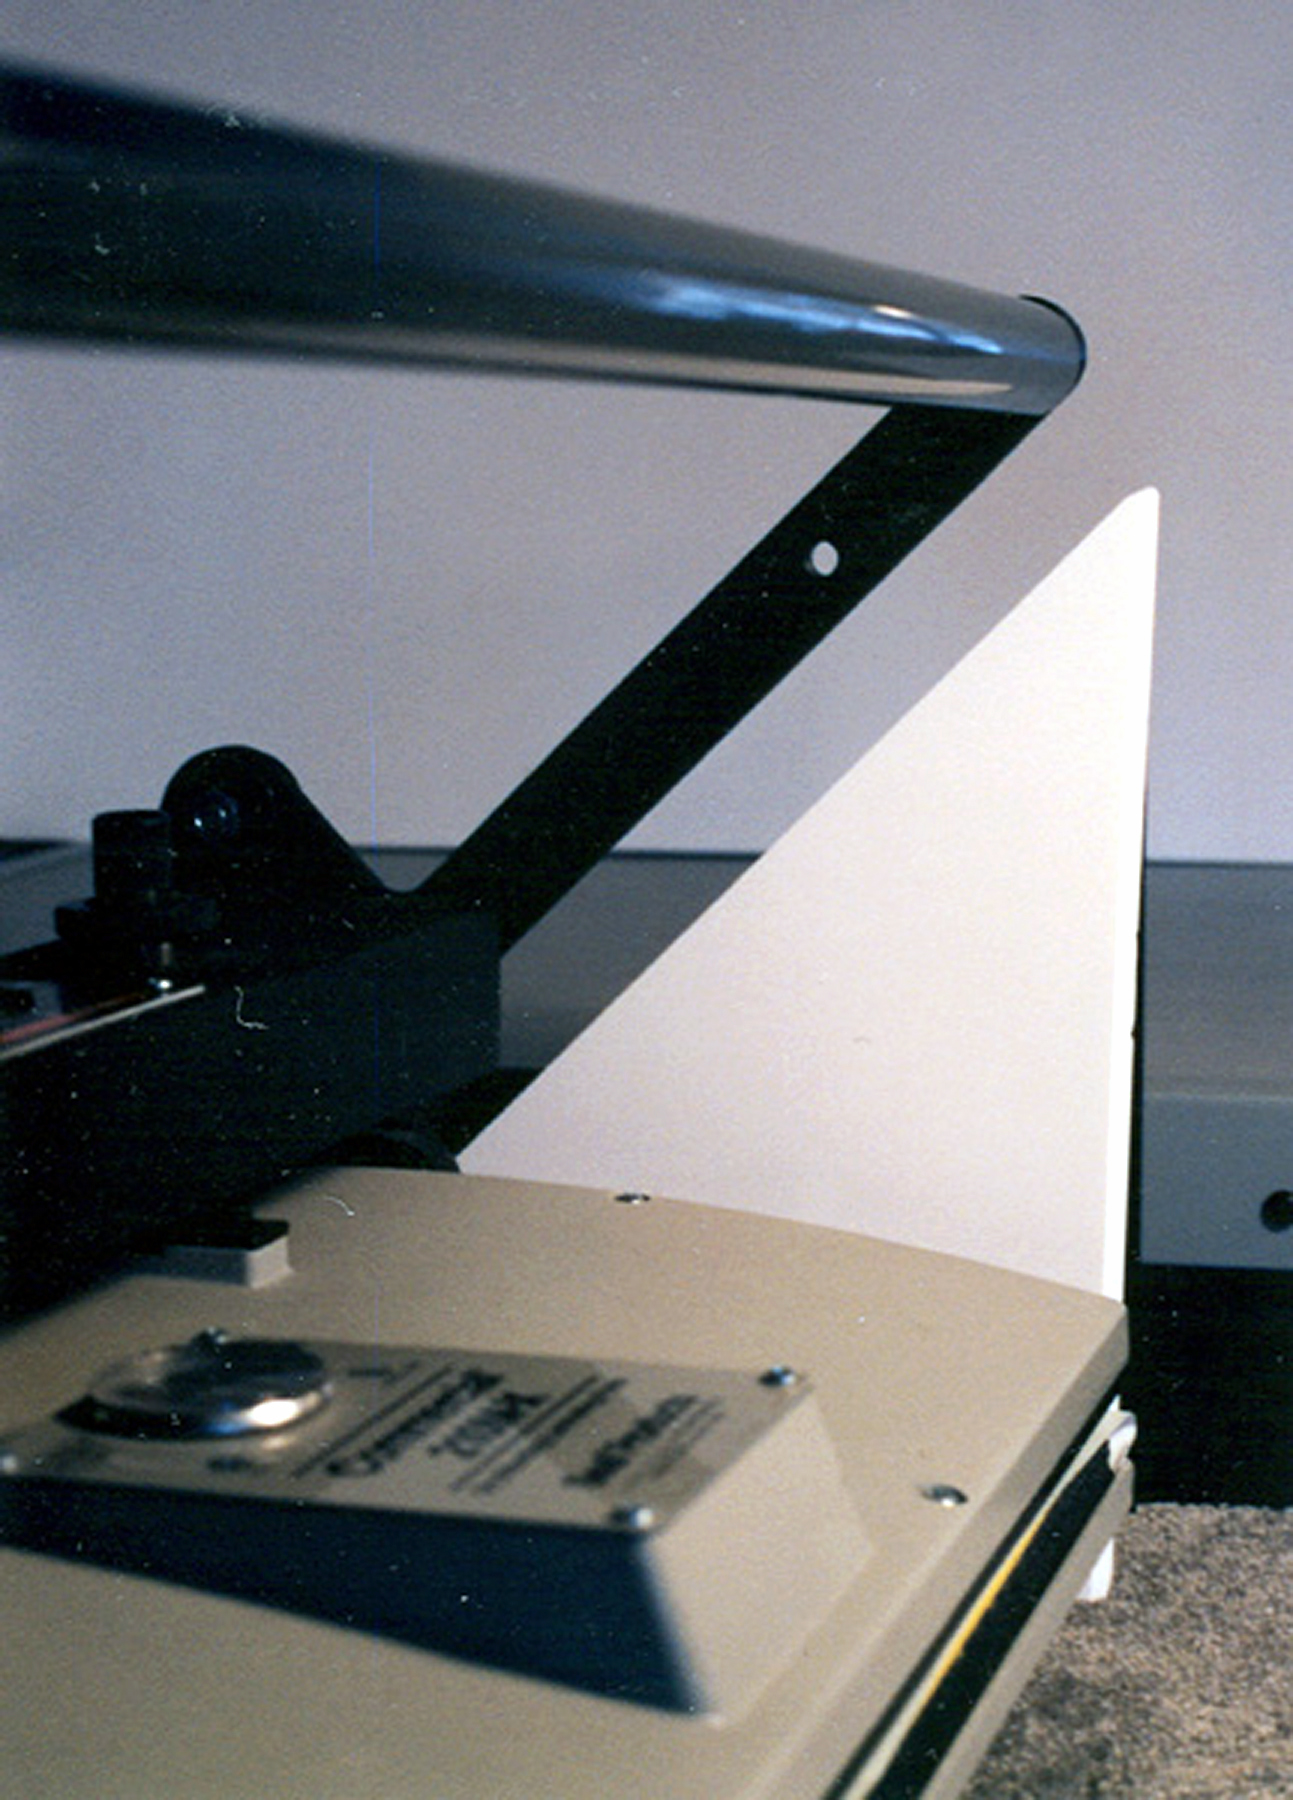 Photo 2
This is the correct pressure adjustment for the substrate inside the press. Note the parallel lines between the press arm and the foam board pattern—45°.
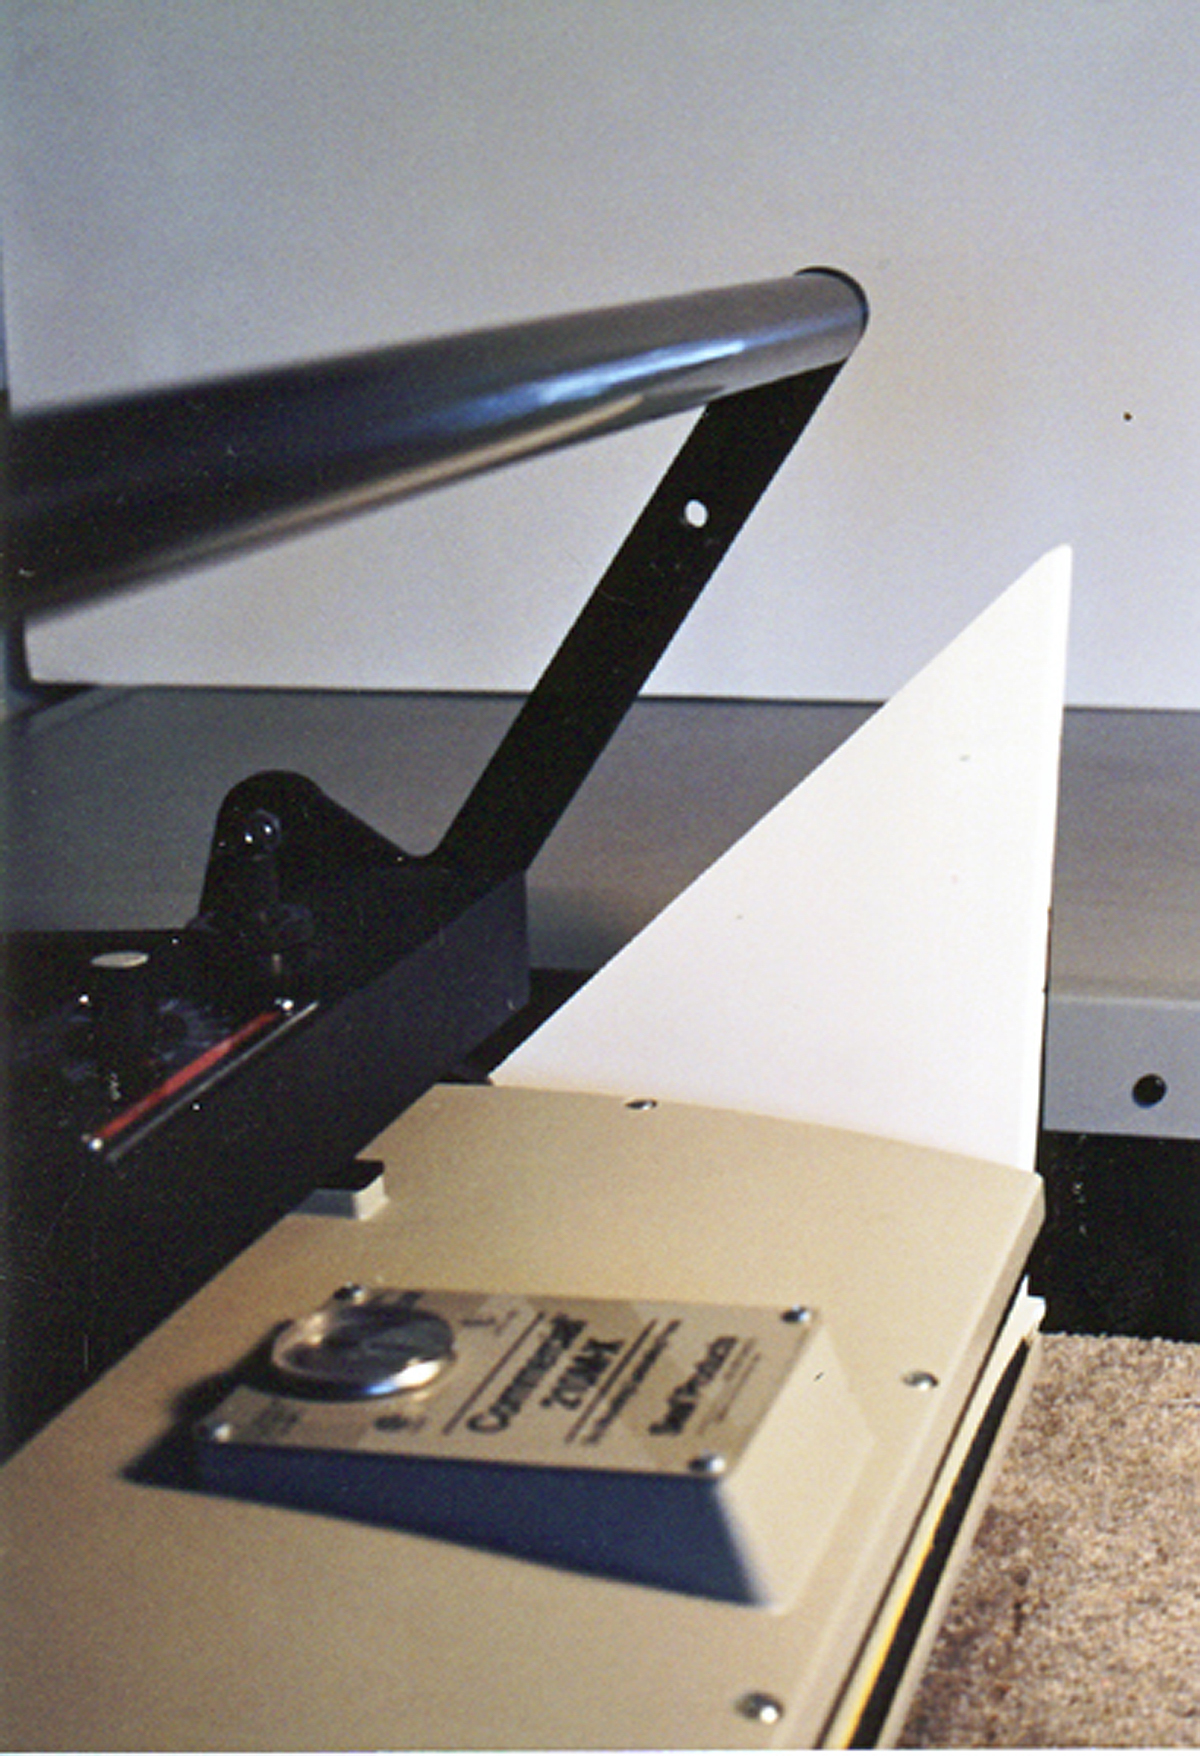 Photo 3
If the arm is too high there is too much pressure for the thickness of the substrate. Dents in your mounted foam board base might result. Note the "un"parallel lines of the handle to the pattern.
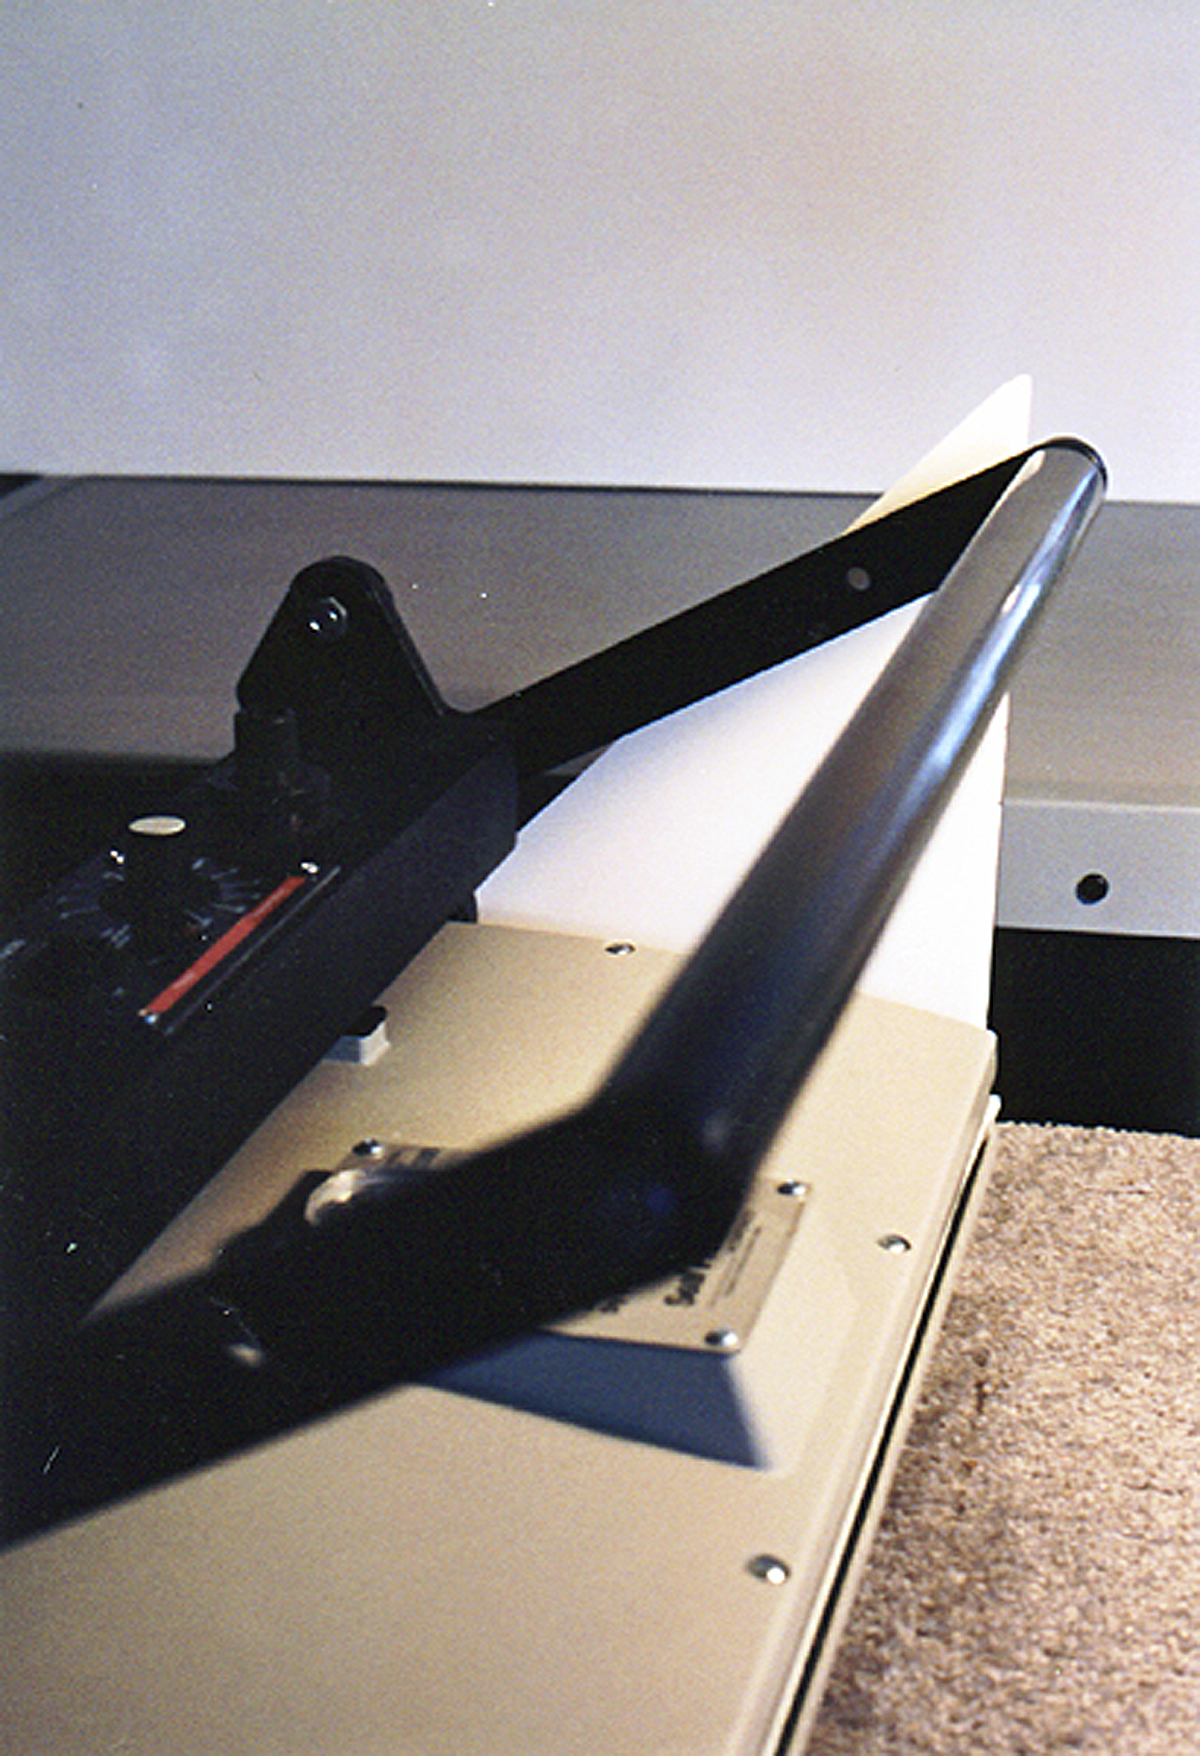 Photo 4
If the pressure setting is too low, air bubbles might remain in your mounting. Always check for the pressure by looking for the 45° arm.
The "locking nuts" are the doughnut shaped outer rings which loosen when turned counter-clockwise. These nuts must be loosened to adjust the taller, inner "pressure adjusting screws." If the locking nut is too tight to loosen, insert an additional board for space, then lock the arm down to loosen the pressure of the locking nuts on the press and unscrew them until they are out of the way or off (photos 5A & 5B). If an additional board was added to loosen the locking nuts, remember to remove it prior to setting the 45°.
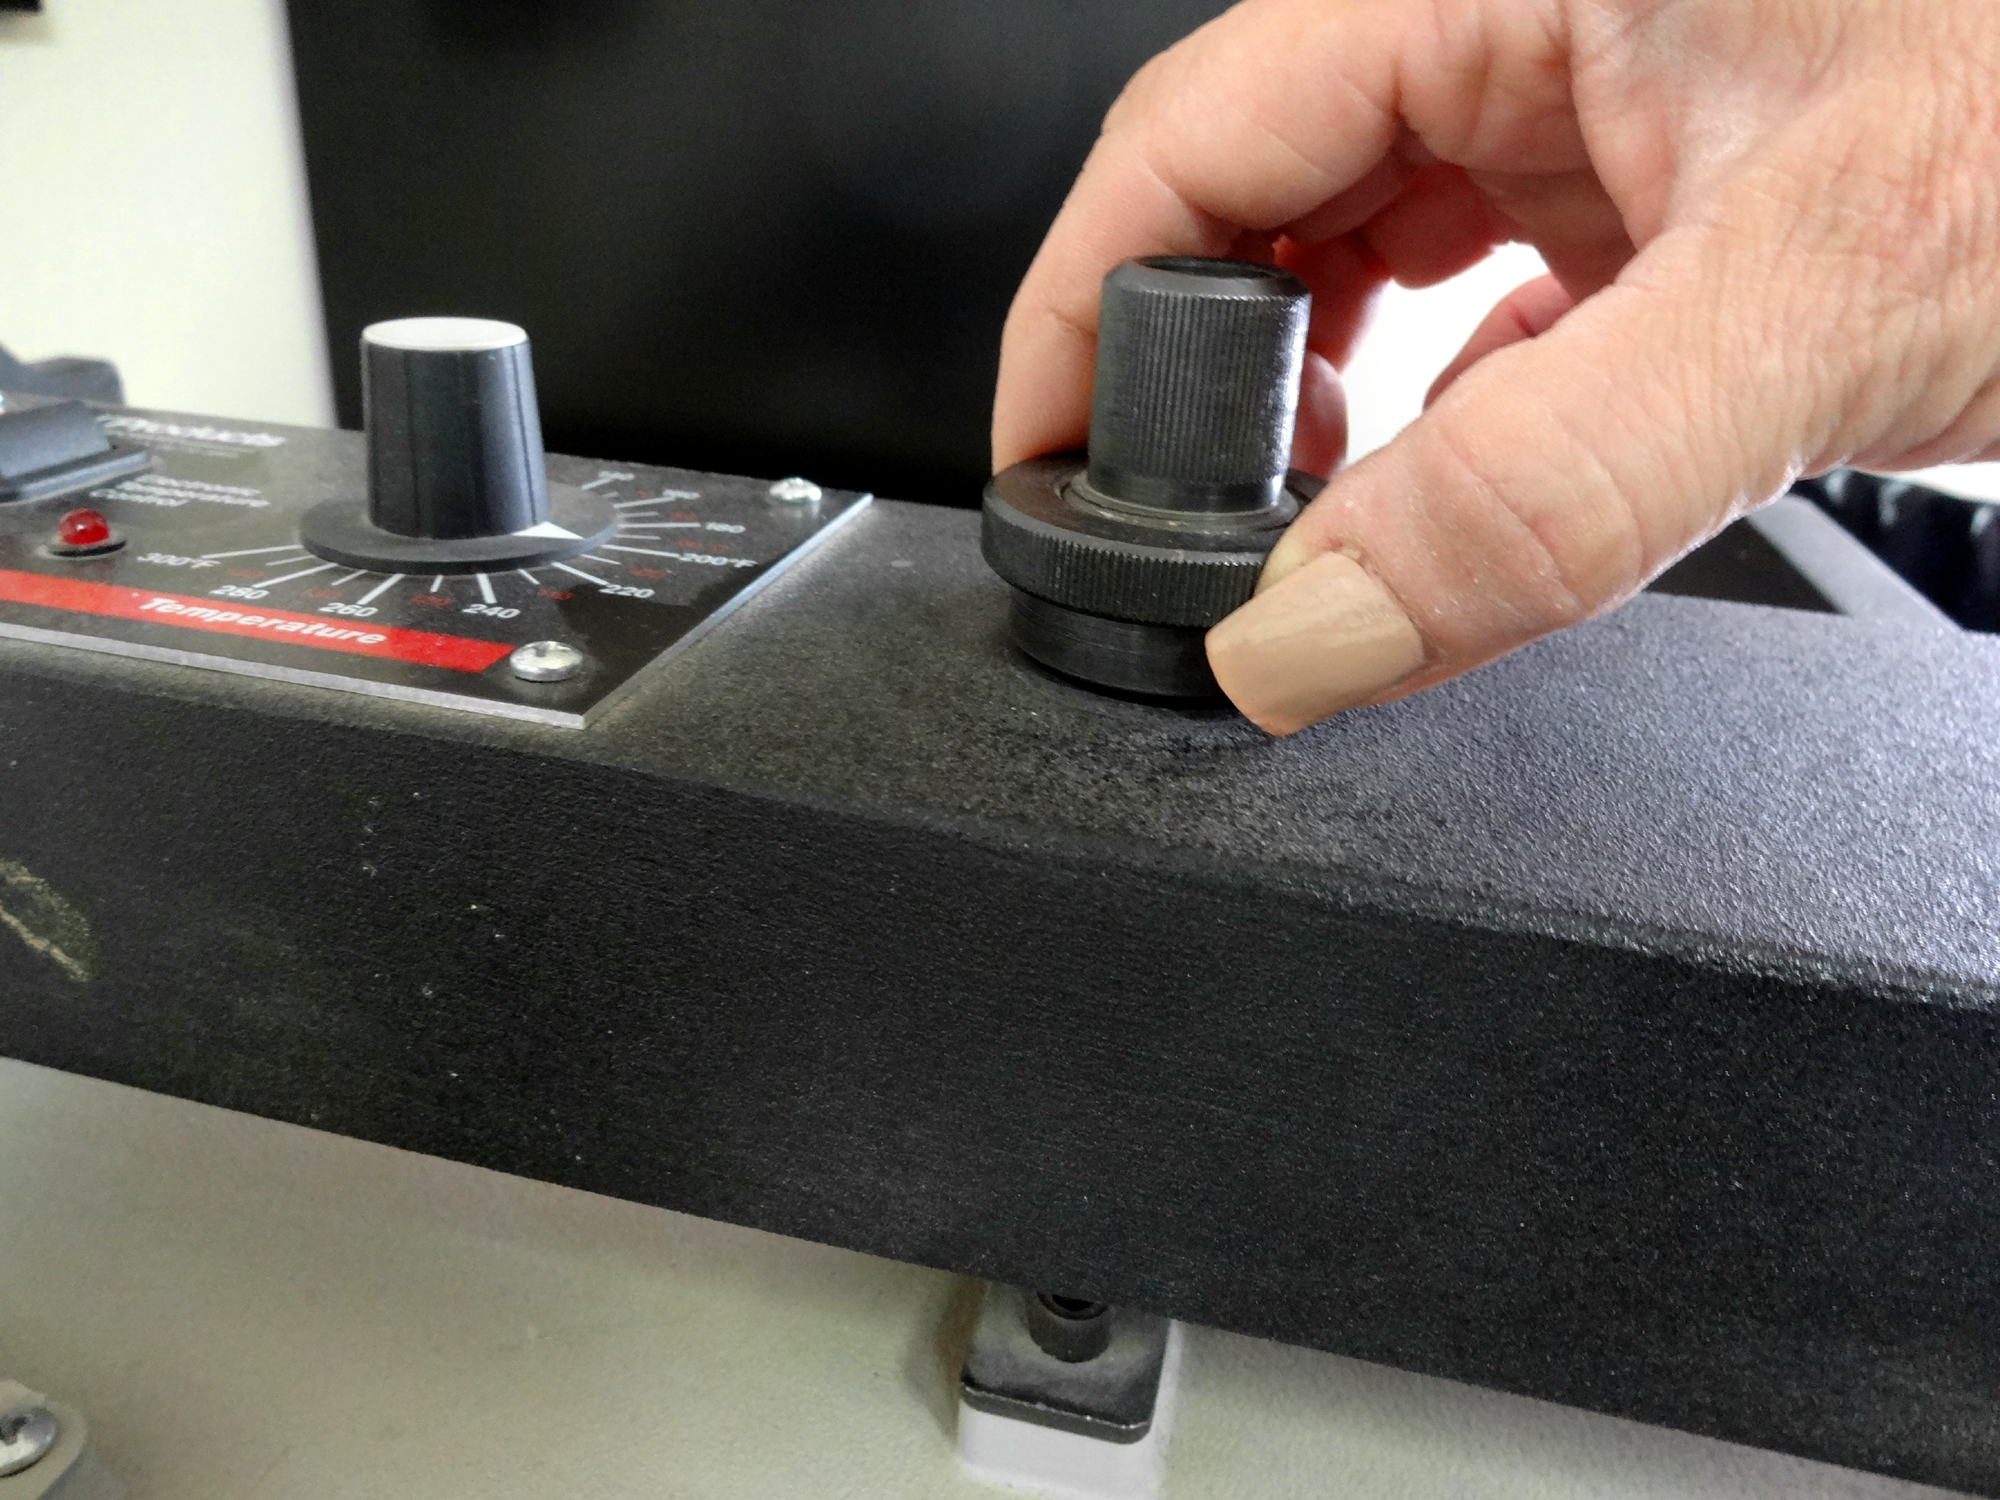 Photo 5A
Loosen or remove the outer "locking nut" to allow free turning adjustment of the inner "adjusting screws."
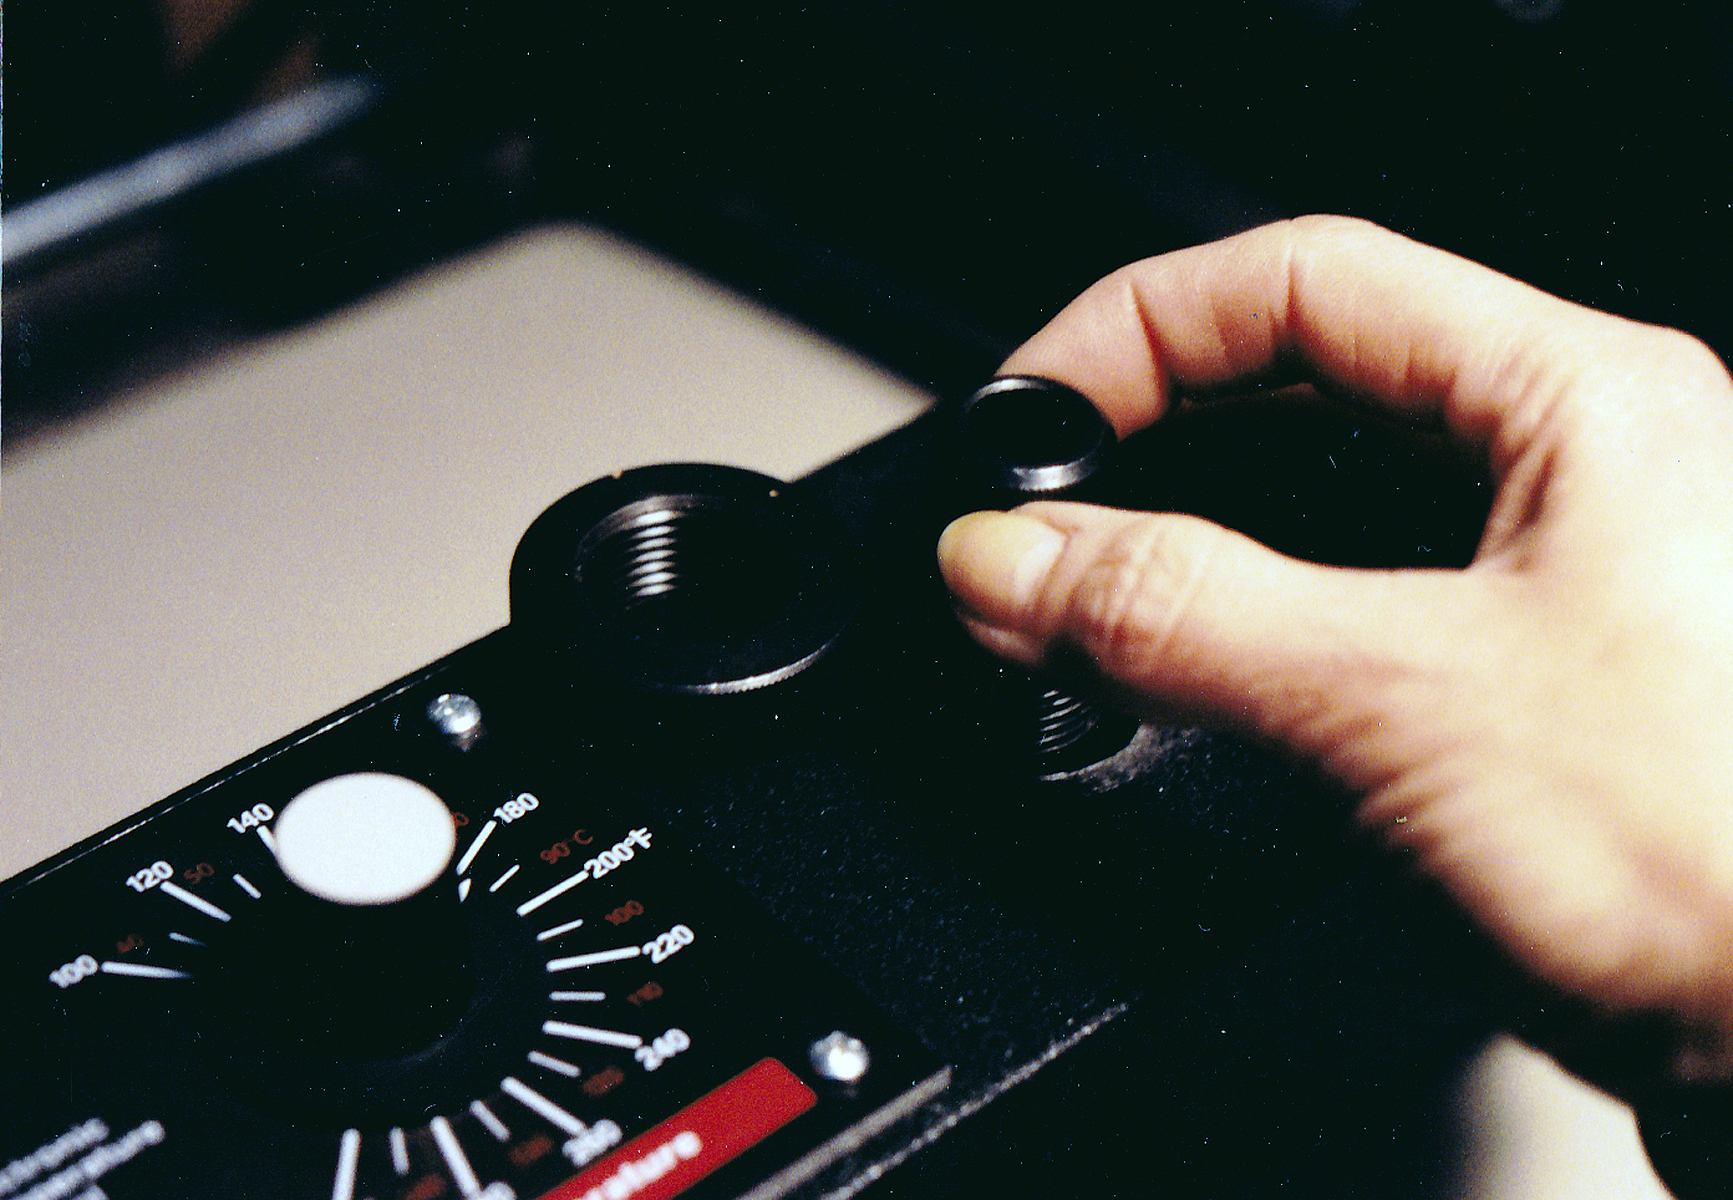 Photo 5B
Adjust both tall screws simultaneously, counter-clockwise to raise the arm, and clockwise to lower the arm (and pressure). Always adjust with the desired substrate in the press and remember to tighten the outer locking nuts.
Pop the press open. Since the locking nuts are no longer holding the adjusting screws in place, they may be readily turned to accommodate the necessary changes in pressure.
Twisting the adjusting screws evenly to the right or in a clockwise position will drop the lever arm down, thus lightening or decreasing the press pressure. Conversely, twisting the nuts to the left or counter-clockwise will raise the arm up and increase the press pressure. Align the 45° foam pattern with the lever arm for whatever substrate thickness is desired, lock the arm closed and replace the locking nuts snugly.
Shim Variation
The press should be adjusted to the dominant thickness of substrate or mount board being used. Readjustment of the press is required each time the sustrate changes or the pressure will change as well. As an alternative, shims can be cut and placed beneath the masonite board to accommodate the variation in substrate thickness and make up the difference in thickness (photo 6). Remember, these shims are placed beneath the masonite, not within the platten/sponge pad mounting area.
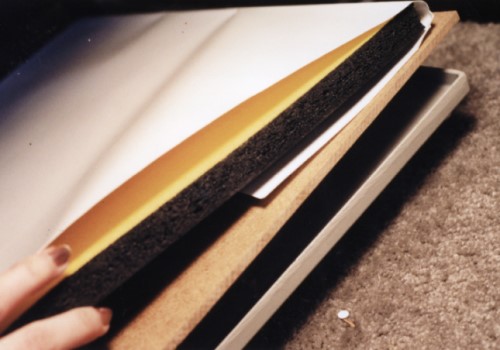 Photo 6
Shims may be inserted beneath the masonite sheet to take up additional space within the press to avoid necessary readjustments. This is an alternative to constant readjusting if numerous different substrates are used for mounting on a regular basis.
The jaws of your mechanical press must always be clean, aligned and properly adjusted in order to achieve the repeatedly reliable, consistent, predictable mountings necessary to successful framing. If the jaws are too loose there may be gaps or air pockets in the bond between substrate and artwork. If the jaws are too tight, indentations may occur when mounting an oversized project "in bites."
The monster within the press can easily be tamed simply by using your common sense. Never fear the "jaws." They are there to simplify your life and make you more money! Follow the standard guidlines of 45° for the placement of the lever arm, and never forget the principles of time, temperature, pressure and moisture.
END
Copyright © 1992 Chris A Paschke
For more articles on mounting basics look under the mounting section in Articles by Subject.
Additional information on all types of mounting is found in:
The Mounting and Laminating Handbook, Second Edition, 2002,
The Mounting And Laminating Handbook, Third Edition, 2008 and
Creative Mounting, Wrapping, And Laminating, 2000 will teach you everything you need to know about getting the most from your dry mount equipment and materials as an innovative frame designer.
All books are available from Designs Ink Publishing through this website.
Chris A Paschke, CPF GCF
Designs Ink
Designs Ink Publishing
840 Tucker Road, Suite H-190
Tehachapi, CA 93561
P 661-821-2188
chris@designsinkart.com