 Photo 1
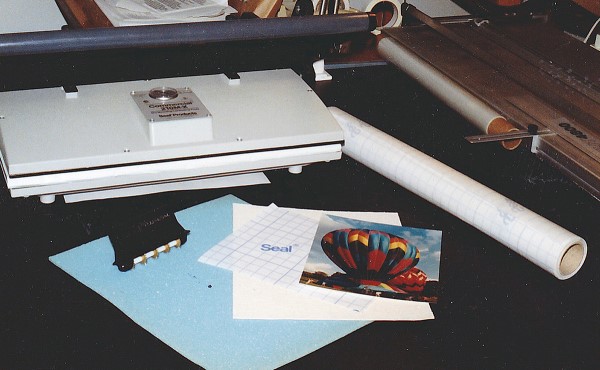
The basic materials required for transferring an RC photograph to canvas (as used in this demonstration) are fairly minimal: a heat mount system, self-adhesived fabric, blue foam overlay, a perforator and the resin coated photo.
If you already maintain a heat mounting system, expanding into the use of laminates is a natural progression for realizing more profit potential from your equipment. Not only are you able to provide additional services to your customers but also create a market untapped by you in the past.
Photo 1
The basic materials required for transferring an RC photograph to canvas (as used in this demonstration) are fairly minimal: a heat mount system, self-adhesived fabric, blue foam overlay, a perforator and the resin coated photo.
Laminating is the process of applying a protective plastic film to the surface of paper art or photograph using a heat mounting system. "A Clear View of Glazing", January 1991 correctly refers to film laminates as a nonreversible alternative to glass, but there are many additional reasons these films are used by framers. As a glass substitute it is washable, durable, nonbreakable, lightweight, permanent, won't finger print, and often has UV protective properties. They come in matte, luster, canvas and linen textures and as illustrated in this article may be used by innovative framers to increase profits and expand their framing creativity. Engineers, architects, preschools, hospitals, city/county/state agencies, as well as assorted federal agencies often are in search of alternative ways to mount and protect items to be used for oral presentations, short-term viewings or other temporary needs.
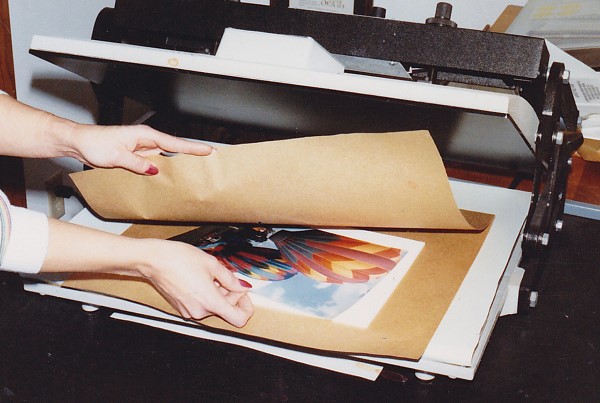 Photo 2
Always pre-dry all paper and substrate materials except when they are pre-adhesived. Place the sustrate and photo in an envelope of kraft paper, then into a pre-heated press for 10-15 seconds.
Also consider for a moment the concept of paying off a major equipment purchase. Obviously the quicker an investment piece of equipment has paid for itself the quicker additional profits will end up in your pocket. Assume for a moment you are charging ten dollars to mount a particular poster. If you then laminate the same item it is generally suggested you charge an additional ten dollars (or the equivalent of the mounting charge) for the laminating process. A number of facts come into play at this point.
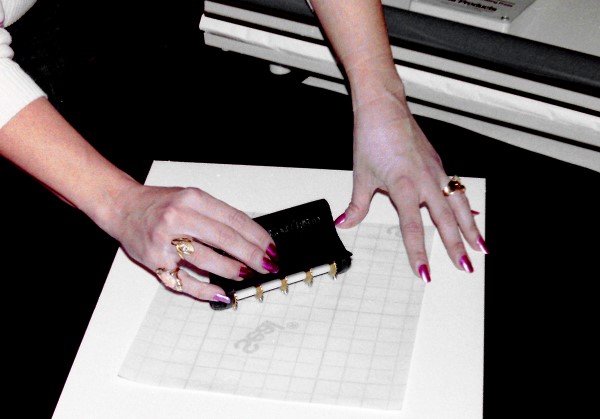 Photo 3
Perforating the laminate prior to heat bonding is necessary when applying it over any plastic, such as an RC photograph. The tiny air holes allow the air to be compressed from between the materials during the heat application, yet they will seal up just prior to final bonding in the press.
Technically it is possible to mount and laminate the poster all at one time, thus saving you the time and equipment use of the second mounting. Since the basic materials of adhesive, substrate and overhead have been calculated into the basic mounting price (whether you use a basic united inch price, suggested dealer price chart or national pricing schedule) by doubling the mounting charge when laminating only the cost of the film needs to be added prior to realizing your profit. Simple mathematics will illustrate the time and cost effectiveness of adding lamination to your repertoire of services. By using the doubling format of pricing lamination there is also plenty of room available to discount or subcontract if you wish. If you then additionally venture into the more creative aspects of laminating films by incorporating them into mat design, faux glass etching and transferring photos onto canvas then there is yet more potential for increased profits and added customer services.
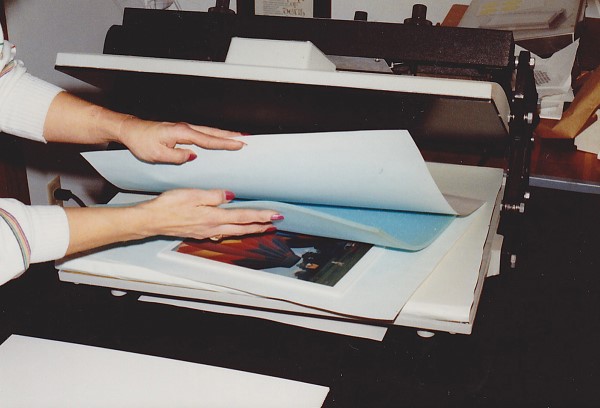 Photo 4
Place the substrate (foam board) with the photo already mounted to it, the perforated laminate positioned on top of the photo, and blue foam overlay on top of the laminate into an envelope of release paper. Overlay foam must be used to ensure even pressure and good adhesion.
The basics of laminating a mounted photograph must be briefly covered in order to establish the process differences between paper art lamination and plastic photo emulsion lamination. Then in the hands-on portion of this article we will be transferring a pre- laminated photograph onto a self adhesive canvas (Seal CanvasMount) in preparation for later stretching and framing.
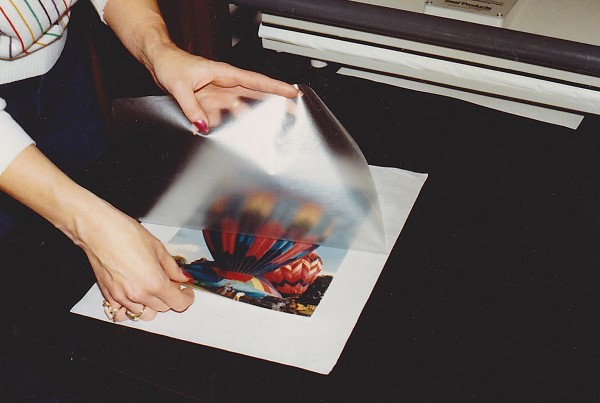 Photo 5
Sanwich the RC photo between the clear perforated laminate and its back release paper. Bond 10-15 minutes turning the temperature from 180°F to 225°F. Be sure to use an oversized piece of laminate and trim it down later to accommodate the desired pre-cut canvas. The laminated photo and canvas should be the same dimensions, and 1½" to 2" should be allowed beyond the edge of the photo for later stretching onto bars.
In preparation for laminating a photo, as always predry the substrate and photograph in an envelope of kraft paper for 10-15 seconds, mount the photo with an appropriate breathable permanent dry mount tissue designed for use with a nonbreathable photo such as Seal ColorMount or TechMount TM2. Keep in mind any glassine or dry mount core tissue that does not breathe (MT5 or TM1) generally will not allow any trapped air to escape from between the photo and tissue core and air bubbles may result.
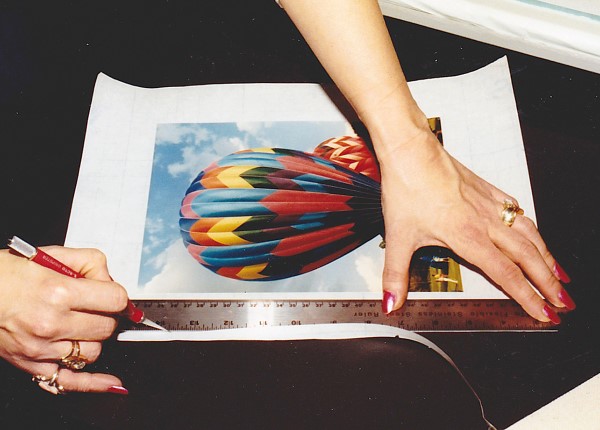 Photo 6
Upon completion of bonding the laminate, and prior to stripping the emulsion from the photo, trim the excess laminate to match the dimensions of the canvas. By sandwiching and mounting the photo onto an oversized piece of laminate you eliminate the need to center the photo exactly, saving a great deal of time by simply trimming after bonding. The entire piece of canvas must be covered by the laminate or the adhesive on the canvas will adhere to and destroy the foam overlay.
Since both the RC (resin coated) photograph and the laminate (Seal Print Guard-UV Matte) are plastics the laminate must be perforated to allow the air to be compressed from between the layers prior to permanent fusion of the laminate to the photo. Using a special metal perforating tool, allow the weight of the tool with just a minor amount of pressure to roll across the surface of the laminate so that tiny holes are created approximately ¼" apart. Always perforate the laminate on the film side otherwise the removable paper backing of the laminate may be forced into the puncture holes leaving white paper residue within the completed photo. Also be certain to perforate on a pliable surface such as a self-healing mat, foam board or mat board. Too hard a surface will not allow the teeth of the perforator to penetrate the laminate enough to create adequate holes for the air to escape before they seal up in the press.
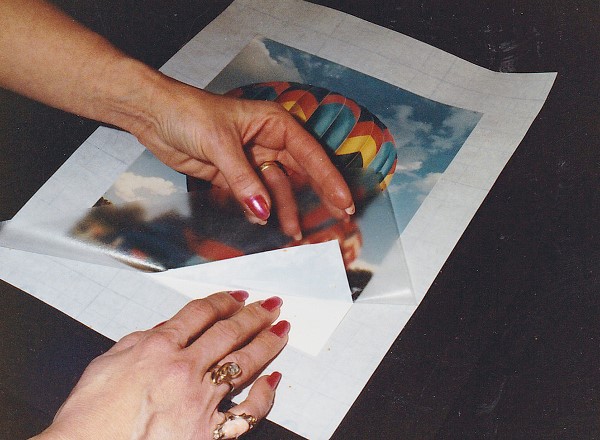 Photo 7
Carfully holding the backing paper and RC photo paper down, begin peeling the laminate with bonded photo from the remaining RC paper from one corner. You will quickly see that the thin photo emulsion which is being peeled from the backing resembles a decal.
Although 215-225ºF is the standard temperature setting required for laminating paper artwork, with photographs the press should begin at a temperature of 180ºF. Place a package of substrate with photo, applied laminate (with backing paper removed) and sponge foam overlay in an envelope of release paper into the press, clamp it closed and immediately turn the temperature up to 225ºF. As the press temperature slowly climbs to the desired laminating temperature of 225ºF the air has adequate time to be compressed from between the plastics and the tiny perforations can melt back together. Although it may take from 10-15 minutes to reach the laminating temperature once the press reaches the 225ºF temperature it will actually only take 3-5 minutes for the laminate to bond to the photo.
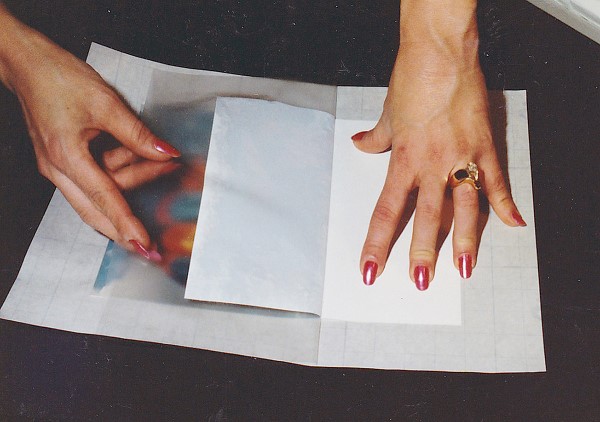 Photo 8
Strip the emulsion from the RC paper by turning the top emulsion in a tight hairpin turn against itself. Pull slowly and evenly. Assistance may be needed for larger photos. Excess amounts of paper remaining on the back of the emulsion may reduce the amount of texture achievedafter transfer. Take it slowlyand smoothly.
The basic laminating theory when transferring a photo to canvas remains the same as previously described, however the laminate is perforated and bonded to the photo before it is mounted. Sandwich the RC photo between the perforated laminate and its paper backing, layer the sponge foam on top, place it between release paper sheets and close the press. Remember to begin with the press at a temperature of 180ºF and turn it up to 225ºF upon closing the press, then be patient for 8-15 minutes. You may check your press temperatures by watching the thermometer if you are using a 210M-X or 500T-X, or by waiting until the indicator light goes off on your VacuSeal press to determine the temperature. Once you are certain the temperature has reached the required 225ºF you need only leave the photo under pressure an additional 3-5 minutes.
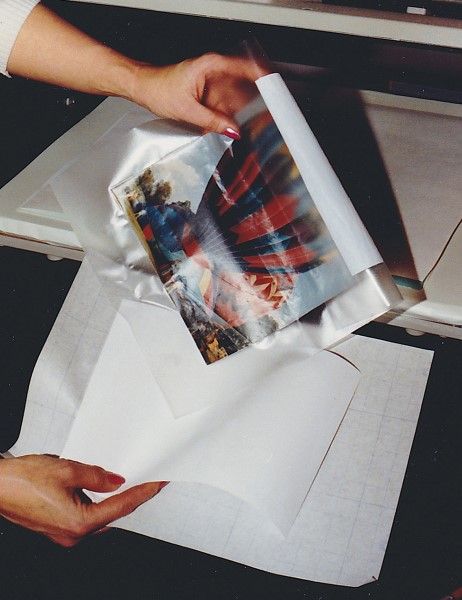 Photo 9
The stripped emulsion resembles a decal and will feel rather limp (although it is quite durable). The remaining RC photo paper and laminate backing may now be discarded.
If you intend to use this process of laminating photos often it would be wise to time the entire process and make a note of it for future reference. Then you only need set a timer for the entire process without having to monitor each lamination. Remember that "time is money" and if you need to watch the entire process each time it disallows you from effectively completing another project while your press works for you.
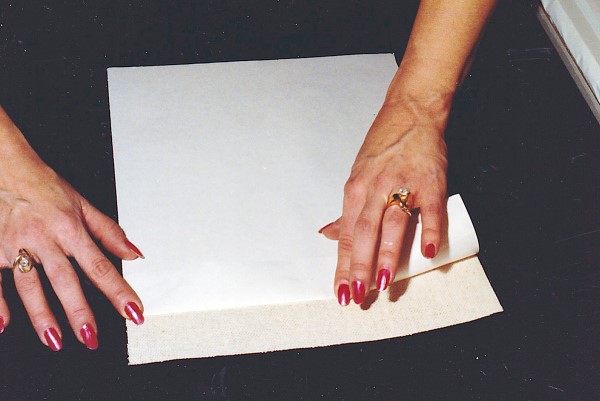 Photo 10
Face down on a smooth surface, fold the top 1"-2" of the backing paper onto the adhesive-backed canvas and crease it down exposing the sticky adhasive.
Only matte or luster finishes should be used for this transfer process since the texture of the canvas will be picked up through the photo emulsion upon final mounting. Using pretextured canvas laminate will compete with the natural canvas texture rather than enhance it and is visually very ineffective. Seal Print Guard-UV Matte is being used for this demonstration to give a non-reflective finish.
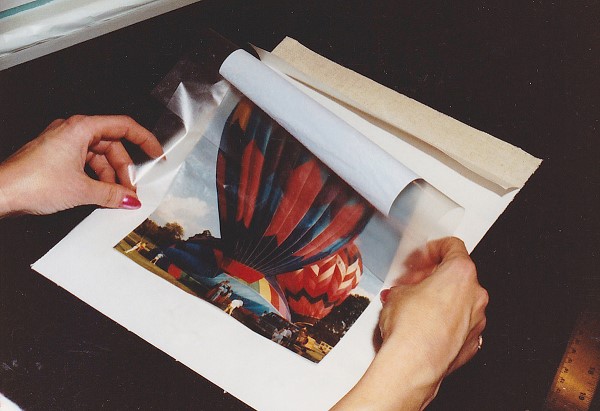 Photo 11A
For positioning purposes, line up the laminate/emulsion from the bottom of the canvas with the backing paper still in place. Slide your hand to the exposed adhesive from the bottom up, making certain the placement is correct.
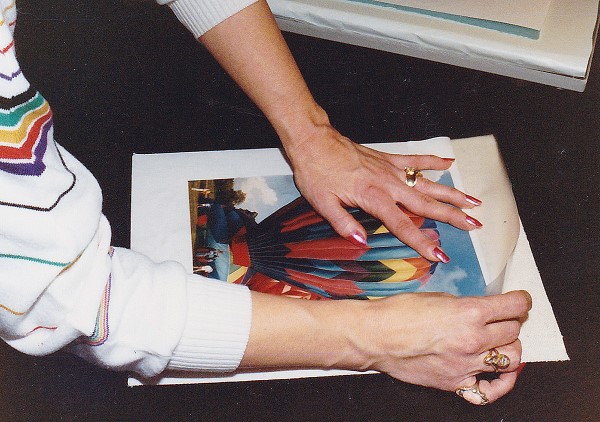 Photo 11B
Upon reaching the exposed adhesive, stick the two pieces together. They are not repositionable once tacked in place. Trim off any exposed adhesive prior to setting into the press, since the foam overlay will stick to the adhesive.
The laminate should be sized large enough to completely cover the mounting piece of adhesive backed canvas (Seal CanvasMount), otherwise when the sponge foam is layered over the surface for final mounting it will adhere to the exposed adhesive. Note you must consider leaving adequate material to stretch the canvas onto stretcher bars, 1-½ to 2" beyond the edges of the photo should be sufficient. Thus if working with an 8x10 photo bond it to an oversized piece of laminate and then trim it down to allow adequate border on all sides prior to canvas mounting.
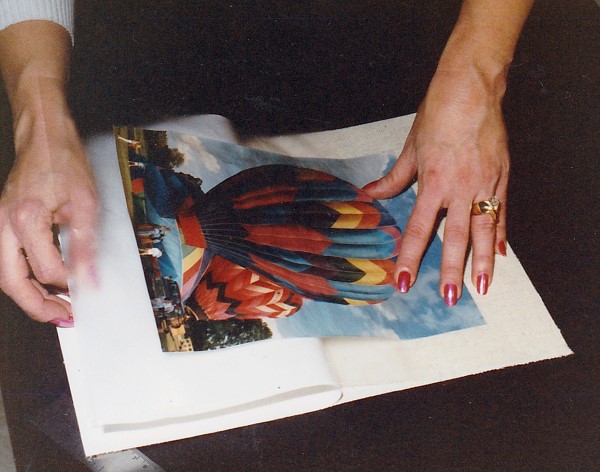 Photo 12
Once the top laminate is tacked to the adhesive-backed fabric, remove the paper backing on the canvas by peeling it out from under the laminate. Slide your hand along the face of the laminate/emulsion as you remove the backing to avoid excessive trapped air bubbles.
After the laminate has been bonded to the photo the final mounting step may be completed. Cut the CanvasMount to the matching dimensions of the laminated photo (presized 11x14 used here) and have it ready prior to removing the photo from the press. Upon removing the photo with laminate from the press lay it face up on a hard surface such as a glass covered work table. As you peel the laminate from it's backing paper, (using an X-acto knife, razor blade or finger nail) separate the top layer of photo emulsion from the RC paper and begin to peel it against itself in a sharp hairpin turn. Once you have begun to peel continue at a smooth steady speed and pull as evenly as possible holding the remaining RC paper and backing paper firmly with your free hand. On large photos assistance may be needed to keep the tension smooth and constant. Be extremely careful to separate the very top layer of emulsion only, because any paper left on the emulsion will reduce the amount of overall texture achieved. The stripped photo emulsion should be extremely thin and look very much like a decal.
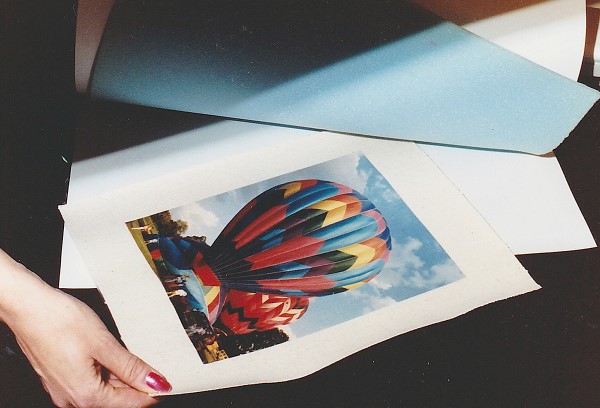 Photo 13
Place the laminate/emulsion/canvas unit into the press, beneath the foam overlay, within a release paper envelope. Close press and heat 3-5 minutes at 225ºF.
Once the photo emulsion has been stripped from its RC paper backing prepare the canvas by folding back the top 1-2" of the release backing paper to expose the adhesive. Line up the photo laminate from the bottom to ensure proper alignment since once the two adhesives come in contact with each other they are securely stuck. Slide your hand up from the bottom to the top and carefully smooth down the laminate onto the exposed canvas adhesive. Now carefully lift the lower unattached photo/laminate, remove the remaining protective release paper from the canvas and smooth the laminate in place. Insert the canvas/photo/laminate unit complete with sponge foam on top into a release paper envelope and place in a dry mount press at 180-225ºF (properly adjusted or shimmed to accommodate the thinner materials) and set the laminate to the canvas for 3-5 minutes. Upon completion of the above steps the newly transferred photo may then be stretched and framed as desired.
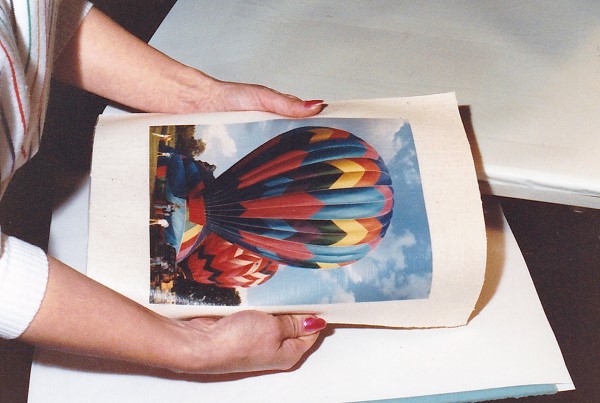 Photo 14
The completed transfer is now ready for mounting onto stretcher bars.
These canvas transferred RC photographs are designed to resemble oil portraits or paintings by pressing the texture of the CanvasMount through the emulsion for the look and feel of authentic canvas art. A similar process is readily used within the photographic industry and costs about $50 to have an 8x10 photo transferred to canvas by Olin Mills. It is an extremely high profit service when offered by framers since the completed process costs approximately $5 for base materials. Even adding necessary labor costs will give you a sizeable profit margin and increased use of your equipment. Sounds like a great idea to me.
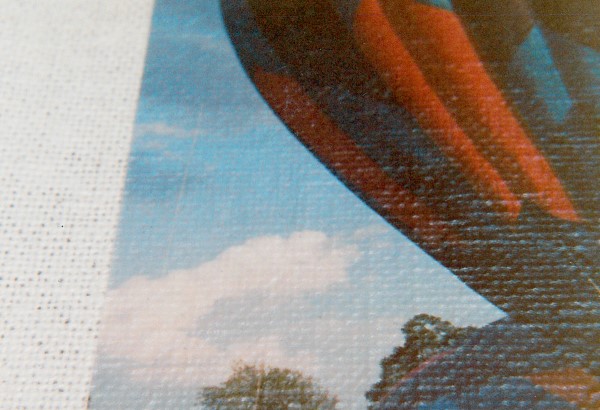 Photo 15
Close-ups of the transferred photo illustrate the textural differences achieved in a photograph once it has been heat bonded to adhesive-backed fabric. Although it will always remain mounted to a foam or board substrate, it will never quite achieve the same deep canvas look, feel and overall impact. The only thing more effective is an actual oil painting.
END
Copyright © 1991 Chris A Paschke
For more articles on mounting basics look under the mounting section in Articles by Subject.
If you already know the specific title then search under Articles by Title.
Additional information on all types of mounting is found in:
The Mounting and Laminating Handbook, Second Edition, 2002,
The Mounting And Laminating Handbook, Third Edition, 2008 and
Creative Mounting, Wrapping, And Laminating, 2000 will teach you everything you need to know about getting the most from your dry mount equipment and materials as an innovative frame designer.
All books are available from Designs Ink Publishing through this website.
Chris A Paschke, CPF GCF
Designs Ink
Designs Ink Publishing
840 Tucker Road, Suite H-190
Tehachapi, CA 93561
P 661-821-2188
chris@designsinkart.com