 Diagram 1
There are many techniques that integrate various types of mounting. Though most are practical applications which attaching art images to substrates, others involve more interesting and creative mat designs. My second book, Creative Mounting, Wrapping and Laminating—available through PubCo and the PFM Bookstore—teaches assorted mounting techniques for the creation of wrapped and embossed mats as well as tiered matting techniques. These creative applications feature the use of fabrics and decorative papers with traditional dry mount and wet adhesives to develop innovative and unique designs—which is one element that sets one framer apart from another.
Designing with Tiered Mats
Tiered matting—of which are four styles—involves the bonding of multiple layers of fine art paper and board together to create a new mat board with hairlines or bands of color that appear within the bevel once a window is cut. Surface tiering is the mounting of decorative paper to the face of an existing mat board. Beautiful handmade, Asian and lightfast colored art papers are used for this. Make certain the papers are lightfast and not light fugitive. Lightfast—not permanent—colors will not fade under normal UV and daylight exposures and are generally colored with pigment rather than light fugitive dyes. As a basic guideline think of an Oreo cookie, mount a black sheet of fine art paper to a white blackcore board produces a fine white line in the bevel (diagram 1). Or in reverse, mount a white fine art paper to a black whitecore board produces a fine dark hairline at the top of the bevel. Surface mounting to a solid core museum rag board creates a preservation board with a controlled bevel color.
Diagram 1
Photo 1 shows a surface tiered mat used as a liner with mottled gray Mi-Teintes atop gray rag board. The top mat is a 10ply pin striped tiered mat using 4 ply gray museum board sandwiching three sheets of Black Canson Art Paper to create the middle pinstripe (photo 1). Pin striping mounts sheets of colored art paper between same color core mats to create contrasting hairlines within the bevel itself. The pinstripe location may be controlled by the number of sheets—or boards—mounted to the top or back of the base mat (diagram 2).
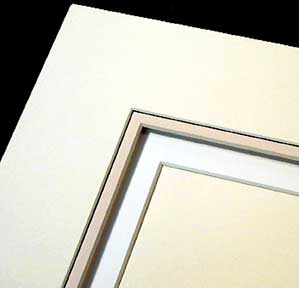 Photo 1
Surface tiered (liner mat) pin striped (top mat)
 Diagram 2
Bevel banding is the mounting contrasting colored core 4 ply boards together to create wide bands of colors within the bevel. These wider stripes make a much bolder statement and can easily increase bevel depth to 8, 10, 12, or 16 ply. Cutting these windows may be limited in a CMC because of their added thickness and may require use of a traditional straightline cutter.
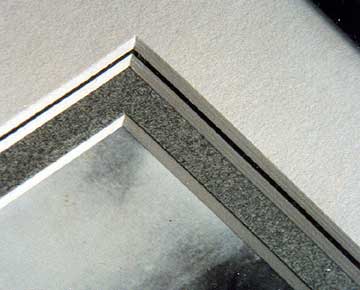 Photo 2
Under tiered top mat with spacer between 2nd and 3rd
Though surface tiered mats have always been a personal design favorite, it seems that under tiering has become the most frequently used in the past few years. Under tiering involves mounting sheets of colored machinemade papers—such as Canson Mi-Teintes—to the back of mat board to alter the lower bevel edge color (photo 2). Under tiering allows a tiny touch of color to be added to the bottom edge of the bevel that can unify the art and framing (photo 3). If a liner mat is used in a design often a ⅛" exposure of bright red could be too much color overpowering a delicate piece of art. Under tiering allows for one or two layers of matching lightfast art paper to be dry mounted behind the uncut mat so just a tiny hairline of color appears once the bevel is cut (photo 4).
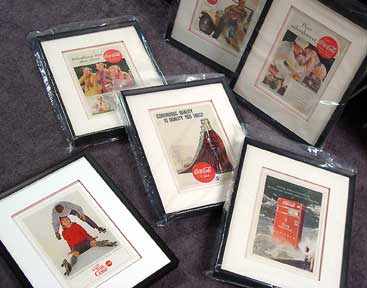 Photo 3
Coke series using under tiering to accent the Coca Cola red-orange logo.
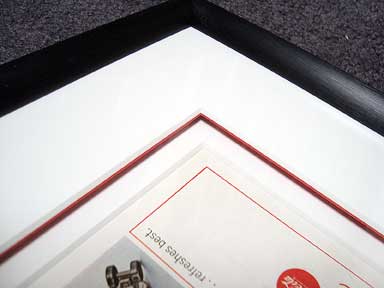 Photo 4
Two sheets of Canson Wild Poppy are dry mounted to the back of Rising White 4-ply rag.
Mounting Basics
Using sheets of pure film adhesive, such as Fusion 4000 or Flobond, and dry mount press is the easiest way to create a decorator tiered mat. A layer of clear dry mount film is placed between each layer and stacked for mounting all at once. A press of 200ºF degrees is suggested for these raw materials, and time in the press will vary according to overall thickness and size of the sheets being bonded. Basic step-by-step directions are:
When stacking materials for mounting always align into a common corner, usually a lower left, that way all materials do not need to be exactly uniform in size for initial mounting. Also size down the board from the common corner using a straightline mat cutter or wall cutter, then cut the mat as usual. A CMC may be used if the new tiered board is not thinker than and 8 ply.
Torn Paper Accents
Torn paper accents are great when framing original art—particularly pencil, charcoal, and ink sketches—because of how well it replicates the feel of the lines within the art. Though a clean cut under tiered bevel may have been a nice accent and good use of visual emphasis, the torn paper is more in mode with the feel of the sketchy image (photo 5). A ⅛" spacer was added between the two mats for additional intensity and the casting of shadows (photo 6), but the design also works very well with no spacer and the two mats just pressed together.
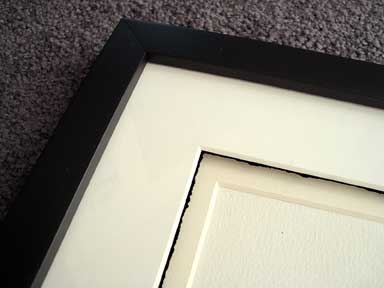 Photo 5
1" strips of torn paper accent the line work
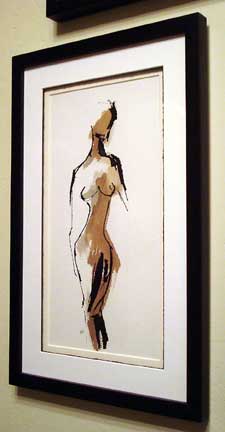 Photo 6
Narrow strips are fitted behind the edge of the window mounted with P-S ATG
Torn strips may be either backed with slightly narrower cut strips of heat-activated pure film adhesive and applied using a variable temperature tacking iron, or may be applied using ATG tape and an oiled bone burnisher. If using the manual pressure-sensitive method:
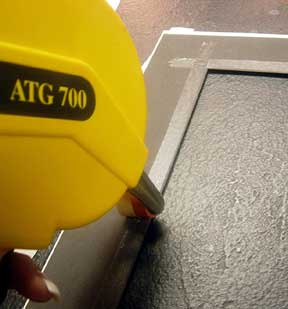 Photo 7
Apply tape 1/16" away from back of window
Dry mount method:
If alignment for dry mounted strips need adjustment the adhesive may be reheated allowing the strip to be moved, then remount. Always use release paper between the iron and the mounting to prevent contamination of melted adhesive. Though this method may seem more time intensive it is the more permanent mounting method of the two.
Creating a Deckle
A modified deckle—ragged edge—may be manually achieved by tearing the desired art paper in strips against a cork-backed ruler. The cork lifts the ruler allowing a small gap between the metal straightedge and the paper. This automatically creates a more ragged torn edge and is why we generally tear paper at 120° back against the sharp edge of a metal ruler (photo 8). The trick is to pull the paper up at a 90° tear and pulse it as you tear. Then the ragged edge may be better controlled (photo 9).
 Photo 8
Strip torn at 120° for cleaner look
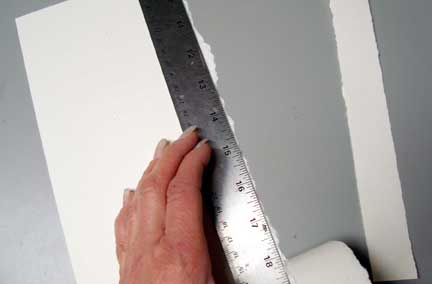 Photo 9
Ragged edge torn at 90°
Different papers will give a different edge as soft papers will pull and machinemade papers all have a grain line. Often if torn the length of a sheet of paper it may be going with the grain which makes it tear easier, but is harder to create a ragged edge.
Decorative Paper Accents
Another wonderful mat design alternative is using pastepaper patterns and marbles papers. Metallic textual and marbled decorative papers are favored for use for deep wrapped bevels, under bevel edges, as surface accents, or peeking from between open v-grooves. The beauty of pastepaper is the wonderful textural patterns that are available and that they have been created using pigmented paints and are entirely lightfast (photo 10). Most handmade marbled papers also use pigmented colors making them lightfast too.
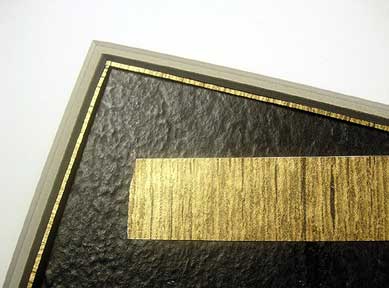 Photo 10
1/16" Pastepaper strip applied to the bottom edge of the mat window with ATG.
The triple oval opening liner mat in photo 11 was topped with a double 4-ply white rag and 8-ply gray rag rectangular window boasting a small 3/16" sparkle of textured metallic antiqued gold pastepaper. The gold was selected for these vintage black and white photos to help integrate the speckled Venezia Larson Juhl 414890 gold frame.
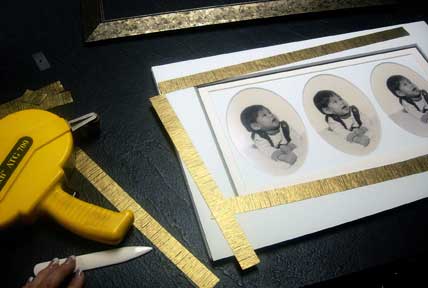 Photo 11
Decorative mat accents—regardless of tiered, torn or clean cut—add value, customization and innovative design to any framing job. You must have samples when suggesting these as add-ons in order to make the sale. Without having something to show the customer during selection and design they may never be able to visualize what you mean. These are the ultimate in personalized designs that may never be repeated for any other customer, so you should capitalize on that fact—particularly when you don't have the exact mat corner sample to show them. It does help to have corners cut from fallouts and a paper sampler of your pastepaper offerings.
END
Copyright © 2012 Chris A Paschke
For more articles on mounting basics look under the mounting section in Articles by Subject.
Additional information on all types of mounting is found in:
The Mounting and Laminating Handbook, Second Edition, 2002,
The Mounting And Laminating Handbook, Third Edition, 2008 and
Creative Mounting, Wrapping, And Laminating, 2000 will teach you everything you need to know about getting the most from your dry mount equipment and materials as an innovative frame designer.
All books are available from Designs Ink Publishing through this website.
Chris A Paschke, CPF GCF
Designs Ink
Designs Ink Publishing
840 Tucker Road, Suite H-190
Tehachapi, CA 93561
P 661-821-2188
chris@designsinkart.com