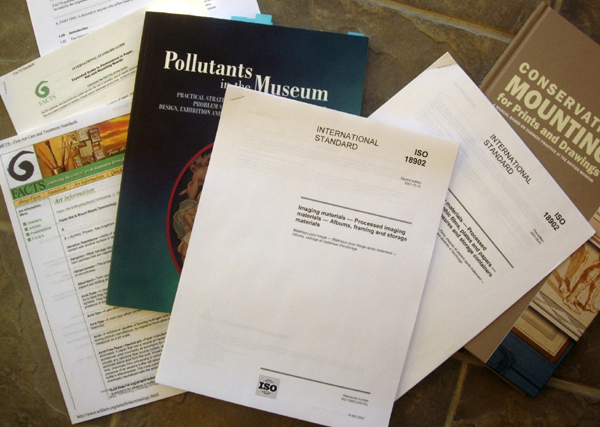
 Photo 1: Resources
FACTS, ISO 18902, and assorted resource books are impacting the use of foam board in framing.
Framers and conservators have had an ongoing love/hate relationship with foam center board for over a quarter of a century. Manufacturers have availed us with foam center boards that are veneer coated, clay coated, acid-free, 100% cotton rag, micro chamber, white, black, and colored. They come ⅛", 3/16", and ½" thick with a wider range of other dimensions and sizes available in the graphics and advertising industries. They may be used to create signage, as a rigid substrate for wrapping, for one piece shadow boxes, and for the construction of fabulous reusable UPS and FedEx safe shipping boxes for framed art.
Foamboard became the corrugated cardboard replacement American framers cannot live without. They are tough, smooth, lightweight, durable and affordable. One would think they would be ideal for any custom framing application, but they were never fully accepted by the purists. For years the museum controversy over foam has kept us wondering about its limited use in preservation framing. Even after thirty years, conservators still remain divided and unresolved over the outgassing questions. There has been no proof of foam board causing any deterioration or damage to art of any kind, yet this lack of printed research never set foam center boards free of the stigma that they might hurt something.
This lack of independent scientific research of foam board has precluded the availability of printed results that would have allowed and encouraged the custom framing and museum communities to embrace use of foam center products as a viable mount, backing or filler board in preservation enclosures (picture frames). Any testing of foam boards by manufacturers in the past seemed to be testing the surface papers in an attempt to meet ISO (International Organization of Standards) 18916 - Photographic Activity Test requirements rather than the foam center itself.
The real clincher over the restrictions of foam board in framing came with the release of the PPFA (Professional Picture Framers Association) MCPF (Master Certified Picture Framer) program in 2003, which specifically banned use of foam center boards in all preservation framing. The PPFA Competition Board has always allowed use of foam board in framing competition, but this discrepancy between MCPF regulations and Competition Guideline allowances caused inconsistency and frustration amongst the ranks. Foam board had been embraced in framing for decades, and now we were being told it was not acceptable.
Foamboard Breakthrough
As an active member of the ISO committee, I represent both the United States and in turn the picture framing industry. My colleague Dr. Mark Mizen and I fought to get the title and focus of ISO18902:2000 Imaging materials - Filing enclosures and storage containers, updated to reflect both albums (scrapbooks) and framing as specific enclosures and containers to better suit our industries. Prior to this revision there was nothing in the ISO directory that specifically targeted the materials routinely being used in framing, foam board was therefore very important.
In December 2007, after years of reworking and updating the existing document, ISO18902:2007 Imaging materials - Albums, framing and storage materials was finally released. With the launch of this document the wheels have been set in motion to change the course of custom framing history surrounding the acceptance of foam boards. This is the first international document, and the only one in the United States, to officially state the use of polystyrene foam center board a product acceptable for use in framing enclosures.* The full document may be purchased from the ISO website at www.iso.org (photo 1).
Photo 1: Resources
FACTS, ISO 18902, and assorted resource books are impacting the use of foam board in framing.
Resources
The resources for foamboard research have been sketchy at best. Even PPFA went to the Canadian Conservation Institute (CCI) when putting the MCPF program together because of a lack of American information with nothing available from the American Institute for Conservation (AIC).
In her 2002 book, Pollutants in the Museum Environment, Pamela B. Hatchfield defines foam center board as made up of "foamed, extruded polystyrene faced with paper or plastic." She discusses use of polystyrene in museum cases and enclosures, and suggests care when using, but states no real restrictions. She does site results from a 1972 Kennett study of burning plastics, which states that detectable degradation products (vapors, gas) may be produced by polystyrene, polyvinyl acetate and even polyester, at highly elevated temperatures. If artwork is caught in a fire, I believe plastic outgassing is the least of one's worries.
PPFA and FACTS Reactions
As a result of the new ISO document release, PPFA is finally looking into modifying the requirements and limitations of their MCPF regulations to allow the use of foamboard in preservation framing. Conservators and archivists involved in the rewrite of 18902 are all in full compliance with this acceptance. In order to meet these ISO specifications, the selected foamboard surface papers are required to meet all PAT requirements of ISO 18916. That does not mean dry mounting to a clay coated foam is museum quality, but hinging to 100% cotton rag may be.
The FACTS Foamboard subcommittee began working on an industry foamboard standard back in 2004, but again with limited printed documentation of foamboard in the United States they were forced to put the project on hold until the release of the 18902 update. Word this week is the committee will be dusting off their information and release of a FACTS Foamboard Standard is just around the corner.
Board Variations
Plain white clay coat foam is slick, glossy, and oddly enough the clay layer is actually considered a better barrier by many conservators than an uncoated acid free or cotton rag surface paper. Acid free (buffered) foamboard has s a warmer, off white color and a soft, toothy surface, wonderful for deep bevel wrapped mats or shadow boxes. Bright White, and 100% Cotton Rag foamboards have cold, crisp, bright white surface color and soft, porous surface with wonderful adhesive absorption.
Foamboard surface appearances vary from surface paper to surface paper and manufacturer to manufacturer. Boards vary in physical thickness as well as in their edging shapes. Not all 3/16" boards are actually 3/16". Some measure 3/16" including the surface papers, some measure the foam itself without papers, some are slightly less than 3/16" even with the papers included. The outside dimensions also vary and may be ¼" larger or smaller than 32x40".
HA Foamboard
As mentioned above, HA foamboard surfaces are all quite unique, and though tough to detect in a photo, most foamboards have some degree of uniqueness (photo 2). Step 150 has a very high shine and almost rubber feeling to the touch, not the least slippery (L). The regular plain clay coat foamboard (center) has a medium gloss and smooth, slick feel. The HartMount HA foam (R) is a satin finish. Some boards are more compressed at the outer edges, some have interleaving sheets to help prevent adhesive blocking (melting together), and some are very difficult to tell which side is the adhesive and which is the plain clay coat.
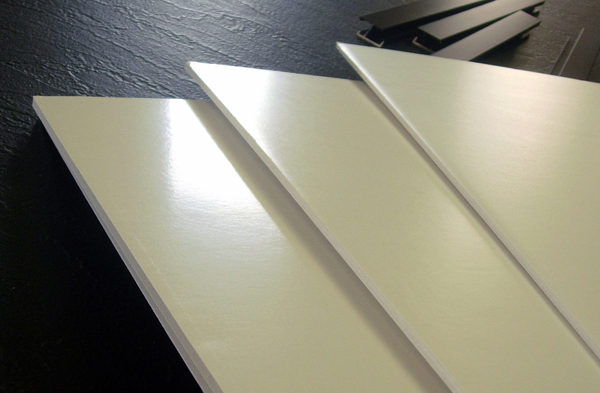 Photo 2: Surface Reflection
Though tough to detect in this photo, the three foamboard surfaces have a high degree of variance in person. Step 150 has a very high shine and the dry HA adhesive has a total nonslip surface feel (L). Regular plain clay coat foam board (center) has a medium gloss and smooth, slick feel. HartMount HA foam (R) has a satin finish.
A common time saver and profit maker is to mount multiple prints on a single oversized board. After mounting and cooling under a weight, prints are trimmed flush to the edge for framing. Make certain the entire adhesive coated board is covered with release paper to protect the platen or glass from adhesive transfer (photo 3).
 Photo 3: Cover All Adhesive
A common time saver and money maker is to mount multiple prints on an oversized board. Since prints in this sample are to be trimmed flush to the edge as many as possible may be placed for a single session in the VacuSeal. A sheet of Gilman HA Reveal is the adhesive coated foam in this sample. Make certain the entire board is covered with release paper to protect the platen or glass from adhesive transfer.
Study both sides to be familiar with the tooth and touch of the adhesive side of any HA board. Just as Bienfang double-sided release paper looks very similar to Bienfang ColorMount, once removed from the case some clay coated HA boards are difficult to tell which the adhesive side is. The sample illustrates a wasted sheet of Gilman HA foam that I aligned four images onto then attempted to mount in a 4060 VacuSeal, only to have them fall off when removed, having mounted them to the nonadhesive side. The damaged foam clearly shows indentations of the images and needed to be discarded (photo 4).
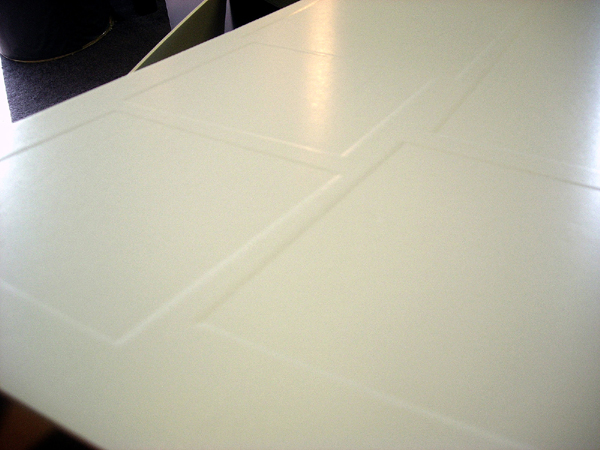 Photo 4: Indented Foam
The sample illustrates a wasted sheet of Gilman HA foam that I aligned four images onto and mounted in my 4060 VacuSeal, only to have them fall off when removed…having mounted them to the wrong non-adhesive side. The foam clearly shown indentations of the images and needed to be discarded.
Other Issues
Last year I mentioned taking care to routinely clean all release materials when mounting with an oversized sheet of film or tissue adhesive or when selecting heat activated foam boards because of the potential for adhesive contamination. Even a tiny 1/16" strip of exposed adhesive surrounding a flat mounted image can apply a thin shiny line of adhesive to the next surface.
Since most HA foam center boards have a fairly thin coat of HA adhesive, nor suggest high temperatures over long dwell times, they do not regularly allow for the transfer of exposed adhesive from the foam board to the release material, though it does occur (photo 5). And that transferred strip of adhesive will most definitely bond itself to the very next mounting project it comes in contact with. It is the more aggressive adhesive boards like Bienfang HA Step 150 that exhibit this behavior.
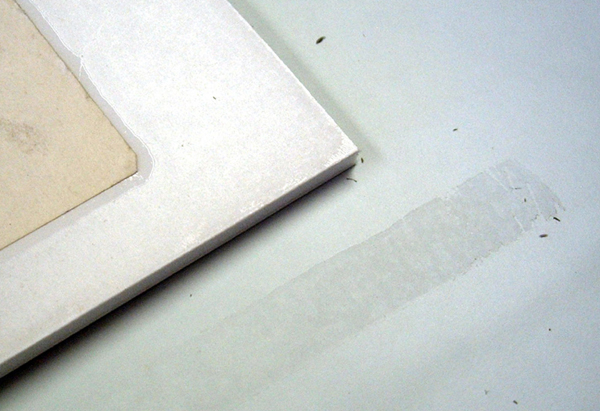 Photo 5: Adhesive Residue
The 1" strip of transferred adhesive came from the bottom 1" edge of the Bienfang Step 150 foam board just above it. This must be wiped from the single sided release paper prior to future mounting.
It is not a bad thing nor does it indicate a problem product, it simply forces the framer to develop better routine maintenance mounting habits. Since release paper is coated with a nonstick layer of silicone, any adhesive residue will not permanently bond to it and may be easily wiped off after cooling with a clean, lint free rag. The residue may not always be visible but will always be detectable by light finger touch across the release paper surface. Your hand should move smoothly across the silicone surface, and will feel snagged if it hits any residue. Hence routine wiping of the silicone surface with a rag prevents later problems.
Folds, creases and crimps in surface laminate or release papers will transfer the same damage to soft surface foamboards (photo 6). Though vinyl laminates are known to be repositionable when first applied, that is not the case with HA foamboards.
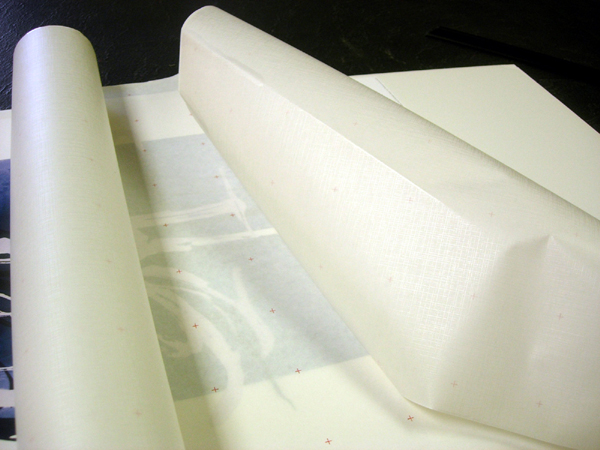 Photo 6: Creased Paper
Any fold, crease and crimp in surface paper, as the laminate in the photo, will transfer to the surface of soft foam center boards.
All in all, regardless of preservation framing or decorative laminating, the future of foam boards in custom framing is locked in forever. And I am thrill to have been able to finally make this announcement!
END
Copyright © 2008 Chris A Paschke
* Note: A special thank you to Nielsen Bainbridge for their ongoing sponsorship of independent consultants allowing for our i3a, ANSI and ISO committee involvement.
For more articles on mounting basics look under the mounting section in Articles by Subject.
Additional information on all types of mounting is found in:
The Mounting and Laminating Handbook, Second Edition, 2002,
The Mounting And Laminating Handbook, Third Edition, 2008 and
Creative Mounting, Wrapping, And Laminating, 2000 will teach you everything you need to know about getting the most from your dry mount equipment and materials as an innovative frame designer.
All books are available from Designs Ink Publishing through this website.
Chris A Paschke, CPF GCF
Designs Ink
Designs Ink Publishing
840 Tucker Road, Suite H-190
Tehachapi, CA 93561
P 661-821-2188
chris@designsinkart.com