Note to readers: This article illustrates the step-by-step assembly of a reusable drop-spine shipping box. It was originally designed—and used many years—framed display art used in Seal Products trade show booth. The drop spine was the easiest as the lid was always attached, it lay flat when opened and could be sealed closed with Velcro. I currently use simple hinged boxes for all my shipping—perhaps a new article is due. Follow the basic steps for the box base and simply add a single board as the lid.
So when is a box not made of corrugated cardboard? When its a foam board shipping box. With the onset of the holidays comes gift giving and the opportunity for shipping framed art. In fact, for many galleries this is often a year round situation, while for framers merely profit potential. Whether or not as a framer you elect to venture into the "service" of shipping framed pieces is not the subject of this two part series, but rather how to efficiently build a durable shipping box that will tolerate today's aggressive carrier handling for those occasional shipping situations.
Shipping Restrictions
You are all probably familiar with the requirements put on us by shipping companies. You know the ones I mean...like being able to drop-kick or throw a package six feet without damage to the contents.
My local UPS representative suggests packing all pieces to meet basic insurance requirements, so that in the event of damage any claims will indeed be honored. They frown on shipping glassed art over 8x10" in size, but if precautions are taken will not refuse shipping. Basic standard care procedures include taping the glass to prevent additional damage to art (if broken), as well as building a 3" cushion from all sides and corners. These are very logical common sense suggestions and they should always be initiated when packing to ship.
Commercial Boxes
There are a number of companies who specialize in the building of reinforced corrugated shipping boxes designed with foam lining ready for artwork. They vary in size to accommodate most framed pieces and may be used more than once. Box costs vary depending upon whether you offer shipping as a routine service and buy bulk boxes direct, or whether it is an occasional situation and you elect to purchase them, as needed, from a retail shipper. These boxes, though may be used again, can easily run from $40-100, OR you can build them yourself!
Building From Scratch
By constructing my own boxes as needed...I am assured of the ultimate in padded protection surrounding my art, can offer boxes that are also reusable, reinforce myself as a full service framer AND increase my profits all in the process. There are numerous ways in which a box may be constructed for shipping. Most are indeed built from scratch and therefore customized to the individual piece being shipped.
Who Needs Boxes?
Galleries are in the business of selling art then delivering it to the party who bought it. Framers often hand the completed job to their customer and never need to consider shipping at all. Consider however, if the artwork in question needs to be shipped to more than one location.
I have a number of artists as clients who require their completed framed art to be shipped from place to place. Artists who enter competition must ensure their art will arrive back to them as safely as it arrived at the appointed show location. It helps to make the entire packing process as painless, brainless, and self contained as possible, especially during juried competitions. Loads of bubble wrap and foam pellets may indeed protect glassed art from damage, but is a major annoyance for the receiving department at show locations. I also do a lot of framing for companies who travel the trade show circuit and also need their artworks to be easily packed by crews for shipping onto the next show.
So that's the when, where and why...onto the how!
Materials
For a one time shipping, corrugated cardboard remains a good filler, shock insulator and easily builds into a good shipping box. Beginning with flat top and bottom pieces cut to proper size, then create four-sided hollow tubes by folding scored sheets. Boxes may be quickly assembled meeting all standard shipping suggestions.
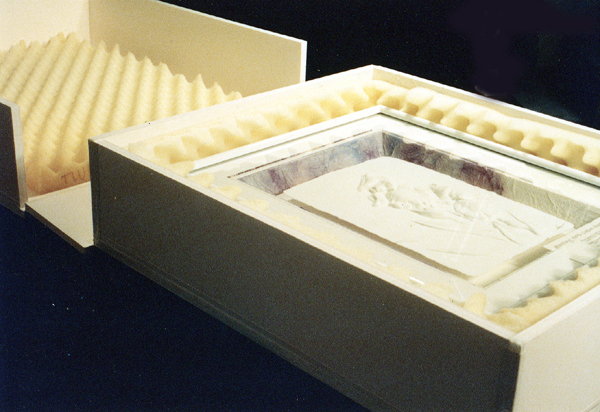
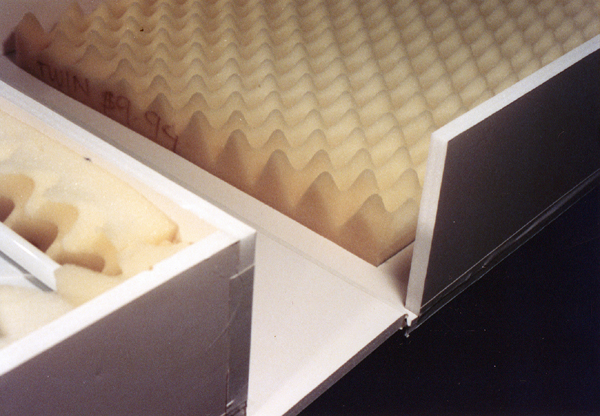
Since most of my constructed boxes require multiple shipping, I prefer building with thick ½" foam board, hot glue, clear shipping tape and eggcrate foam. I dominantly construct what is known as a drop spine box, or one where the lid remains attached or hinged to the bottom at all times. (photo 1)
Measuring Up
Though shipping standards suggest a 3" buffer surrounding the art, since my boxes end up with doubled ½" foam walls lined with eggcrate foam, I feel confident with 2 " to 3" around the art as a buffer.
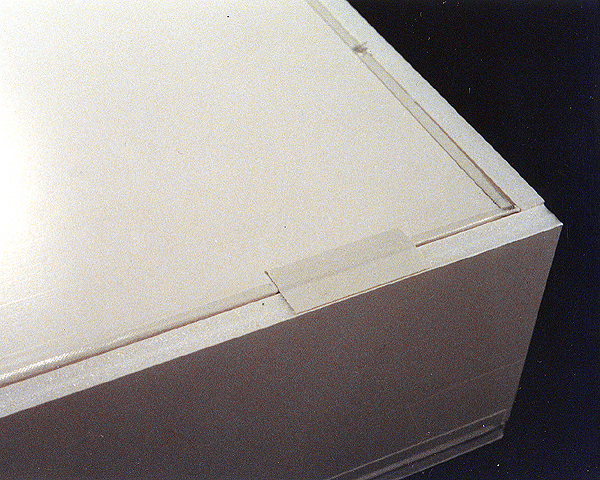
From the outermost extremities of the moulding add 5-6" and cut the bottom board. Measure the thickness of the framed art adding no less than 2" above and below plus the thickness of the frame. The photo sample used in this article was a 2" moulding plus the 4" for a total of 6" of inner box depth. Cut four box sides the same as the bottom board dimensions (box length x 6" high).
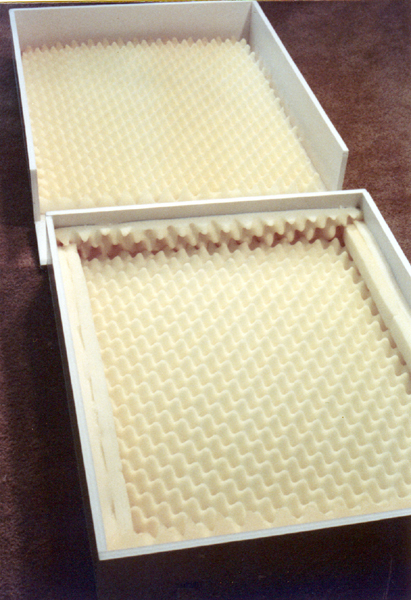
The lid is then cut to fit entirely over the completed bottom box when closed, not just as a same size top piece. This makes all of the walls a double ½" foam thickness. Because the lid fits over the box bottom, the dimensions of the box lid will be 1" larger than the bottom and the walls will measure ½" higher or 6-½" in this case. Prior to beginning assembly, check all box pieces to ensure they are properly cut. (photo 2)

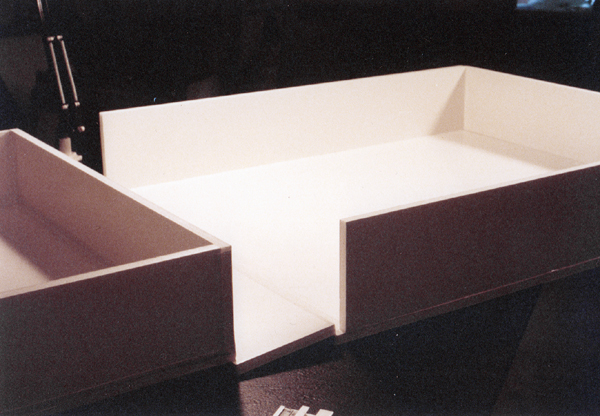
Glue and Reinforcement
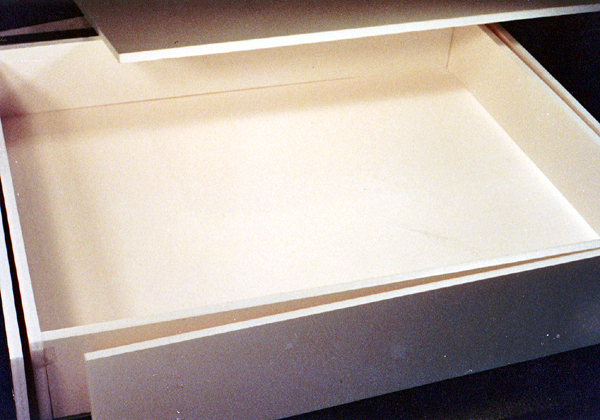
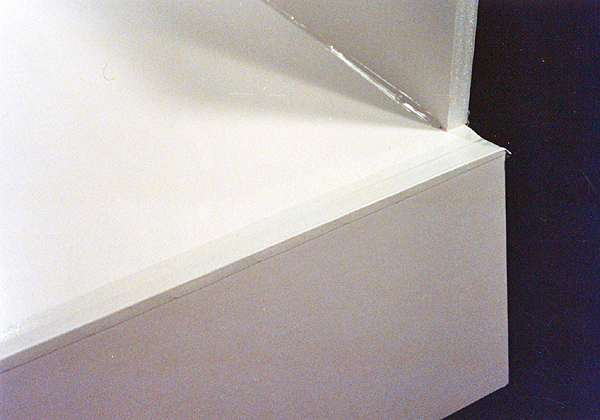
Assemble the box bottom by hot gluing the sides and ends onto the solid bottom, butt joining and trimming the side lengths to fit, check the corners in photo 2. Run a bead of hot glue down all inside seams of the box, including vertical corners. Reinforce the outside of the box seams with clear shipping tape wrapping around the 90 degree edges. Clear shipping tape is wider and much stronger than the linen tape seen in photo 3.
Once the bottom is completed, reinforced with the bead of glue and the seams have been wrapped with tape, assemble all but the hinge end of the box top.
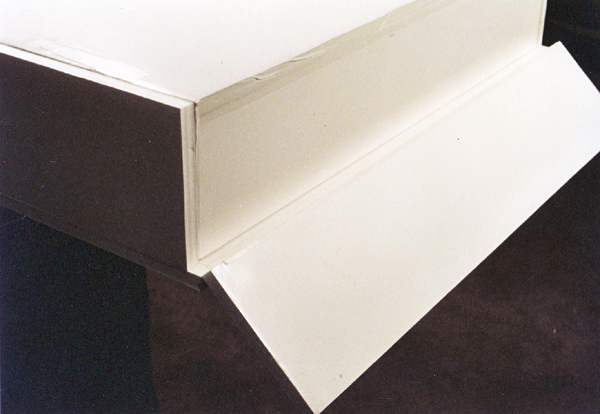
Creating The Hinge
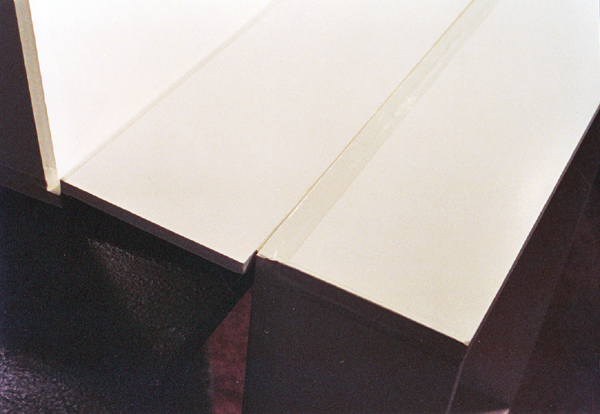
Make certain the hinge piece extends the entire length of the box rather than butt joining (photo 4). Fit the lid over the bottom, place the hinge in position and apply the 2" shipping tape to create a swing hinge (photo 5). Turn the box unit over, let the hinged end piece to fold down 180 degrees over the edge of a table and tape the inside of the same end hinge (photo 6). Fold the end piece back into closed position and temporarily tape it to the bottom box to hold it into position (photo 7). Run a strip of shipping tape along the seam leaving the last ½" of top box walls free of tape.

Open the box by gently pulling the two halves apart remembering they are now hinged together. Suspend the box bottom over a table edge to expose the inner seam for easy taping (photo 8). Place a strip of shipping tape along this inner seam.
Once the two box halves are hinged together make certain all seams have been reinforced with one single piece of 2" wide shipping (photo 9). The assembled box has a solid, reinforced base box unit which has been hinged to the box top using the end of the box as a hinge.
Lining
Once the box is completed, check all seams are properly reinforced with tape and hot glue were applicable.
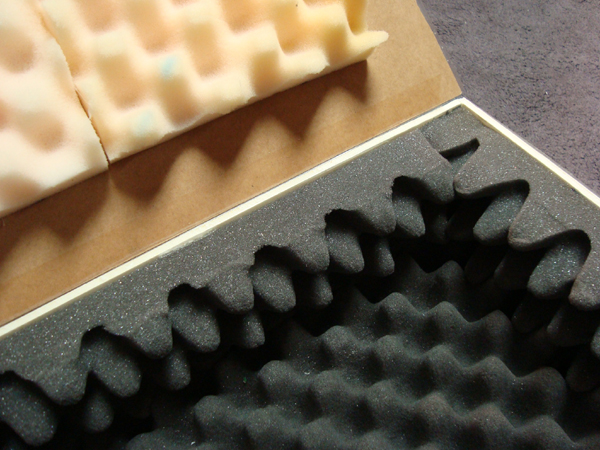
Eggcrate foam is best for padding the inside of the box because of its contoured design. It more readily conforms to the odd shape of some mouldings and the slightly recessed glazing material.
Cut large pieces of eggcrate foam for the bottom and top of the box (photo 10) and position using hot glue around the outer perimeter of the foam to hold it fast as the lid is opened and closed.
The sides of the box should also be lined with the same foam for cushioning, creating a custom sized cradle for the artwork it will be shipping. The bottom piece should be cut to fit the box to size while the top pad should be about 2" smaller around to accommodate for the side padding and inner box wall. * This original article was written in 1995. The dark gray acoustic eggcrate—convoluted—foam below is what I have been using since 2005. It is available from The Foam Factory in 1-½" and 2-½" thicknesses. I use only the thicker 2-½". It is cheaper, denser and gives greater support and does not seem to get brittle or turn color with age.

Building reusable shipping boxes may not be a viable market for everyone, like they have turned out to be for me. Like anything else, maybe you just need to create that market anew. Talk to art guilds and photo groups in your area, if artwork is being sent to shows...they need to be sent in something! Why not offer this service too? It may not be framing, but its a nice diversionary project...and isn't it still protecting the art?
In part two "Shipping Boxes for Flat, Matted or Unframed Art", I'll build an alternative sink box for shipping matted but not framed art. I will also complete this series with additional pricing information for your customized boxes.
END
Copyright © 1995 Chris A Paschke
For more articles on mounting basics look under the mounting section in Articles by Subject.
Additional information on all types of mounting is found in:
The Mounting and Laminating Handbook, Second Edition, 2002,
The Mounting And Laminating Handbook, Third Edition, 2008 and
Creative Mounting, Wrapping, And Laminating, 2000 will teach you everything you need to know about getting the most from your dry mount equipment and materials as an innovative frame designer.
All books are available from Designs Ink Publishing through this website.
Chris A Paschke, CPF GCF
Designs Ink
Designs Ink Publishing
840 Tucker Road, Suite H-190
Tehachapi, CA 93561
P 661-821-2188
chris@designsinkart.com