 Photo 1
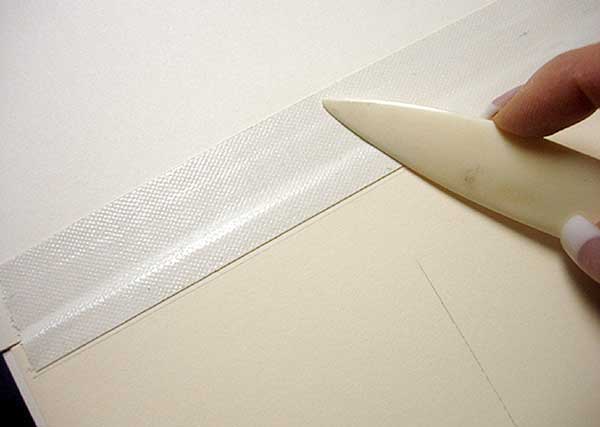
Book hinges of linen or neutral pH kozo tape.
Unlike adhesives that require heat or moisture to activate, pressure-sensitive adhesives and tapes bond by mechanical or manual activation and mutual attraction. Regardless of whether manually rubbed, set in a cold vacuum frame or run through a roller laminator, any PSA must be activated by pressure to properly begin its bond. The elements of time, temperature, pressure, moisture apply to all PSAs including rolled adhesive, ATG tape, and shipping tape all require some type of burnishing for proper activation. Anyone who has used their fingernail to rub down cellophane tape has burnished the adhesive to try to get it to stick better, which is where bone burnishers come into the picture.
The most permanent method for bonding mats together is placing a bead of PVA white glue around the perimeter and weighting until dry, but when ATG tape is used for holding mats together—or applying dust covers—simply pressing or hand rubbing the surface of stacked mats only activates about 25% of the P-S bond. Even after full cure the adhesive has not been used to its full capacity and will fail in time. To fully activate a P-S tape it must be aggressively rubbed to initiate the first 80% grab. The final 20% of a PSA bond occurs once fully cured while under weight.
Photo 1
Book hinges of linen or neutral pH kozo tape.
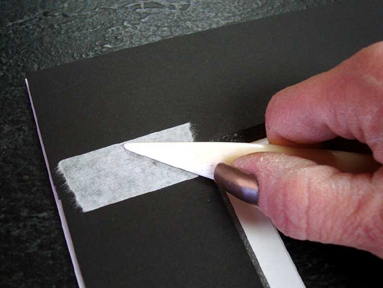 Photo 2
Spacer blunt cut seams are reinforced with Lineco Abaca P-S tape and burnished.
There are numerous applications that call for pressure-sensitive products regularly used in framing, such as book hinging window mat to backing (photo 1), blunt cut seams of spacers between mats (photo 2), decorative paper deep bevel wraps (photo 3), and angled and fitted pinwheel joins (photo 4) should always be burnished. In addition all fitted joins—reverse bevel against bevel—should be diagonally reinforced on the under corners to maintain their snug fit and proper alignment (photo 5).
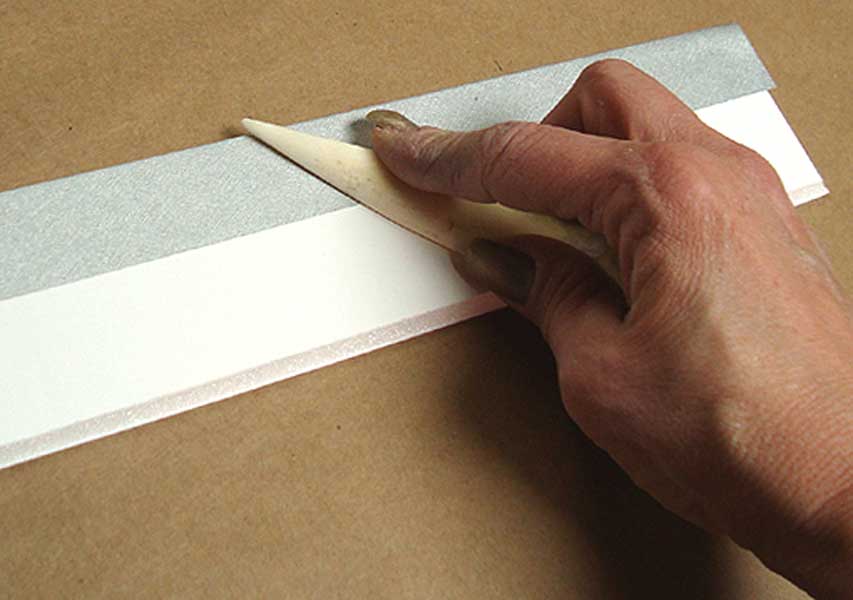 Photo 3
Deep wrapped bevels may be made with 3/16" bevel cut foam, ATG tape, strips of decorative paper and a burnisher.
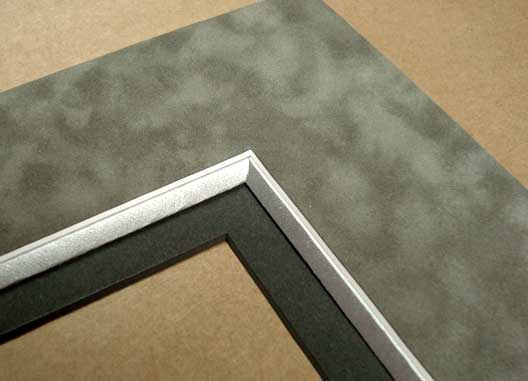 Photo 4
Pinwheel joins of wrapped bevels are well fitted.
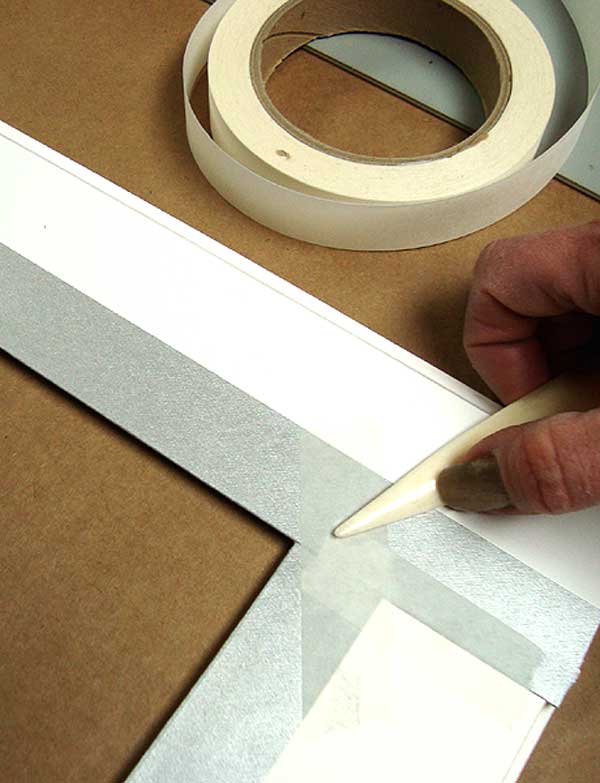 Photo 5
Reinforced joins both vertically and diagonally with Abaca then burnished.
Bone burnishers should be one of the most indispensible tools in the frame shop, but is often one of the most overlooked in day-to-day use. So where is your bone anyway? Perhaps you bought one then put it away for when you needed it…but that time never came. Or worse yet, you never considered investing in a bone at all. It's a small inexpensive addition that should be part of every framers basic tool kit.
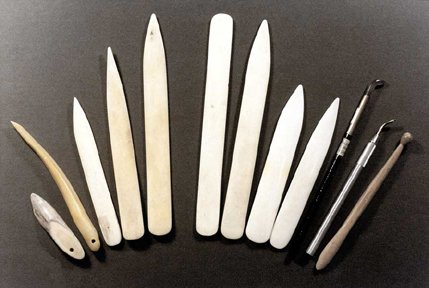 Photo 6
P-S linen tape must be fully activated with a bone. Burnishers are available as horn, bone, stone, metal, wood, and synthetic.
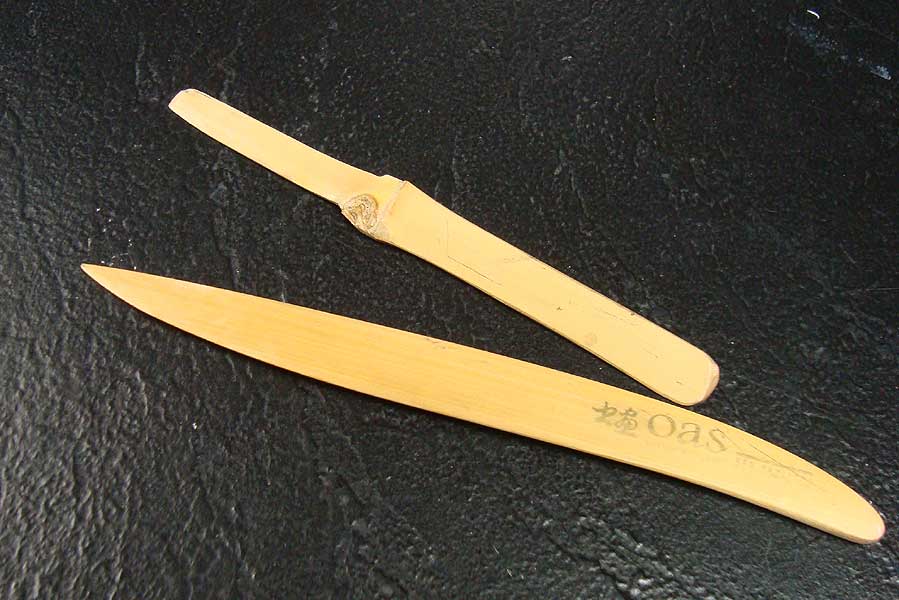 Photo 7
Homemade knife from dried bamboo (top), commercial knife/burnisher (bottom).
Burnishers—also called bone folders—are available as horn, bone, stone, metal, wood, and synthetic, but for framing purposes bone is usually the burnisher of choice (photo 6). The length and shape of the bone really matters not as far as tool efficiency therefore whatever is purchased will no doubt become the favorite. They come in a variety of sizes, shapes and materials used extensively in the making and restoring hand sewn books and bookbinding. I prefer a more pointed bone—4th from left—but I also use the shorter more blunt tool and love the commercial OAS Bamboo Papercutter from Oriental Art Supply, available online.
Bamboo knives/burnishers are a tool of choice for Asian arts being strong and yet nonabrasive. One end is a sharpened knife for separating mats, removing applied strips, and cutting folded paper (diagram 2), while the other is a tough burnishing tool (photo 7). The knife may be kept sharp by grinding on a course 100 grit 1"x7" sanding stick available at beauty supply stores (photo 8). A bamboo tool was recently used to help separate a large 32"x40" original painting that had been dry mounted to a 3/16" foam center board which had badly warped (photo 9).
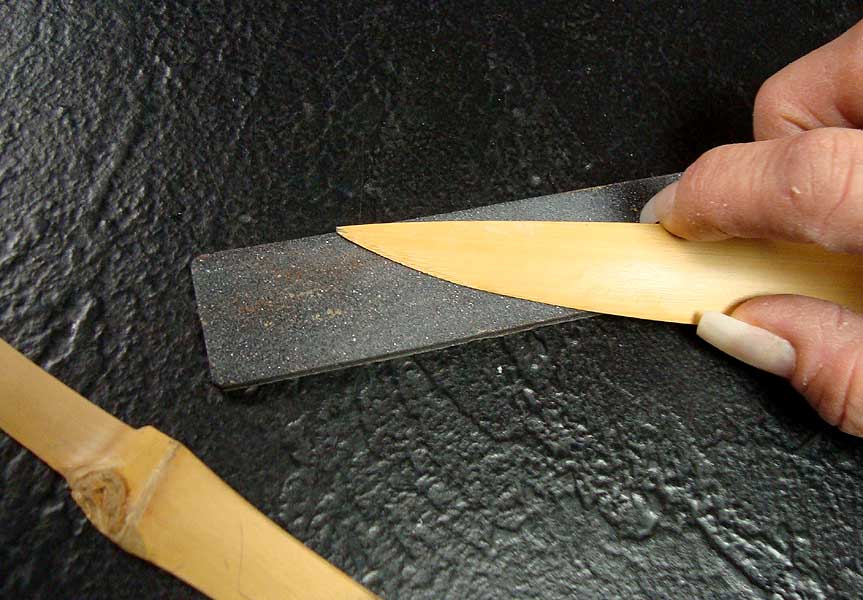 Photo 8
Sharpen knife for clean separation of stuck mats without fear of bending.
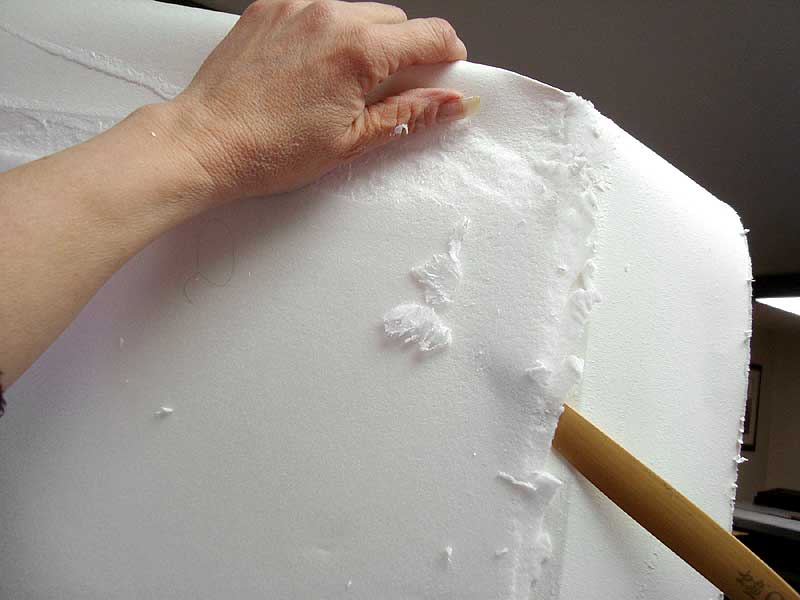 Photo 9
Bamboo knife used to remove foam center from behind mounted original for proper reframing.
Selection of the proper burnisher matters not as far as shape is concerned, but some materials—such as metal—have been known to transfer a discoloration to mat board bevels. Some materials may also resist sliding along a toothed surface not allowing them to glide as smoothly as an aged or seasoned bone. Most alternative burnishers have actually been developed for other technical uses—vinyl transfer designs, gilding—and should only be used as a temporary substitute for bevel smoothing while you search for your neglected bone.
Seasoning A New Bone
A new burnisher should be seasoned with oil prior to first use, much like you would a new gourmet sautpan. Liberally apply vegetable or corn oil to all sides of the bone and removing excess with a clean absorbent cotton rag, then let sit overnight to completely absorb the oil. Natural materials—not plastic or synthetic—will readily absorb the oil into the dried bone altering the original white color of the polished bone to a softer yellow (photo 10). The darkening of the bone is the direct result of oil absorption but will not leave the bone oily in any way.
A seasoned bone is extremely smooth and glides along the surface. If used to separate window mats or remove strips of art paper it may become contaminated with adhesive residue which will inhibit a smooth glide. A little solvent does remove unwanted adhesives but also dries out the bone, so re-oiling may become necessary. It might be better practice to have a second bone for separating p-s layers thus reserving one specifically for bonding pressure activation.
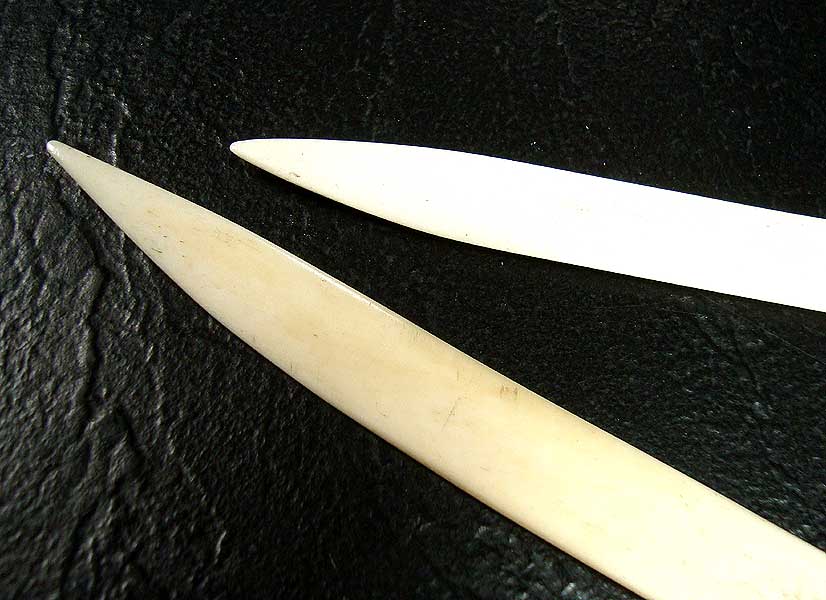 Photo 10
New unoiled bone (top) aged and oiled bone (bottom).
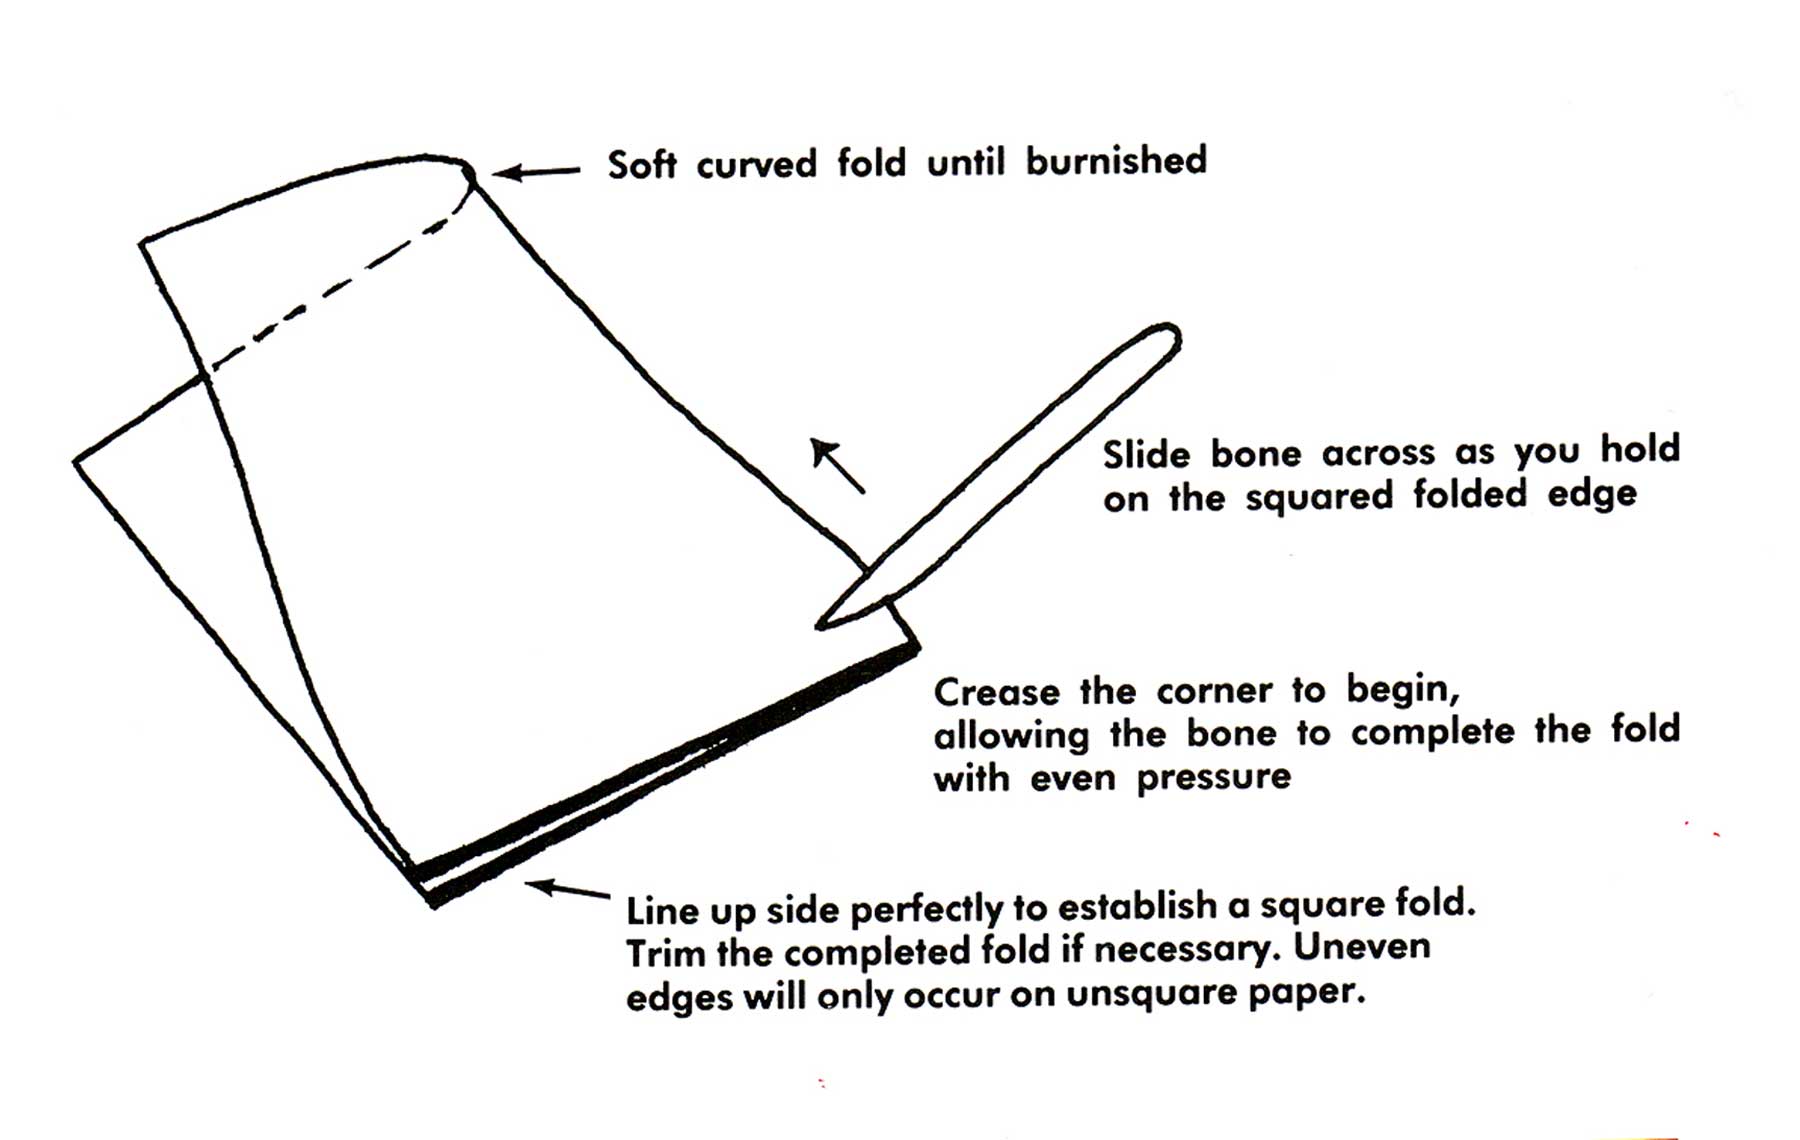 Diagram 1
Folding paper.
Besides giving the bone a smoother surface, the reason for seasoning—oiling—is to seal the new bone from the dirt and oil found on human hands which can make dirty bones sticky. Older untreated bones will eventually take on a similar aged look but will also absorb other dirt and contaminants that may make the bone sticky.
Other Uses
Bone folders are favored for their accuracy of creasing a correctly squared sheet of paper. Simply align along one side and run the folder down the folded edge (diagram 1). When cutting most soft museum rag, 12-ply tiered mats, or when a blade is getting dull, a burnisher easily smooths down newly cut raw or ragged edges and gives the mat a more polished and completed look. A ragged unburnished bevel edge looks unprofessional, unfinished, and has been known to lose a point or two during competition judging (photo 11). Slight imperfections in mat corners such as tiny overcuts may also be visually reduced—though never healed—by using a bone. Turned mat edges may not be the solution to a hooked corner, but they most definitely should be the professional framers finishing touch.
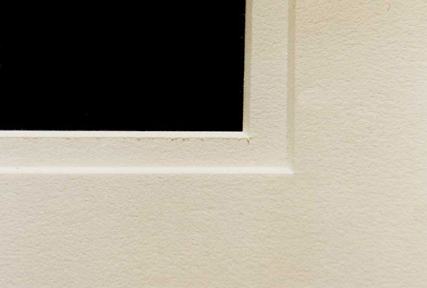 Photo 11
Rough edges to any window mat bevel need to be lightly burnished for a polished finish.
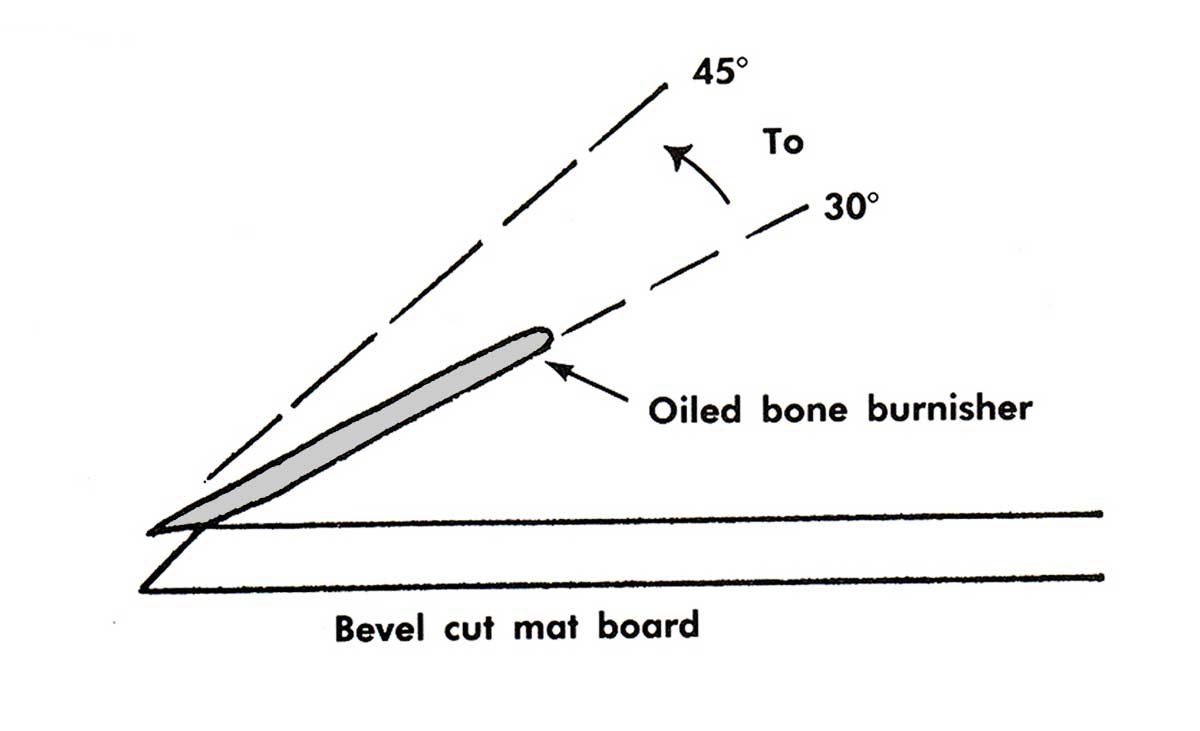 Diagram 2
Turning rough cut bevel.
When cutting very thick 8 to 15-ply pin-striped or bevel banded tiered mats there is a shifting of the planes at the window corner. This is merely the result of the blade being inserted then removed from the very dense board. By burnishing the bottom edge of the bevel from the back of the mat, shifted corner is flattened and the window is realigned. Since all burnishing is done from the back of the mat, any shiny spots resulting from a polishing of the board surface will not be visible.
Less Is More
Very little pressure is required to smooth the cut edge of the mat. Do not press hard or aggressively burnish, as too much pressure may dent the board or remove the crisp edge between the mat face and the bevel itself. The idea is not to reangle the bevel, just to clean it up (diagram 2). One quick, gentle slide down each side of the window will turn the rough edge for a clean cut window. Consider for a moment the impact all this could have on your professional image. The viewer never quite realizes why the matted picture looks better...it just somehow does. So if that bone you bought last year is buried in the back of a drawer somewhere, maybe it's time to dig it up and put it to some good use.After all, a bone in the hand is worth two in the drawer.
END
Copyright © 2012 Chris A Paschke
For more articles on mounting basics look under the mounting section in Articles by Subject.
Additional information on all types of mounting is found in:
The Mounting and Laminating Handbook, Second Edition, 2002,
The Mounting And Laminating Handbook, Third Edition, 2008 and
Creative Mounting, Wrapping, And Laminating, 2000 will teach you everything you need to know about getting the most from your dry mount equipment and materials as an innovative frame designer.
All books are available from Designs Ink Publishing through this website.
Chris A Paschke, CPF GCF
Designs Ink
Designs Ink Publishing
840 Tucker Road, Suite H-190
Tehachapi, CA 93561
P 661-821-2188
chris@designsinkart.com