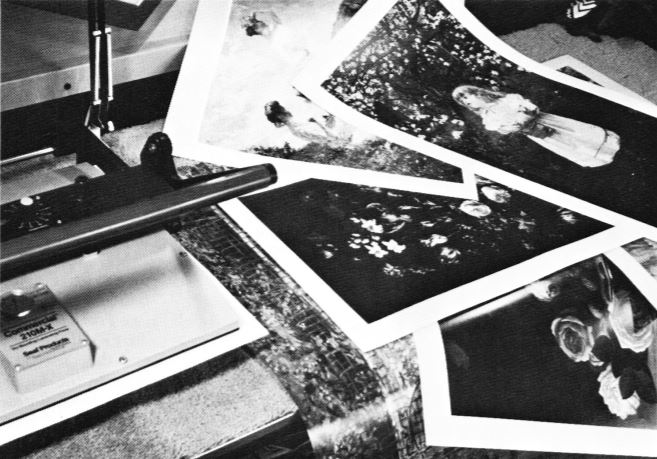
 Mounting poster art that is too large for your press is easy if you use a systematic approach and follow a few basic steps. This 18" x 24" dry mount press can handle artwork up to 32" wide and any length.
Mounting poster art that is too large for your press is easy if you use a systematic approach and follow a few basic steps. This 18" x 24" dry mount press can handle artwork up to 32" wide and any length.
When approaching a large scale or oversized framing job, such as the ones in the masthead photo, the element of mounting will need to be addressed. If it's a poster and it has been decided to permanently mount it rather than hinge or otherwise archivally treat it, there are a number of mounting options available. If the project is a poster larger than your vacuum press the solution will involve one of three possibilities. Locate a larger vacuum press and subcontract the mounting portion of your job to another framer, counter roll the poster and either wet or spray mount the item by hand, or use a mechanical press and dry mount the artwork in bites.
Pros and Cons
Subcontracting to another framer would not be a profit making venture for you, but good customer relations will be maintained, you will continue to be a source of complete services to them and the remainder of the project will continue to bring in your profits. If wet or spray mounting is chosen as the solution, you must consider the additional labor time involved in accomplishing this project if you are not routinely set up for oversized mountings of this type. Care must also be taken to ensure adequate ventilation and proper weighting—after mounting—as it dries.
As I have mentioned in previous articles, one of the distinct advantages to owning or having use of a mechanical dry mount press is its potential for mounting items larger than itself in bites. This is the term used to describe systematically dividing up a large item and pressing smaller sections until it is completely mounted, this then becomes yet another mounting option of the above oversized project and the meat of this particular article.
Dry Mounting Rules
There are a couple of basic rules which need to be closely followed in order to successfully achieve an oversized mounting in bites, but there is no reason for apprehension. Using the proper ratios of time, temperature and pressure must be applied as well as pre-drying the artwork and substrate. Two important elements must be addressed to ensure a smooth, predictable mount when the substrate will enter the press more than once; proper handle adjustment to 45 degrees and using a release board larger than the platen of the press.
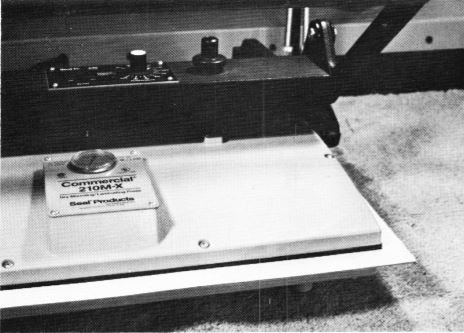 Photo 1A
The handle of the press must be at 45°. Always use a release board rather than paper.
Make certain your press is adjusted for the proper pressure required for the substrate to be used, see "Pressure Point of Mounting", May 1992. If foam board is to be used and the press is too tight, indentations in the foam board may occur, if too loose (in an attempt to overcompensate for potential dents) you might experience bubbles in the completed mount because of inadequate pressure. Also use a release board (not paper) larger than the platen, the board helps diffuse the pressure at which the edges of the press meet the oversized substrate and artwork.
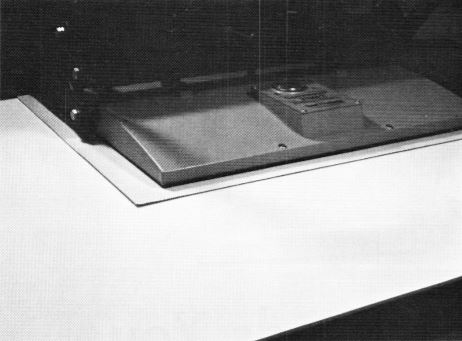 Photo 1B
Set the press handle with the full sized substrate board and release board in place.
The proper time and temperature will be fairly standardized as in approximately 180ºF for 1-2 minutes (per section) depending upon chosen substrate and size of the bites.
Limitations
It is important to pay close attention to the width of your press and the actual width of the mounting. Multiple bite mountings are only achievable a little less then twice as wide as your press, but naturally as long as you have room to work. A Seal 210M-X platen measures 18½"x 23" so it will comfortably mount 2x16" or 32" with an adequate overlap to ensure no trapped tunnel of unmounted materials. A Seal 500T-X platen measures 26"x34" so it will mount 2x24" or 48" total width very well. Remember this measurement is for total required width of the mounting board not simply the poster. If the artwork is to be matted, the substrate will measure the actual outer mat dimensions or a little larger so as to simplify the centering and aligning of the mounted print to the mat.
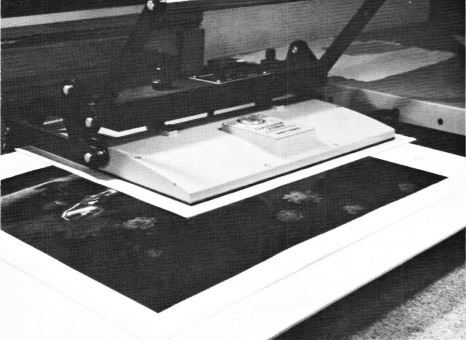 Photo 2
Notice the extra width surrounding the border of the poster, allowing room for the mat width to align with the backing board. This extra width must be taken into account when determining required width vs. press width.
It is also a good idea to mount with a permanent, breathable tissue (Seal/ColorMount, TechMount-2, Drytac/Trimount). These tissues bond under heat within the press and being permanent will not release with subsequent visits to the press for additional bites. Porosity also allows oversized photographs to be tackled in bites.
Tacking and Bites
Upon adjusting the press, cutting and pre-drying materials the final preparation is to tack the artwork in the appropriate location for best results, and...yes, it can make a difference. The poster art should be tacked in only one place and the recommended Z-method should not be used during this particular process. The portion of the poster to enter into the press first is where the tack should be made. In the series of photos I have indicated with the arrow the appropriate tacking location. If a piece is meant to be pressed twice, tack on the end to be inserted first. Always turn the mount board completely around to mount the other side, even if the substrate is narrow enough to be pushed straight through. The board may not always fit between the braces and damage may be done to a soft foam board.
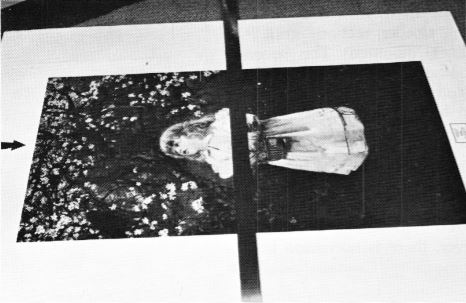 Photo 3
The arrow at the left indicates the point of tacking poster, adhesive and substrate together after pre-drying. The project then enters the press, arrow end first. Turn around to complete the other side.
If the poster needs four bites, tack on the side of the quarter to enter the press first. With a four step mounting it doesn't matter whether you move adjacent to or across from the initial mounting (clockwise or counterclockwise), but always be systematic and complete the entire project once begun.
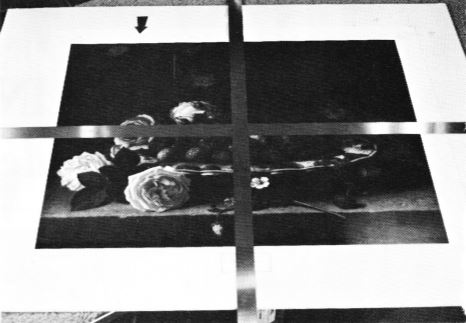 Photo 4
The arrow indicates the tacking point for this mounting. This is the quarter that enters the press first.
In a longer poster (Michael Jordan, James Dean) still narrow enough to fit within the confines of twice the platen width, tack in the center of one of the long sides. This then will be fed into the press first, then directly across from the initial mounting. Then move either right or left always completing the bite across as you progress. As with stretching a canvas, always work from the center outward, it's much easier to ensure proper placement on the mount board as well as pressing the air from the center to the outer perimeters of the poster.
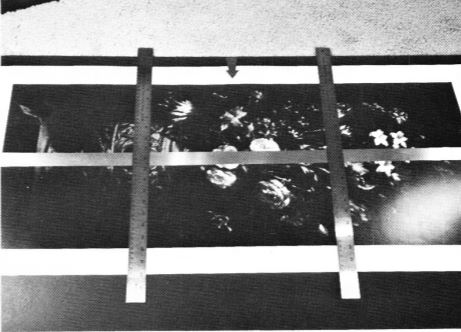 Photo 5
In a mounting of more than four bites, begin at the canter of one side. The arrow indicates the tacking point. Press first at the arrow, then directly across from the initial mounting. Shifting right or left next doesn't matter, but be systematic and work from the center out to the ends.
Recap
To sum up the easy steps for a perfect multiple bite project every time, consider this as a checklist:
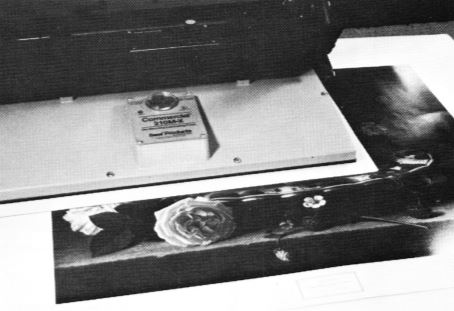 Photo 6
Overlap your mounting bites as much as possible to prevent unmounted tunnels between bites. This will also aid in the prevention of denting by repeated pressing at the same edge point.
Follow the steps and then have no fear when approaching that oversized project, for there's more money available in biting that art that feeds you.
END
Copyright © 1992 Chris A Paschke
For more articles on mounting basics look under the mounting section in Articles by Subject.
Additional information on all types of mounting is found in:
The Mounting and Laminating Handbook, Second Edition, 2002,
The Mounting And Laminating Handbook, Third Edition, 2008 and
Creative Mounting, Wrapping, And Laminating, 2000 will teach you everything you need to know about getting the most from your dry mount equipment and materials as an innovative frame designer.
All books are available from Designs Ink Publishing through this website.
Chris A Paschke, CPF GCF
Designs Ink
Designs Ink Publishing
785 Tucker Road, Suite G-183
Tehachapi, CA 93561
P 661-821-2188
chris@designsinkart.com