Paschke Online
Designs Ink Publishing Article Archive and Reference Library
Articles by Chris A. Paschke, CPF GCF
"Greening The Desert"
April 2011
In this era of recycling and using renewable resources being green is on the forefront of everyone's mind. I recently encountered a client with a hobby that embraces cast aside materials by redefining them into usable items. During the summer of 2010 Greg Loskorn came in with an unusual request. He had six 16x20" photos of trains that he needed framed for the special art show at the opening of the Tehachapi Railroad Museum. He wanted them mounted, matted, glazed and fitted—but he would be supplying the frames for me. Though this is not an unheard of request, little did I realize what he really meant by supplying the frames. Greg is a fine art photographer who has a passion for the high desert, railroad, and anything to do with airplanes. Though he has been photographing the surrounding terrain and local attractions for a long time he had never exhibited his images in a formal gallery.
Greg owns Milepost Imaging, Tehachapi CA and is an avid hiker who also ventures out into the Mojave Desert for hours following old railroad tracks always on the search for unusual and unexpected photographs.— On one such trip he encountered a series of buried and deteriorating old wood boards that may have once been used as a barrier fence to help prevent excesses of desert sand from building up around and over the railroad tracks. Most of these planks are cracked, warped, rotten and very weather worn, totally unusable for much of anything. But they needed a home, so while harvesting these broken old boards it triggered the idea they would make the perfect frame for his railroad and desert images. After cleaning the wood and finding the straightest planks, he began searching for the perfect framer to teach him what to do next.
Designing For Unity
On his first visit, Greg brought in his photos and a small 6" piece of scrap wood as a sample of color and texture. He was soon to launch a new website, cards, prints and fine high end photos, so we needed to design a layout that would be flexible in color and style while creating design continuity and visual unity between current and future images.
The frames would be a weathered green-gray, though some planks were slightly more neutral brown. Because of the texture of the landscape in his images we selected 4-ply suede board to be used as the top mat. The inner liner mat would be a solid core museum rag or conservation board in a color that helped draw the eye into the photo. A palette of earthy neutral suedes were selected with Bainbridge Mist and Dusk being the first two chosen. Artcare Mist Suede #4196 was the perfect pale gray-green color to make the transition from sand fence to each of the B&W photos (photo 1). Dusk Suede #4195 was perfect to match the texture and colors of the sandy earth beneath the tracks and in the engine of the color images (photo 2). Brushed Pewter and Antiqued Copper Precious Metal paper was selected to wrap 3/16" foam bevels as a visual spacer between the top and bottom mats and all six photos used Bainbridge Black Shadow #8669 as the liner (photo 3). Though the wrap may seem incongruous to the earthy barnwood nature of the photos it really helped tie all the elements together.
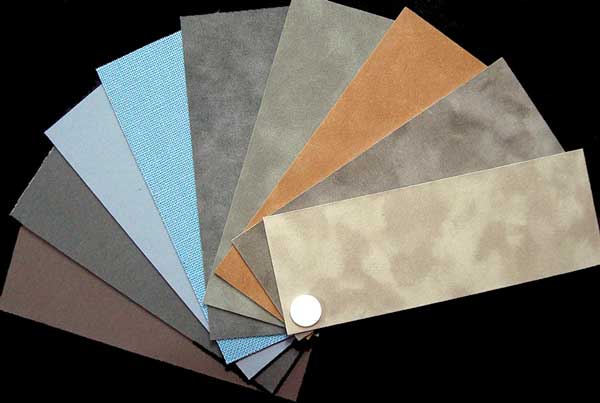 Photo 1
(L to R) Rag Mat Sable Brown 1184 ; AlphaRag Black Shadow 8669; AlphaRag Colonial Blue 8651; Degas Blue Linen 4026; Artcare Shadow Suede 4197; Artcare Mist Suede 4196; Crescent Twig Suede 5639; Artcare Fango Suede 4206; Artcare Dusk Suede 4195.
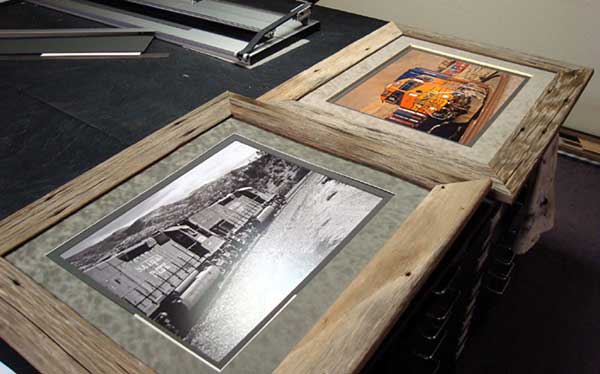 Photo 2
Mist Suede was used on B&W images while Dusk was perfect for the color ones.
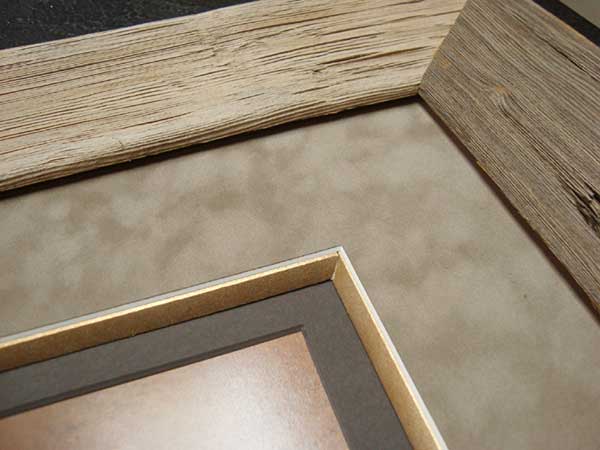 Photo 3
Sand fence frame accented with Brushed Pewter and Copper Gold Precious Metal paper wrapped 3/16" foam bevels as visual spacer between the top and bottom mats.
Frame Criteria
The original sand fence planks average 4" wide and since Greg loves the fractures, holes and pits in the wood he wanted to keep as much of the original board as possible. He planes the boards to smooth and level them for sizing, then cuts the rabbet on a table saw. They are then mitered to length and joined, but keeping with the rustic nature he does not fill corners nor holes or discolorations of the wood—oh yes and there shall be splinters while framing.
Because of the wide nature of the frames we either had to increase the mat borders to 5" or narrow them down to allow for a contrast between the mats and the frame. We opted for 3" borders for the liner mat and 2-¼" for the suede top mat, making the outside dimensions 22x26" plus ⅛" allowance. The wrapped bevel uses color to draw the eye from the outer frame into the color and metallic of the engines helping integrate and unify the design. Keeping the mats narrower also allows the frame and photo to remain the dominant elements. Since the frames were being built to my specifications of 22-⅛"x26-⅛" I was able to mount the photos, cut the mats, and assemble the package in preparation for the frames. The glass was not cut until the frames arrived to verify size for final fitting.
Mounting and Matting
All of these photos have been professionally printed by a high end lab on matte finish Endura photo paper. Since control of orange peel was a primary concern they were all mounted to 3/16" Bienfang Step 150, a 150ºF degree low temperature, 30 second short duration, heat-activated board with a smooth surface that is well suited to photographs. On B&W and dark photos such as these it is very important to prevent anything from being trapped beneath or imprinting into the mounting. All release materials were cleaned and wiped down and the mechanical press was wiped and checked for residue. Both the mount board and the back of each individual photo needed to be wiped down with a clean microfiber rag to remove all particles and debris just prior to tacking for mounting (photo 4). Preparing all the photos at the same time may allow for new paper dust to accumulate where not wanted.
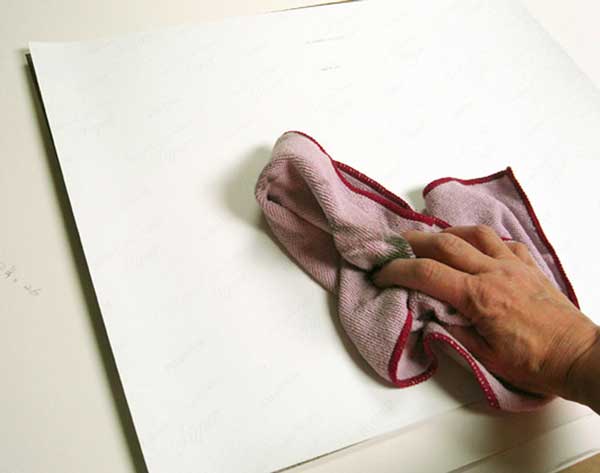 Photo 4
Microfiber cloths are perfect for removing dirt and dust prior to mounting photos. Wipe back of image AND mount board.
Each mount board was cut to exact exterior dimension and placement was established by lining on a manual mat cutter. Three inch margins were lined and the photo was cleaned and centered, tacked, then mounted.— This same process and steps are used for each photo. Though it may not be a time effective mass production method it best controls maintaining clean lint free mounting for photos. Once the matting package is complete all layers are fused and book hinged to the 3/16" mount board—photo attached—for glazing and final fitting once the frames arrive. UV Conservation Clear glass was recommended for these first photos, but since then he has embraced museum glass and there has been no turning back.
Other Desert Debris
The next batch of recycled wood and new frames also came from the desert. Just as the space race has left debris orbiting the earth and on the moon, it appears that progress has also left telephone poles out in the desert to slowly rot away over time. A few months ago while on another wood finding mission Loskorn discovered piles of discarded telephone poles and cross arms that had been pulled up and replaced with high tech, more stable metal framework. Though the new towers may be better for withstanding the rigors of weather extremes, the old poles—having been creosote treated to resist rotting—may take generations to degrade, if at all.
In a flash of innovation he realized though the poles could not be used as moulding, but the cross arms might be perfect.— Rich dark rustic recycled frames are cut from alternate sides of the heavy 4-½" beams leaving the inner few inches for smaller frame potential. The latest collaboration is an elongated 12x24" B&W Four Island Lake framed to 18x30" (photo 5). Shadow Suede 4197 and black rag were used with no wrapped bevel for this one though a 3/16" spacer was placed between the mats. The grays were perfect, the suede picked up the feeling of the fog in the hills and the spacer added dimension.
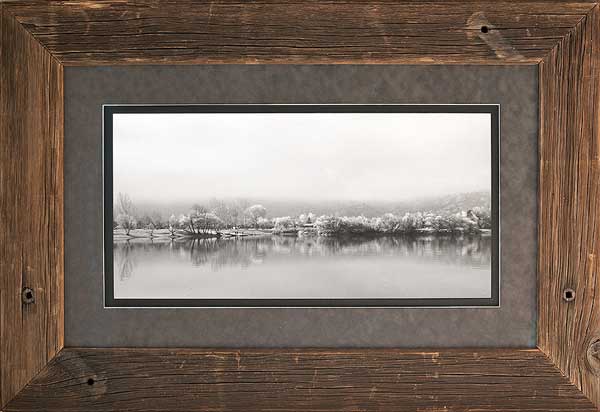 Photo 5
Frames show drilled holes and sun fading of cross arms that were harvested from the desert and cut into frames.
Photo and frame shown courtesy of Greg Loskorn, Milestone Imaging.com
Scraps and Dumpster Diving
Loskorn Has taken most everything I have taught him to heart and has the makings of a real framer as he never throws anything away.— Even his frame scraps get recycled.— The inner section of the telephone beams are being cut and built into small 1" wide 7x9" frames and he is buying all the suede blanks to cut into 1-¼" 7x9 single mats to fit inside to fit his 5x7" photos (photo 6). These are then able to be priced very affordably for wannabe collectors that can need to begin small (photo 7).
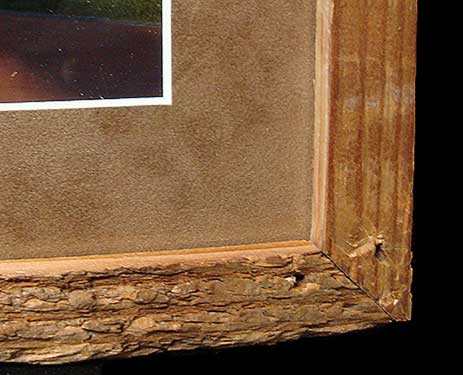 Photo 6
Narrower inner wood scraps and suede fallouts are used to cut and build smaller more economical framed photos.
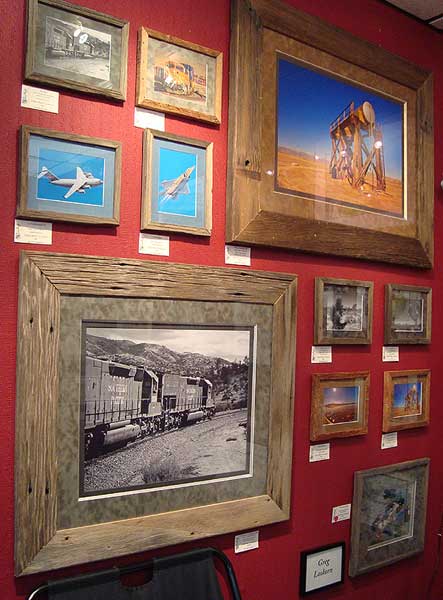 Photo 7
Photos are framed with sand fence, telephone beams and studio timbers.
He is a sound engineer for Sony Pictures and in his ongoing quest for wood he has also collected old MGM studio timbers that had been cast off and awaiting him in a dumpster. Again the rustic nature and color of this wood cried frame to him and he recently completed framing two of my prints with it (photo 8).
 Photo 8
A Paschke print Joshua Tree double matted with 3" wide studio timber frame.
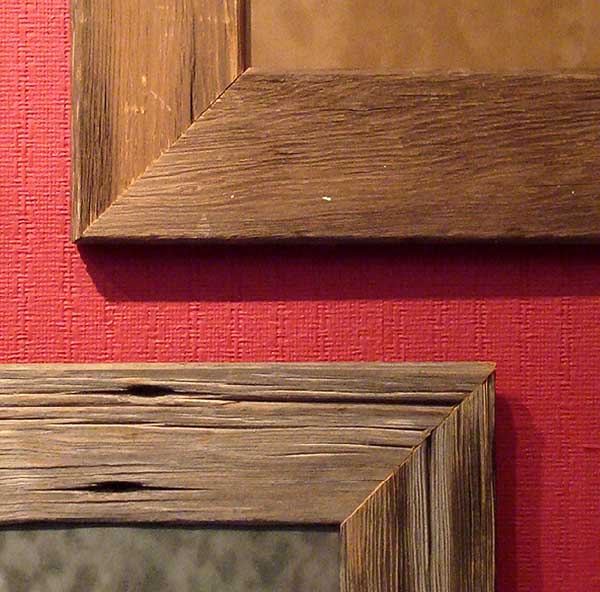 Photo 9
Salvaged MGM studio timbers (T) and sand fence (B) trimmed, planed, sanded and mitered into specialty frames by photographer Loskorn.
In this era of recycling and trying to best use our renewable resources, isn't it lovely to find someone who is willing to spend hours harvesting buried wood, telephone pole remnants (photo 9) and studio timbers as a recyclable resource which in turn helps keep the desert healthy and "green"—or brown as the case may be. Greg has become a loyal customer and friend and to date we have collaborated on over twenty projects—plus I have helped him launch his open edition economy line of images which he frames himself—though he'll always need me for mounting his photos.
Note: All featured photos are Greg Loskorn and shown courtesy of Milepost Imaging. His photos, cards and calendars may be viewed and purchased on his website www.milepostimaging.com or at Crossroads Gallery, Tehachapi CA.
END
Copyright © 2011 Chris A Paschke
For more articles on mounting basics look under the mounting section in Articles by Subject.
Additional information on all types of mounting is found in:
The Mounting and Laminating Handbook, Second Edition, 2002,
The Mounting And Laminating Handbook, Third Edition, 2008 and
Creative Mounting, Wrapping, And Laminating, 2000 will teach you everything you need to know about getting the most from your dry mount equipment and materials as an innovative frame designer.
All books are available from Designs Ink Publishing through this website.
Chris A Paschke, CPF GCF
Designs Ink
Designs Ink Publishing
785 Tucker Road, Suite G-183
Tehachapi, CA 93561
P 661-821-2188
chris@designsinkart.com