 Photo 1: Inspection
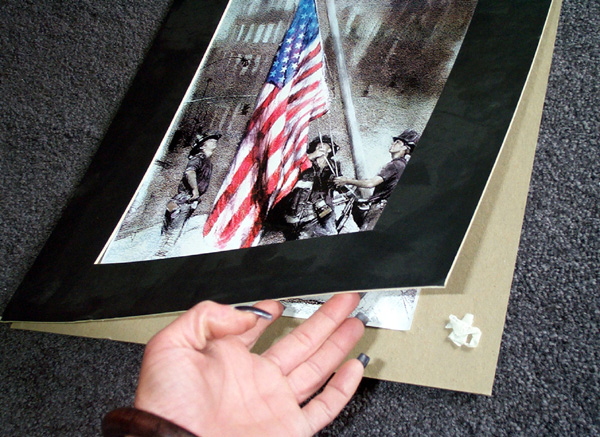
The single matted image was loosely sleeved into a black, very dusty, paper mat that was glued on the left side. The top mat was held in place by a "wad" of ¼" masking tape at the lower right hand corner.
So what do gold and mounting have in common? Besides a pun on words for the gilding issue, both gold and pressure-sensitive adhesives need to be burnished in order to shine. This month we'll be looking at pressure-sensitives, their application and bonding longevity. When an adhesive holds well, it is money in your pocket, when it fails...it's a redo. Thus, proper cold mounting methods for pressure-sensitives should be gold in the bank.
I have been talking a great deal about digitals and their identification over the past few years, and have striven to explain how to identify them and what to do with them, both when they are identifiable and when not. A recent customer project of mine presented me with the opportunity to take you through the identification and handling of an unidentified image first hand. What better way to help address these digital issues?
First Stage of Design: Definition
This past week, a customer brought in a matted, open edition image of the three firemen hoisting the American flag in New York to be framed. Her father is a retired fireman who had purchased this piece while on recent holiday in New York. He bought it during a ferry ride to the Statue of Liberty, and paid $50 for the unframed, single matted piece.
Since the first stage of the design process is to define the art, then identifying this artwork is what had to be done prior to any other design steps. Only then can the proper mat boards, rabbet lining, and mounting decisions be made for handling any project. The single matted image was loosely sleeved into a very dusty, black paper mat that was glued along the left side to a piece of acidic 2-ply gray board. The mat was then held closed by a "wad" of ¼" masking tape at the lower right hand corner (photo 1). A framer's nightmare!
Photo 1: Inspection
The single matted image was loosely sleeved into a black, very dusty, paper mat that was glued on the left side. The top mat was held in place by a "wad" of ¼" masking tape at the lower right hand corner.
Stages 1, 2 and 3 Merge
Stages two and three of design are creativity and analysis, this is when the actual design and limitations are acknowledged and considered. In this case the creative aspects of the design were being left to my professional discretion, but the limitations would include what mounting process could be used for this image. I felt sure this piece was a digital, but I needed to try to nail down what kind of digital. My customer was unsure of any additional details so she called her Father to see what else he could supply. Not much, besides a great boat ride.
Upon removal from the mat folder I began the overview of the image for the condition report. The surface of the image did not have a consistent gloss or sheen to it. The black areas were shinier than the white areas further leaning towards it being a duplicate from a copy machine. It was not signed, nor numbered, and it measured 11x17", which is not a standard photo paper size (photo 2). It is, however a standard, 4 color copy machine size.
 Photo 2: Sizing the Image
Upon measuring for the condition report, the piece measured 11x17". Though not a standard photo paper size, it is a standard 4-color copy machine size.
At this point we eliminated it being a traditional photo or thermal transfer, because it was on paper and not photo paper, and began thinking it could be a toner copy, LED, laser, or inkjet. In my January 2002 article "Everything Old Is New Again", I said the process of photocopying uses electrical, chemical, or photographic techniques to copy previously printed and pictorial material, meaning existing documents, or in this case art originals.
It was unlikely this was a scanned computer image that had been printed on an inkjet printer. As a photocopy the original could have been any media from traditional photo to oil painting to manipulated photo, making this image either of electrophotographic or electrostatic origin. Color electrophotography includes all basic four-color copiers, like those found in consumer stores like Office Max, Staples and Kinko's. It was most likely an electrophotographic image.
Or is it Electrostatic Printing?
Since electrostatic printing is generally not used for fine art I was not leaning this direction. It is a copying process that uses static electricity (electrostatic) or the attractive force of electric charges to transfer the image to a charged plate or drum. Electrostatic graphics are defined by the fact that images must be printed on special dielectric media, which is usually paper. Since this paper felt like a very common 20-24# lightweight copy paper, that also helped support the electrophotographic theory.
Mounting Options
Once the decision of it being a toner copy was made then a mounting process had to be chosen. Even though electrostatic images are not printed on an actual thermal paper, they do use a heat-set ink process, and these images are more sensitive to dry mounting than electrophotographic ones. Any time the printing origin of the image is unknown, it is best to select a cold method of mounting. This project could then be mounted using most any wet, spray, pressure-sensitive, or preservation technique.
Since electrophotographically printed images are water soluble and the papers are often thin, moisture control should be implemented. That would have a tendency to eliminate the options of wet and spray mounting. Actually, if the selected spray adhesive was a solvent based and not a water based aerosol, the digital would tolerate the moisture encountered ("Solvent and Removal Techniques", April 2003). Dry mounting was also not a good choice. These dry pigments are pressed to set under heated rollers during replication and the resulting gloss is often altered during heat mounting.
Acid-free Hinging or Formal Preservation
By process of elimination, the mounting options were reduced to either acid-free P-S tapes or preservation techniques (photo 3). Since use of water borne mounting methods is not desired, and since it had been decided this was a low cost copier replica, traditional Japanese hinges were discarded in this case. Corner pockets were a little too bulky for the weight of the 20# digital, so Lineco Hinging Tissue was chosen. The tissue is the closest thing to traditional cooked starch and torn tissue hinges without moisture, while still being a ready-to-use, acid-free, neutral P-S tape.
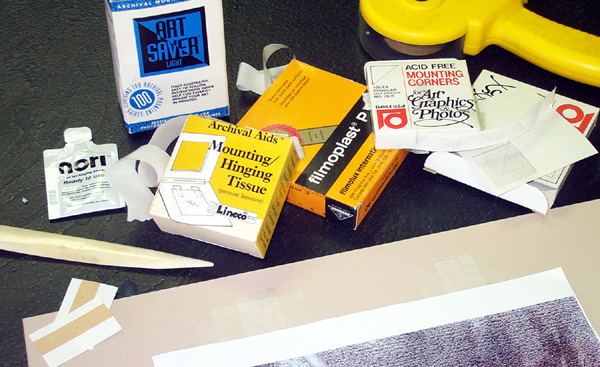 Photo 3: Cold Mounting Options
This brings the mounting options down to P-S or preservation techniques. Left to right are Nori prepared cooked starch; Art Saver P-S strips for the perimeter of the art; Lineco and Neschen P-S acid-free hinging tapes; Dahle clear mounting corners; and ATG tape (upper right corner).
Burnishing the Hinges
Whether traditional rice paper hinges and cooked starch or P-S hinges, the same strip application applies. A pendent T-hinge was used so the P-S tape would only come in contact with the back side of the top edge of the paper image. It was placed on the top ⅛" of the inner side, then a cross piece was applied horizontally across the face of the first tape. This will allow the tape to tear rather than the image if it were to fall to the floor. A bone burnisher was used to activate the tape and maximize the bond between the tape and the 4-ply Alpharag backing board (photo 4). Once the tape face was burnished, then the hinged art is turned to expose the verso side and that tape attachment is also burnished in place (photo 5).
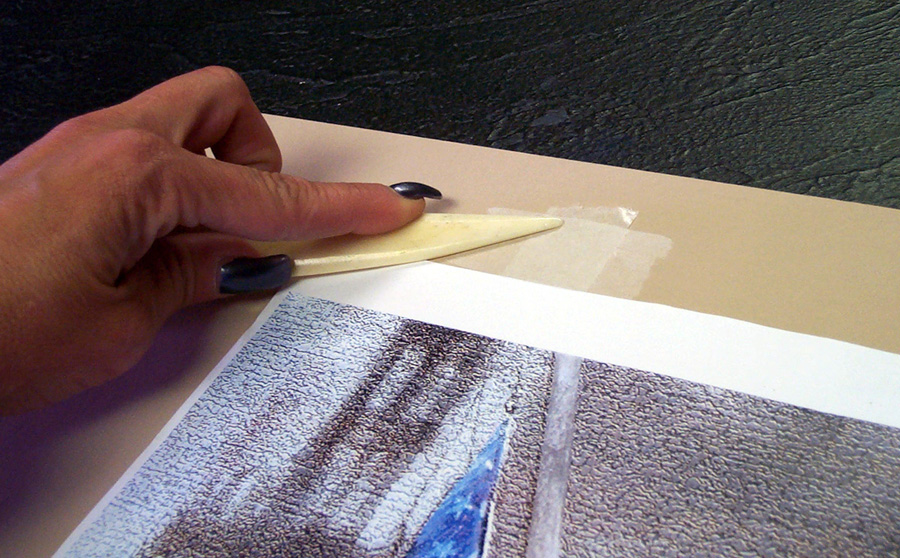 Photo 4: Bone Burnishing
A T-pendent hinge was placed on the top ⅛" of the inner side with a cross piece horizontally over the first tape. A bone burnisher was used to activate the tape and maximize the bond between the tape and the 4-ply Alpharag backing board.
 Photo 5: Burnishing the Verso Side
Once burnished on the face then the hinged art is turned to expose the back and that tape attachment is also burnished in place.
Burnishing for Maximum Bond
A pressure-sensitive adhesive is a permanently tacky substance that bonds to an untreated surface at room temperature, with only the application of slight pressure. By definition P-S adhesives differ from every other category of adhesive. PSAs do not require any open time or solvent evaporation in preparation for bonding.
They have slightly lower bonds than heat-set dry mounting adhesives, but because of their permanent tack, they are always ready to bond to almost any surface with only thumb pressure. It needs to be reminded that the thumb pressure without burnishing that initially activates the adhesive only activates about 25% of its bonding potential. Based on the theories of TTPM (time, temperature, pressure, moisture) any P-S adhesive or tape must be properly burnished to activate, then that tape must be allowed to cure under a weight to create maximum bond. That is true for any P-S material.
We have all applied a clear P-S tape to paper or board and burnished it smooth with our thumb nail to activate. You can see the tape clarify beneath the burnishing when that is done. It is proving visually it has been activated. In photo 6, lines of ATG tape have been applied to the verso side of the foam board spacer that has already been P-S taped to the underside of what is to be the top mat. Notice the tape crosses at the corners and runs the entire length of the window opening for maximum bonding potential.
 Photo 6: ATG Application
The tape crosses at the corners and runs the entire length of the window opening for maximum bonding potential. Also notice the 3/16" mat spacer has been cut as a full size sheet with a window opening to evenly support the mats all around.
Though difficult to see and even tougher to photograph, there are tiny white air bubbles all along the applied tape indicating a very light tack. In photo 7, notice the tape has not aligned evenly onto the mat because of inconsistent application pressure when applying with the gun. Though this foam spacer will no doubt hold decently for the life of the framed art, it will never be because of well activated nor cured P-S tape application and weighting.
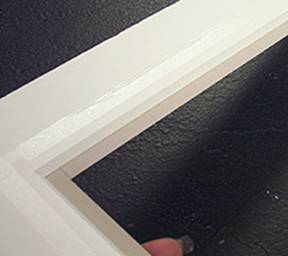 Photo 7: ATG Tape Rolled at Edges
The tape has not aligned evenly onto the mat because of inconsistent application pressure when applying it with the ATG gun.
When two mats are ATG taped together they are aligned and pressed manually to attach and activate the tape to hold (photo 8). As mentioned above this is most likely only activating about 25% or the potential ATG bond. Most of the time these mats are then immediately placed into the frame and readied for final fitting without weighting at all. If P-S tapes are to be used, in order to best support the window mats and help ensure inner mats will not release and fall down into the window opening, all mats should be sized within ⅛" of the outer mat. Then if the tape bonds were to fail the mats may not shift through gravity enough to even be noticed. Though the more correct method of bonding would be white glue.
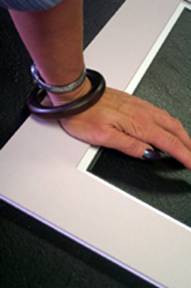 Photo 8: Pressed to Activate
When two mats are ATG taped together they are then aligned and pressed manually to attach and activate the tape to hold.
A stronger pressure-sensitive linen tape may be used as the side book hinge for the triple mat with spacer (photo 9). This too must be burnished with a bone to ensure maximum bond. Another way to ensure lack of mat misalignment is to linen hinge the mat front to the backing at the bottom edge rather than the longest side. This is generally a personal choice, and as shown in the photo 9, I taped these on the longest side not the bottom. P-S tapes are also prone to cold creep or oozing of adhesives over time. All of these may be great reasons to have opted for corner pockets, edge strips, or cooked paste hinges.
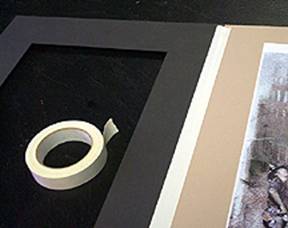 Photo 9: Linen Hinge
A pressure-sensitive linen tape may be used as the side book hinge for the triple mat with spacer. This too must be burnished with a bone to ensure maximum bond.
Nearly Completed Project
Once all layers are completed and the mats assembled it is ready for viewing and final fitting. When the completed mat package is closed and viewed from the front the 3/16" foam board spacer holds the top mat off the middle mat for added intensity. This helps draw the viewer into the art (photo 10).
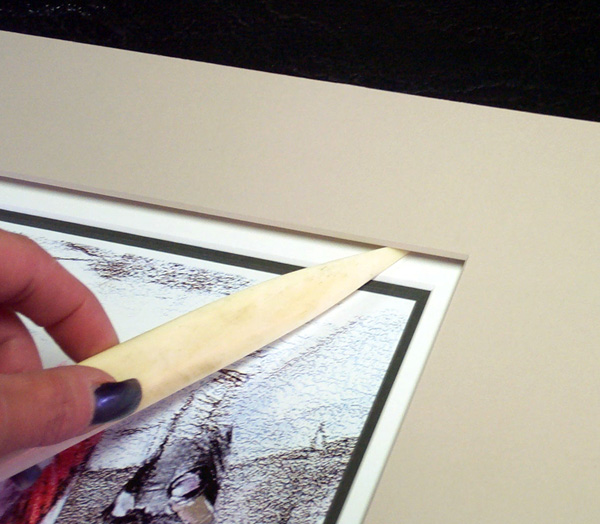 Photo 10: 3/16" Spacer Gap
When the completed mat package is closed and viewed from the front the 3/16" foam board spacer holds the top mat off the middle mat for added intensity that helps draw the viewer into the art.
Though the frame has not yet been placed on the project, the completed mat unit with spacer nicely showcases this digital image. Though the picture in this article may appear a little blue it really is not. The top mat perfectly matches the faces of the firemen, the middle cool blue based white mat pulls the eye into the flag, and the inner charcoal liner mat is identical to their fire hats (photo 11).
 Photo 11: Newly Matted Project
Though the frame has not yet been placed on the project, the completed mat unit with spacer nicely showcases this digital image. Though the picture may appear a little blue, the top mat perfectly matches the faces of the firemen, the middle white mat pulls the eye into the flag, and the inner charcoal liner mat is identical to their hats.
END
Copyright © 2003 Chris A Paschke
For more articles on mounting basics look under the mounting section in Articles by Subject.
Additional information on all types of mounting is found in:
The Mounting and Laminating Handbook, Second Edition, 2002,
The Mounting And Laminating Handbook, Third Edition, 2008 and
Creative Mounting, Wrapping, And Laminating, 2000 will teach you everything you need to know about getting the most from your dry mount equipment and materials as an innovative frame designer.
All books are available from Designs Ink Publishing through this website.
Chris A Paschke, CPF GCF
Designs Ink
Designs Ink Publishing
785 Tucker Road, Suite G-183
Tehachapi, CA 93561
P 661-821-2188
chris@designsinkart.com