Paschke Online
Designs Ink Publishing Article Archive and Reference Library
Articles by Chris A. Paschke, CPF GCF
"Shipping and Bond Failure"
June 2010
There is a fine line between the failure of a starch hinge because of rough handling and the failure of a hinge due to weak application skills. A mulberry hinge is designed to be the weakest link in a preservation mounting procedure, meaning it is meant to sacrifice itself by breaking to protect the art it is displaying. This could—should—be the result of an aggressive jar to the art package, such as it falling from a wall during an earthquake. Broken hinges are easily replaced with new ones and the art generally remains undamaged.
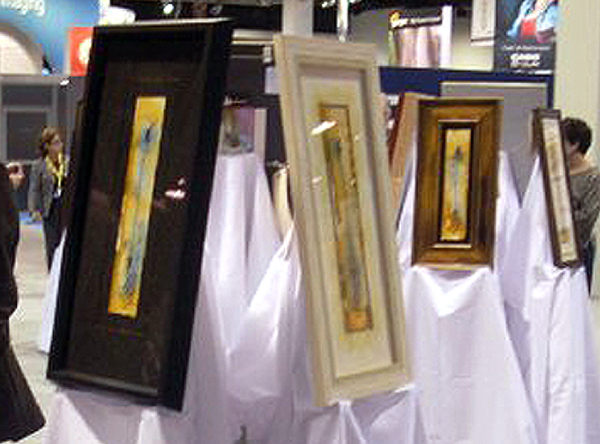 Photo 1: PPFA Anaheim
This is a corner shot of the 36 pieces in PRINT competition this year. The black frame (L) was completed by Trevor Yates, International Mailbox Chapter (Queensland, Australia); the white frame (C) by Sarah Beckett, CPF from Wisconsin Chapter; and the wide brown frame in the back by Sandra Outram, CPF from Western Canada Chapter.
At the 2010 PPFA International PRINT Framing Competition finals held in Anaheim, CA this past February there were 36 finalists competing for money and awards (photo 1). These finalists needed to win regionally at their local PPFA chapter in order to advance to the finals. This year's competition print was Heart Rod Guitar by Rod Morris, a hand embellished monoprint on heavyweight paper with four deckle edges, just screaming to be float mounted. John Gaston was one such talented framer having placed in his local chapter competition (photo 2). Though frames of the finalists may be hand carried to the competition is it preferred to have them shipped ahead. Unfortunately, six of the final competition pieces that had been shipped—including John's—arrived with bond failure, and all had been hinged (photo 3).
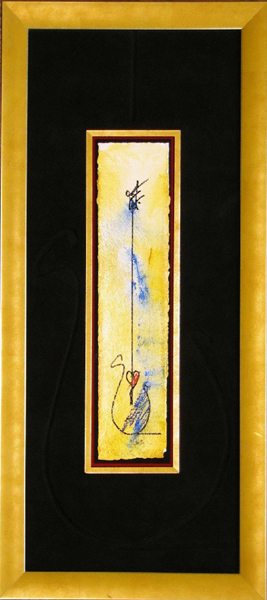 Photo 2: Rod Heart Guitar
This is a shot of John H. Gaston's regional award winning framing entry from New England Chapter PPFA prior to shipping.
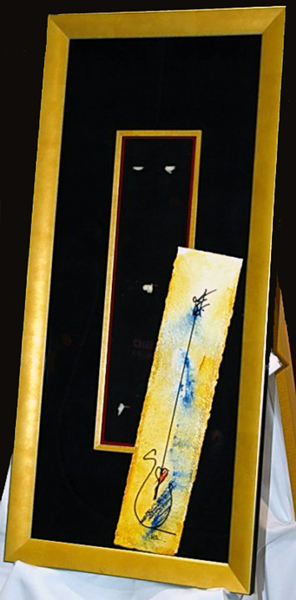 Photo 3: Broken Hinges
John's piece arrived with a classic case of broken hinges, having done just as they were supposed to do…break above the glue line to save the art.
Since the pieces are not disassembled during judging it was difficult to tell whether these were failures due to the hinges having torn during transport, or whether the technical application and adhesive had failed. When John examined his retuned entry after the competition he was pleased to see the hinges had indeed broken above the glue line and the starch had not failed. This is what starch hinges are supposed to do—break.
Float Hinges
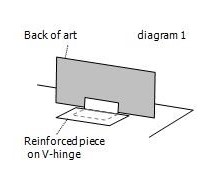
When float mounting, both V-hinges and S-hinges will allow for the full 100% visual exposure of all edges of the art. A V-hinge is a folded piece of Japanese paper applied to the back of the art then to the backing board as an inverted V (diagram 1). The starch is applied to the upper ⅛" to ¼" edge of the hinge strip, allow to lightly dry, then aligned onto the very top edge, verso side of the art. Layer a small piece of spun polyester (Pelon) on the wet hinge, top with a dry blotter, and weight the hinge as it dries. After the hinge has dried, lay the art face down in position on the backing board, apply paste to the opposite end of the hinge and smooth the wet hinge to remove air and feather the edges. Layer with Pelon, blotter, and weight to dry.
Gravity will create a constant pull on a folded hinge which can allow it to be peeled from the art or mount, so a V-hinge should always be reinforced with a crosspiece (diagram 2). Unlike a pendant hinge, they are often placed horizontally with the length of the hinge pasted to the art rather than vertically with the width or narrowest portion attached to the art.
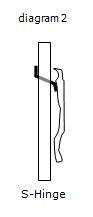
The S-hinge, pass-through, and suspension tab are all names for the same type of more secure hinge that allows the art to visually float in the center of the frame. This is ideal for deckled, torn, uneven, or naturally feathered art that deserves not to have its edges covered by window mats (diagram 3). In this case, hinges are pasted on one end to the back of the art, while the other end is fed through and glued to the back of the mounting board.
Pedestal Hinge
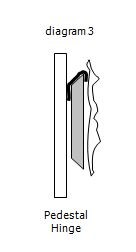
The platform, pedestal, wrap, or float are all names for the same basic technique, a hinge that allows the artwork to be raised off the surface of a decorative backing board. Bevel cut the platform smaller than the art and lightly sand the sharp edges. Paste ⅛" of hinge to the top back edge of the art, weight and dry. Wrap the dry hinge over the smoothed edge of the top to the platform and glue to the back of the pedestal.
Hinges placed at the sides or bottom should be loose enough to allow the art to move without restriction (photo 4). The art/platform unit is then attached to the backing with PVA (white glue) or 3M #3797 TC Jet-Melt hot glue and Polygun-TC.
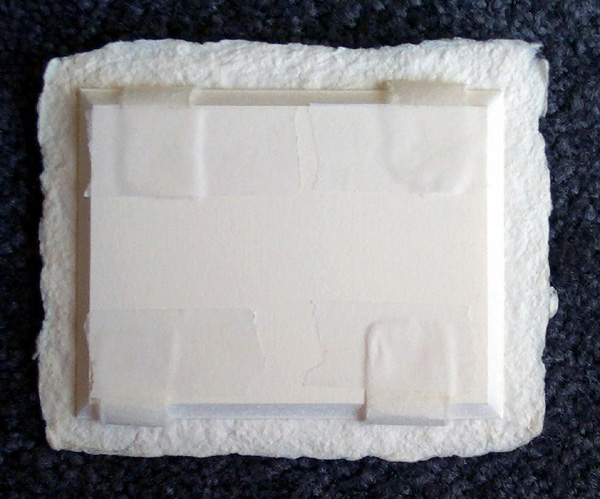 Photo 4: Pedestal Hinges
Only ⅛" of the hinge is attached to the back of the art while it matters not how much is glued to the bottom of the platform. Top hinges touch the edge while the bottom are loose.
Hinges and Shipping
Hinges are only as strong as the rice paper selected and the starch application used. V-hinges are the weakest of float hinge options, so if rough handling or shipping is likely then the S- or platform hinge might be a better hinge choice. When shipping framed art there are two considerations, the strength of the mounting, and the protection of the shipping box. Since hinges are designed to tear in order to save the art they may not be the best mounting method if the framed art is to be shipped upon completion. Mylar corner pockets are also known to break open at the fold if the shipping package receives a hard jarring, so they are not advised either.
There are other preservation methods that will not infringe on the art while still being likely to hold the art if the shipping box is roughly handled, but these may not allow for deckled edges to be visible around. Edge strips or side straps would be a possible solution if the art is to be matted. Sink mounting would be perfect if a window is to be used in the design.
Rigid Packages and Filler
There is a sad misconception that the rigidity of packaging is the major element which prevents damage during shipping—which is not the case. When a cardboard box is lined—on all sides, top and bottom—with ¼" plywood, and stacked full of sheets of 1" polystyrene (photo 5) though the shipping box is solid, any exterior concussion will be transferred through all the layers to the art in the center. The stained glass art is lightly padded by a folded layers of newsprint paper, still sandwiched snuggly between the layers of Styrofoam (photo 6). Although the inner art is wrapped in multiple layers of newsprint paper, there is not enough actual cushion to prevent concussion (photo 7).
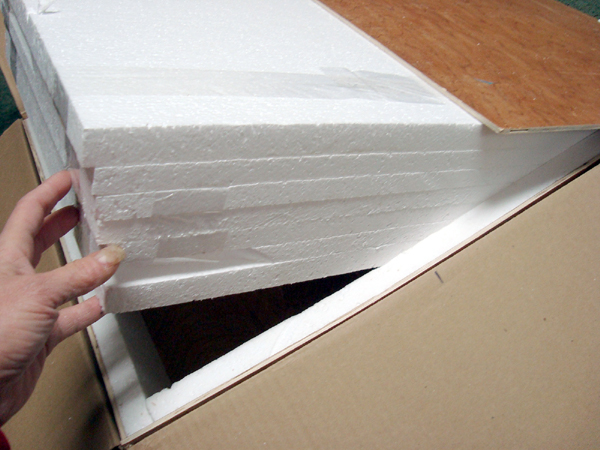 Photo 5: Rigid Packaging
The cardboard box is lined on all sides, top and bottom with ¼" plywood, and stacked full of sheets of 1" polystyrene making a very rigid package.
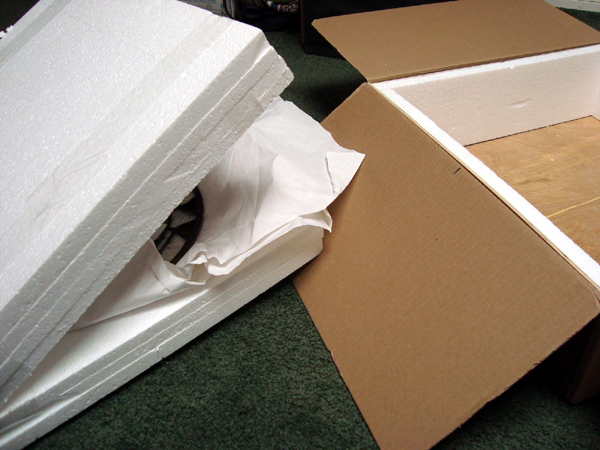 Photo 6: Many Layers
The thin glass art is sandwiched very solidly between layers of polystyrene foam and into a plywood lined, double strength cardboard box for shipping.
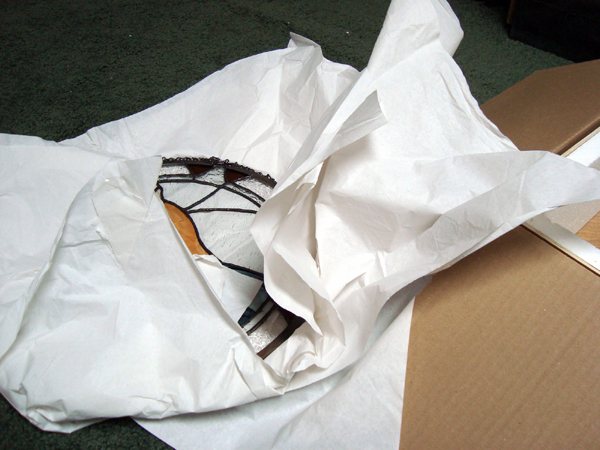 Photo 7: Paper Cushion
The paper will cushion this flat art better than some, but concussion will still translate to the art.
Corrugated boxes are fine for the exterior back unit as long as there is adequate cushioned space surrounding the framed art being shipped. It is cushioning that actually protects fragile items from damage caused by impact and aggressive handling. UPS states there are three types of approved cushioning: small cell bubble wrap; tightly wadded 60# Kraft paper; and loose pellet fill.
Bubble wrap features encapsulated air which provides wonderful cushioning against shock and abrasion. Use multiple layers of wrap and a full 2" around the frame and from the box wall. Wadded Kraft paper is heavier and it is its resistance to collapsing that gives the added cushion. Lightweight Kraft and newsprint is too light to use. It should be well packed so the framed art does not move within the box when shaken.
Loose fill—pellets or peanuts—a terrible, messy invention, but lightweight and do give decent cushion. They are recommended most for use with non-fragile items such as books—not glassed frames. If packing fragile framed art with pellets, first wrap with bubble wrap then surround with a minimum of 2" of polystyrene pellets. There are many negatives to using pellets for padding. They can compress and settle during shipping allowing for art to shift during transport. They also create static electricity, though anti-static pellets are available. And the biggest problem is the mess both during packing and when unpacking. It is highly recommended NEVER to use pellets whenever framed art is being shipped and will be returned back to you—as for framing competition, as the unpacking and repacking causes a great deal of wasted time and mess.
Cushioned Boxes
Foam board boxes are perfect for shipping. They may be made custom size to the art being shipped and are reusable. Directions available in Creative Mounting, Wrapping And Laminating, pgs 84-89, available at PFM bookstore. The drop spine box in the photo is a single unit that closes over the box bottom giving the wall a double thickness and even more structure (photo 8). Boxes are assembled out of 3/16" to ½" foam boards and should be sized to allow a full 2" sponge padding on all sides of the frame (photo 9).
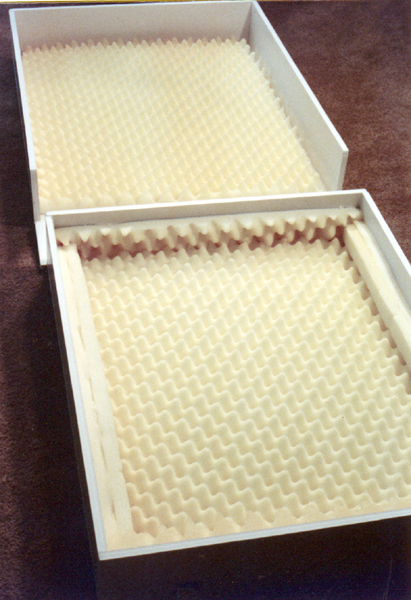 Photo 8: Drop Spine Box
This lid is hinged to the box bottom lying flat when open. Eggcrate sponge for bedding has been used to line the box.
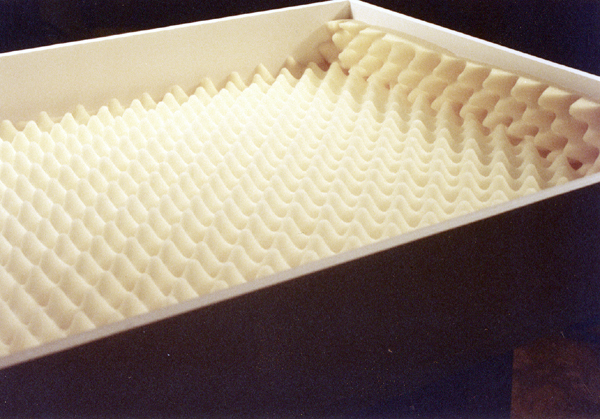 Photo 9: Paper Cushion
Foam center board has a cushion and is more forgiving than other rigid materials making it the best choice for a shipping box. This ½" box is in the process of being lined all sides with bed sponge.
A basic hinged box (CMW&L page 86) is less time intensive and used less materials, and is a perfect well padded box, particularly if a commercial grade denser eggcrate sponge is selected (photo 10). The gray acoustic eggcrate foam, also called convoluted foam, is available in 72" x 80" x 2-½" thick sheets online from The Foam Factory for $47 per sheet covering 40 square feet. Two sheets purchased allows for free shipping.
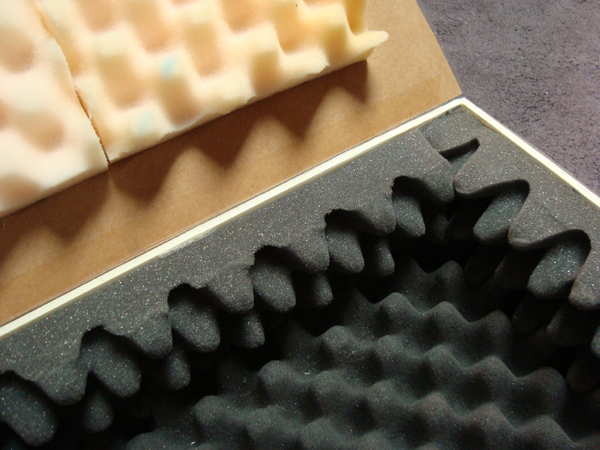 Photo 10: Hinged Box
White (box bottom) and brown Kraft Gatorboard (top) were the boards used here, which is generally too brittle. Gray commercial eggcrate insulation lines the box base white bed sponge is shown on the hinged top.
The Final Hinge
It is not possible to know whether the hinges would have broken if the framed art whose hinges failed had been packaged with more cushioned shipping boxes. Cushioned boxes will bounce rather than pound and if the hinges snapped they would have been less like to break. A failed adhesive bond means the starch recipe may need to be reviewed or application technique may need a little additional practice. Though a broken hinge is disappointing at least it proves you know you are know your skills.
One thing I do know for certain—having been one of the volunteers that was reboxing the pieces for return, I can say we would have been far happier if no pellets had ever been used.
END
Copyright © 2010 Chris A Paschke
For more articles on mounting basics look under the mounting section in Articles by Subject.
Additional information on all types of mounting is found in:
The Mounting and Laminating Handbook, Second Edition, 2002,
The Mounting And Laminating Handbook, Third Edition, 2008 and
Creative Mounting, Wrapping, And Laminating, 2000 will teach you everything you need to know about getting the most from your dry mount equipment and materials as an innovative frame designer.
All books are available from Designs Ink Publishing through this website.
Chris A Paschke, CPF GCF
Designs Ink
Designs Ink Publishing
785 Tucker Road, Suite G-183
Tehachapi, CA 93561
P 661-821-2188
chris@designsinkart.com